
Plans for The New Year

I love old things, textiles, antiques, rusty metal, old photographs, etc. I also love minimalism. This is the story of my life. I go back and forth between the two. Somehow, there must be a place in the middle where the two can meet, a great juxtaposition. I think that is my task for this coming year.
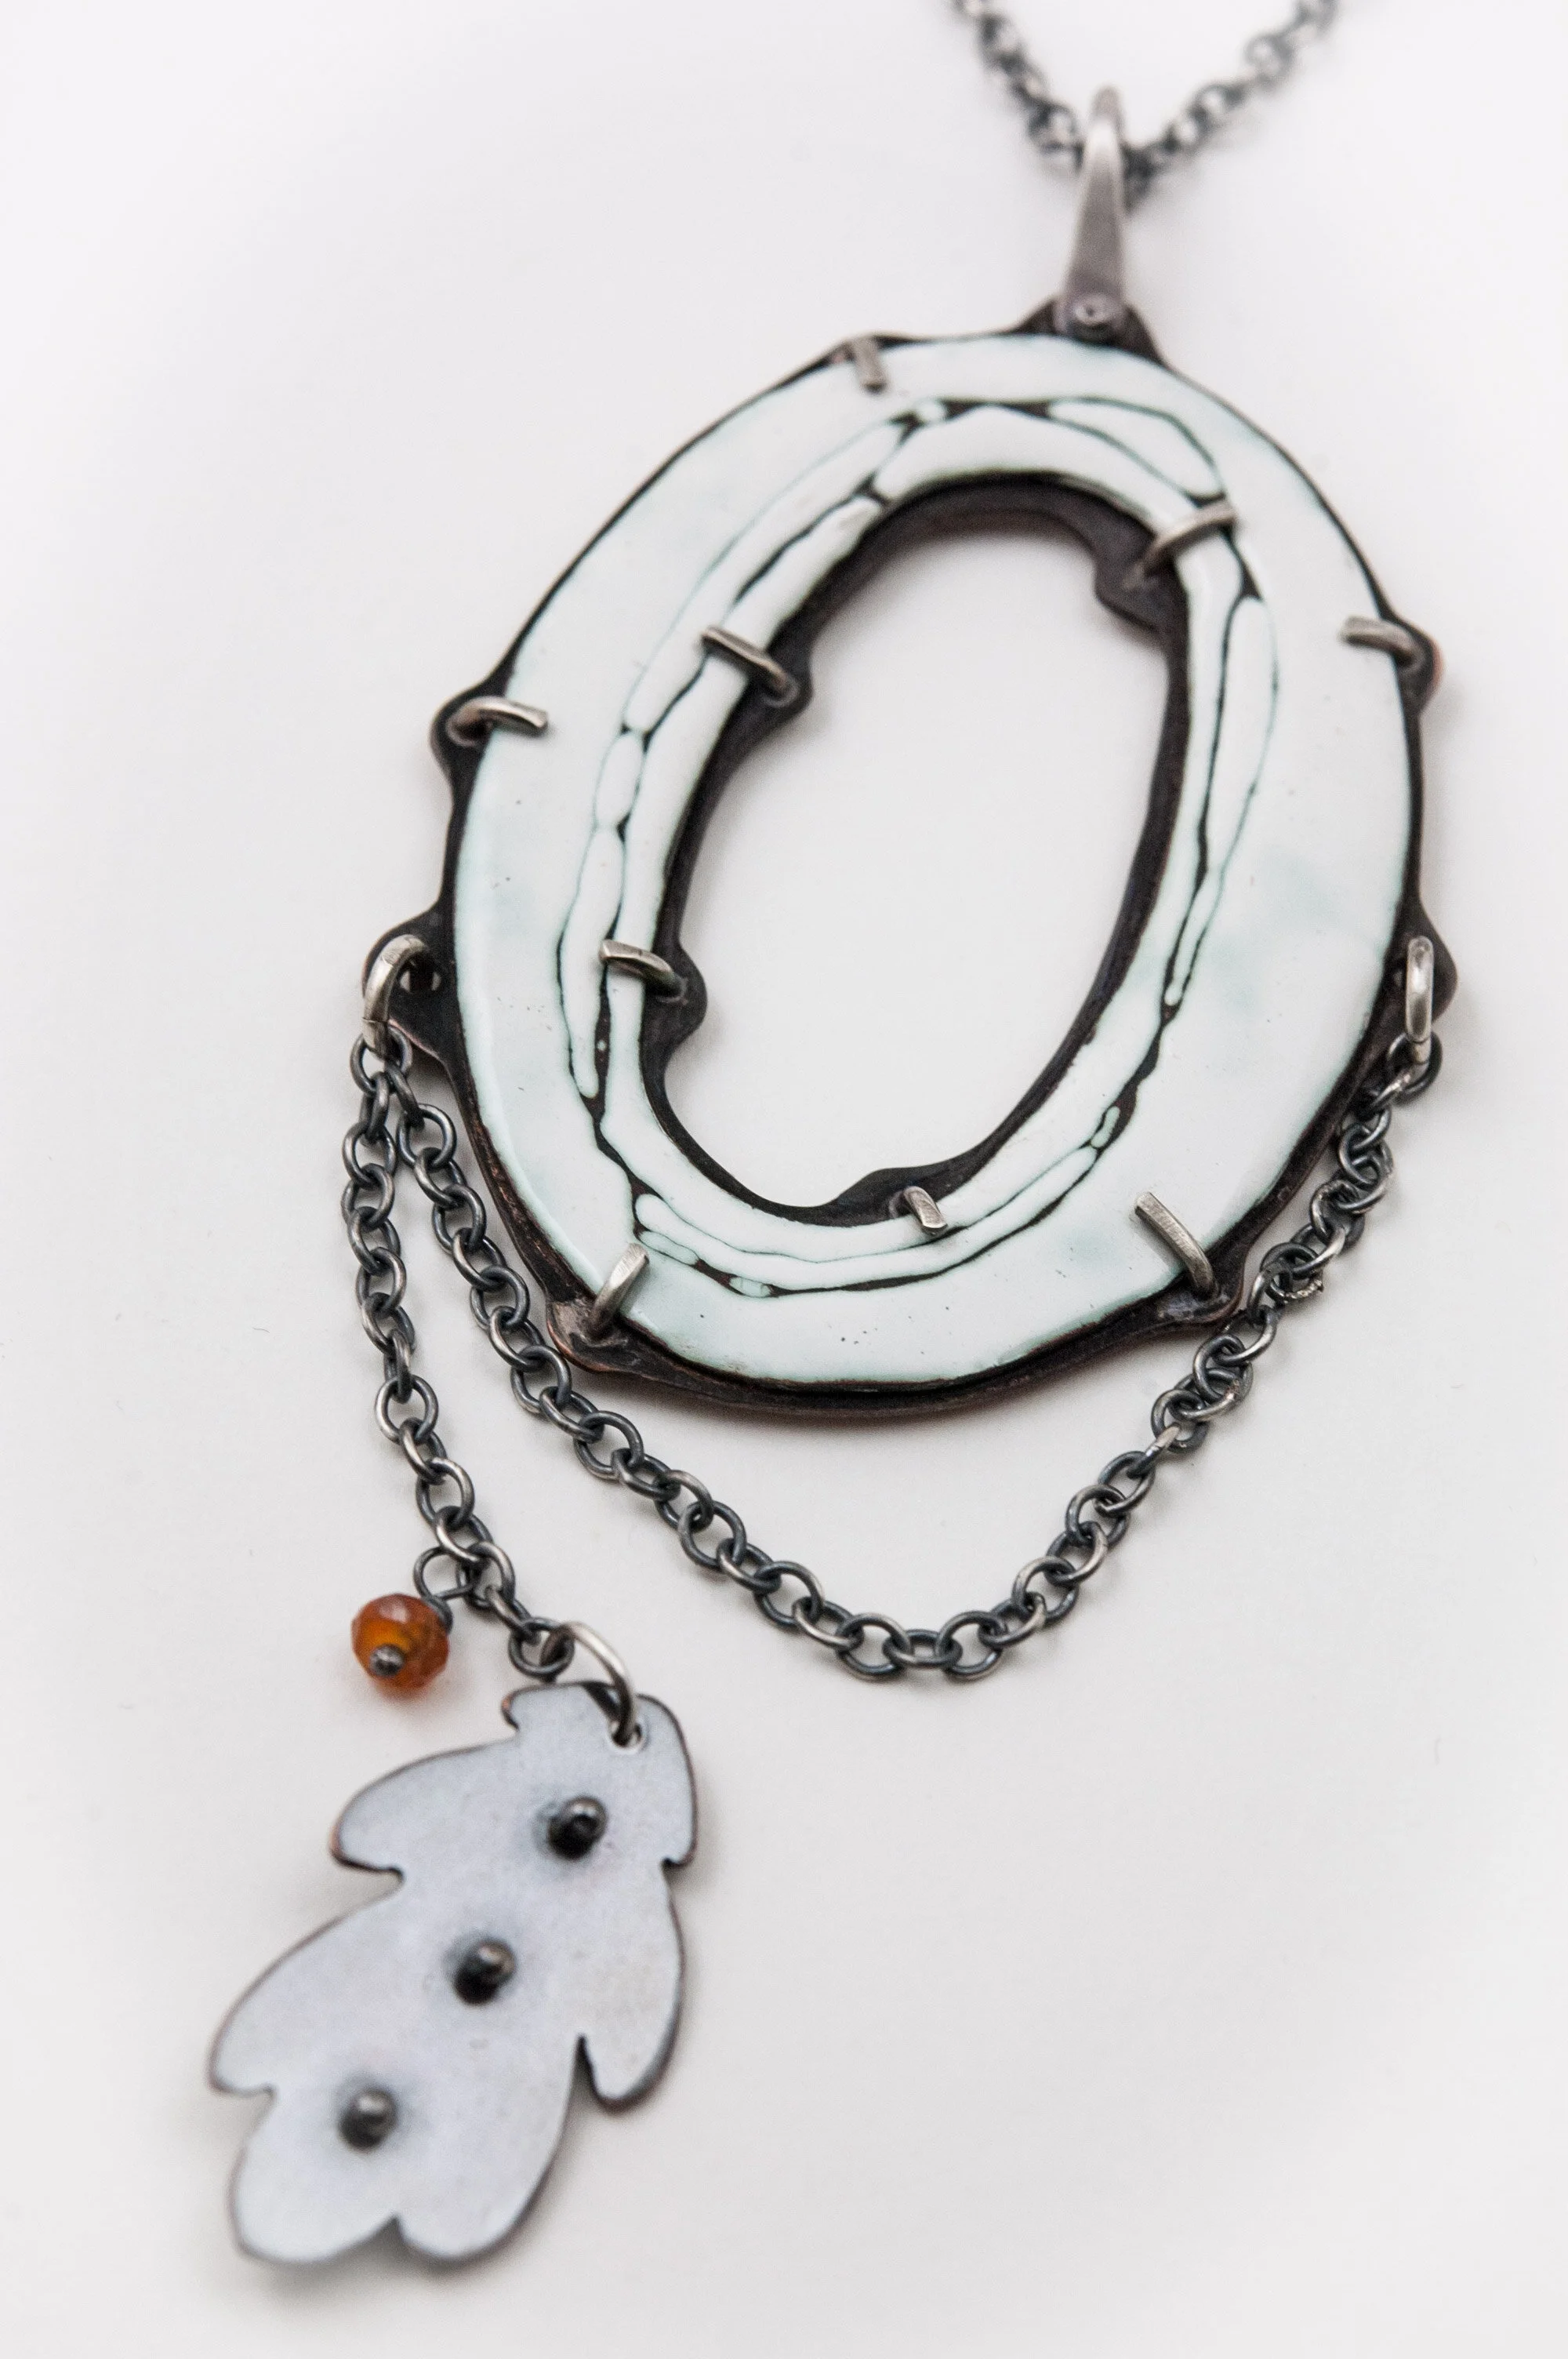
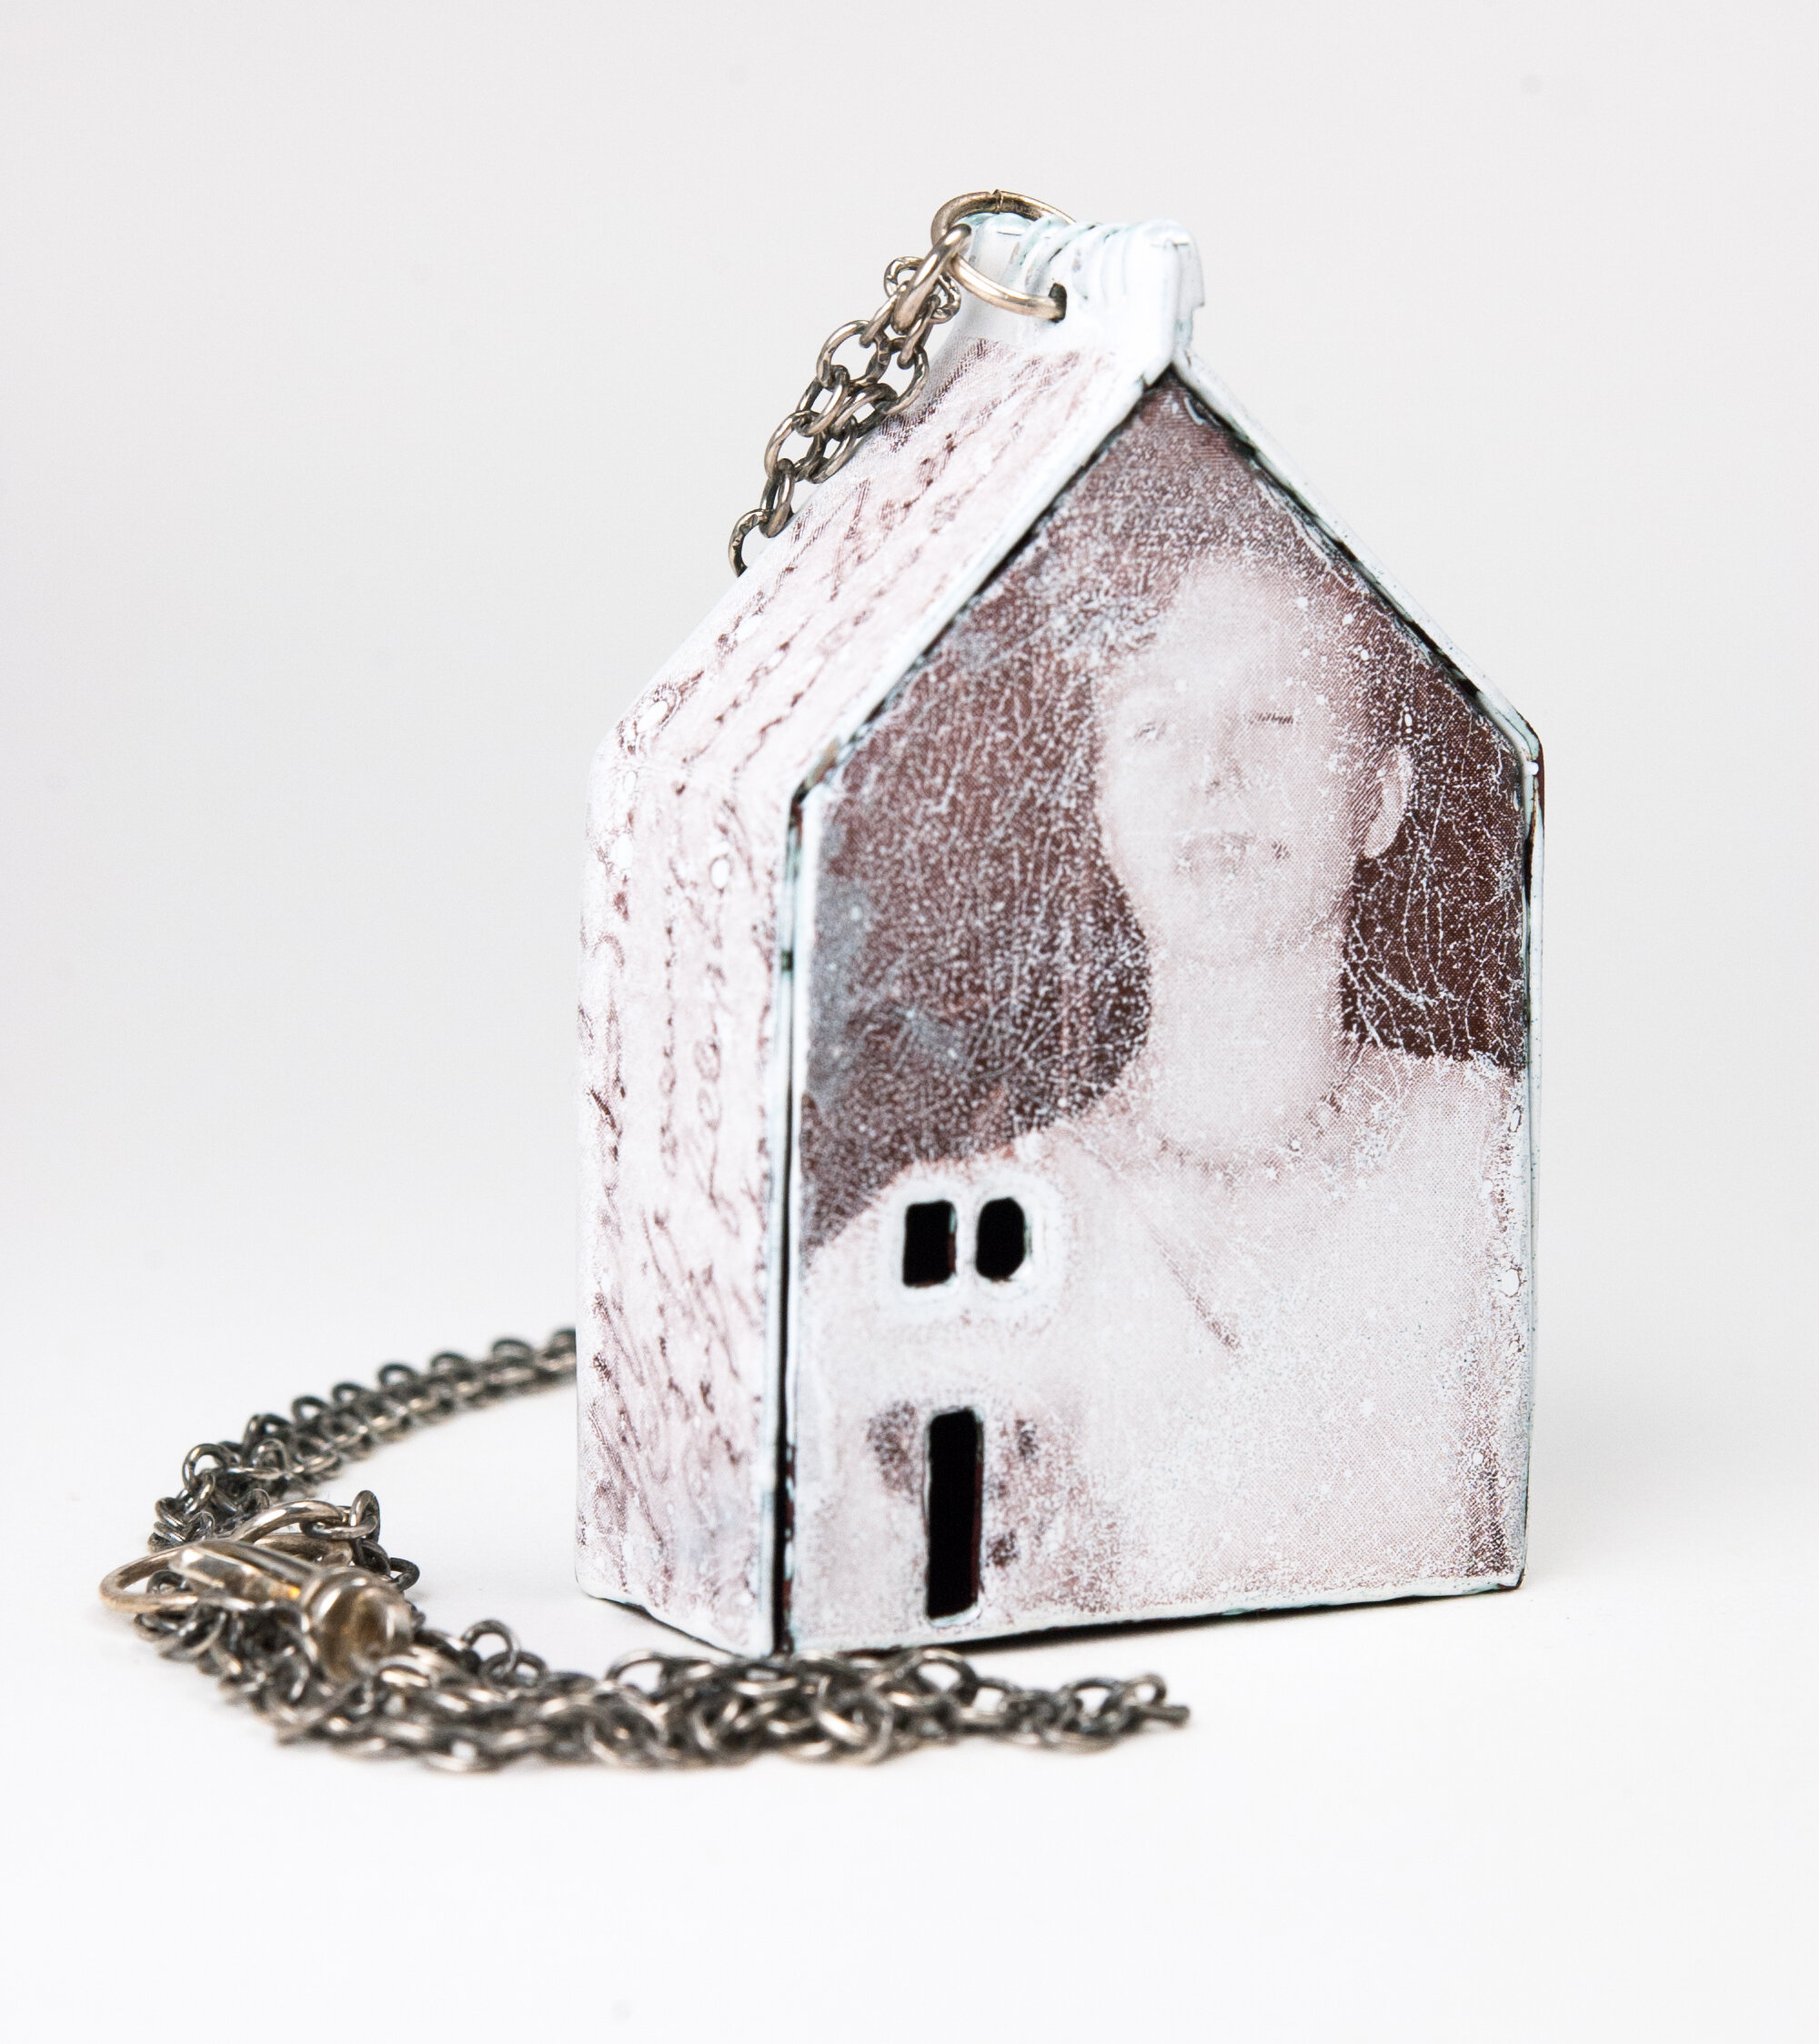
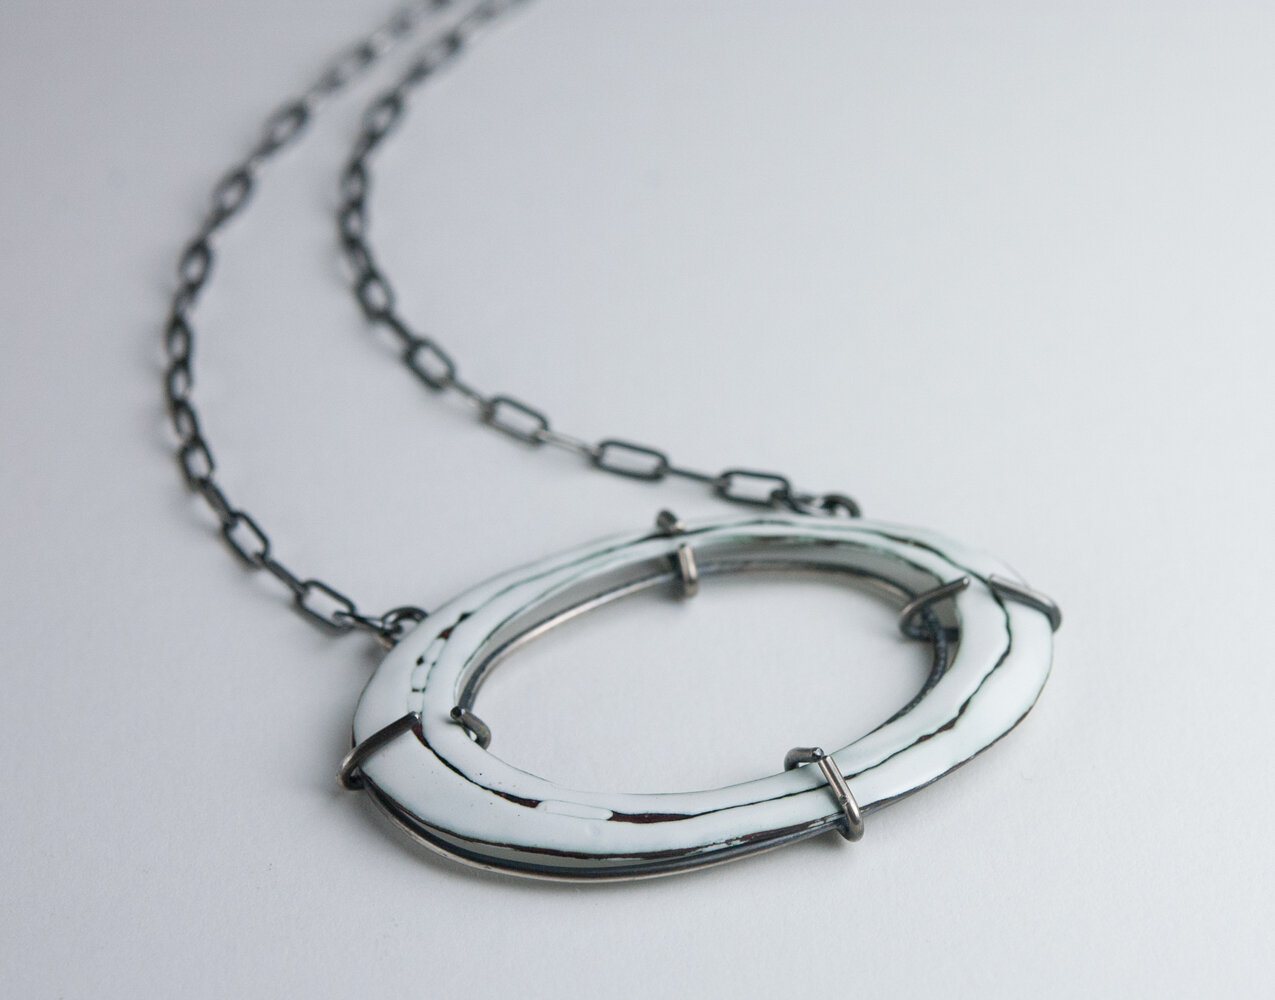
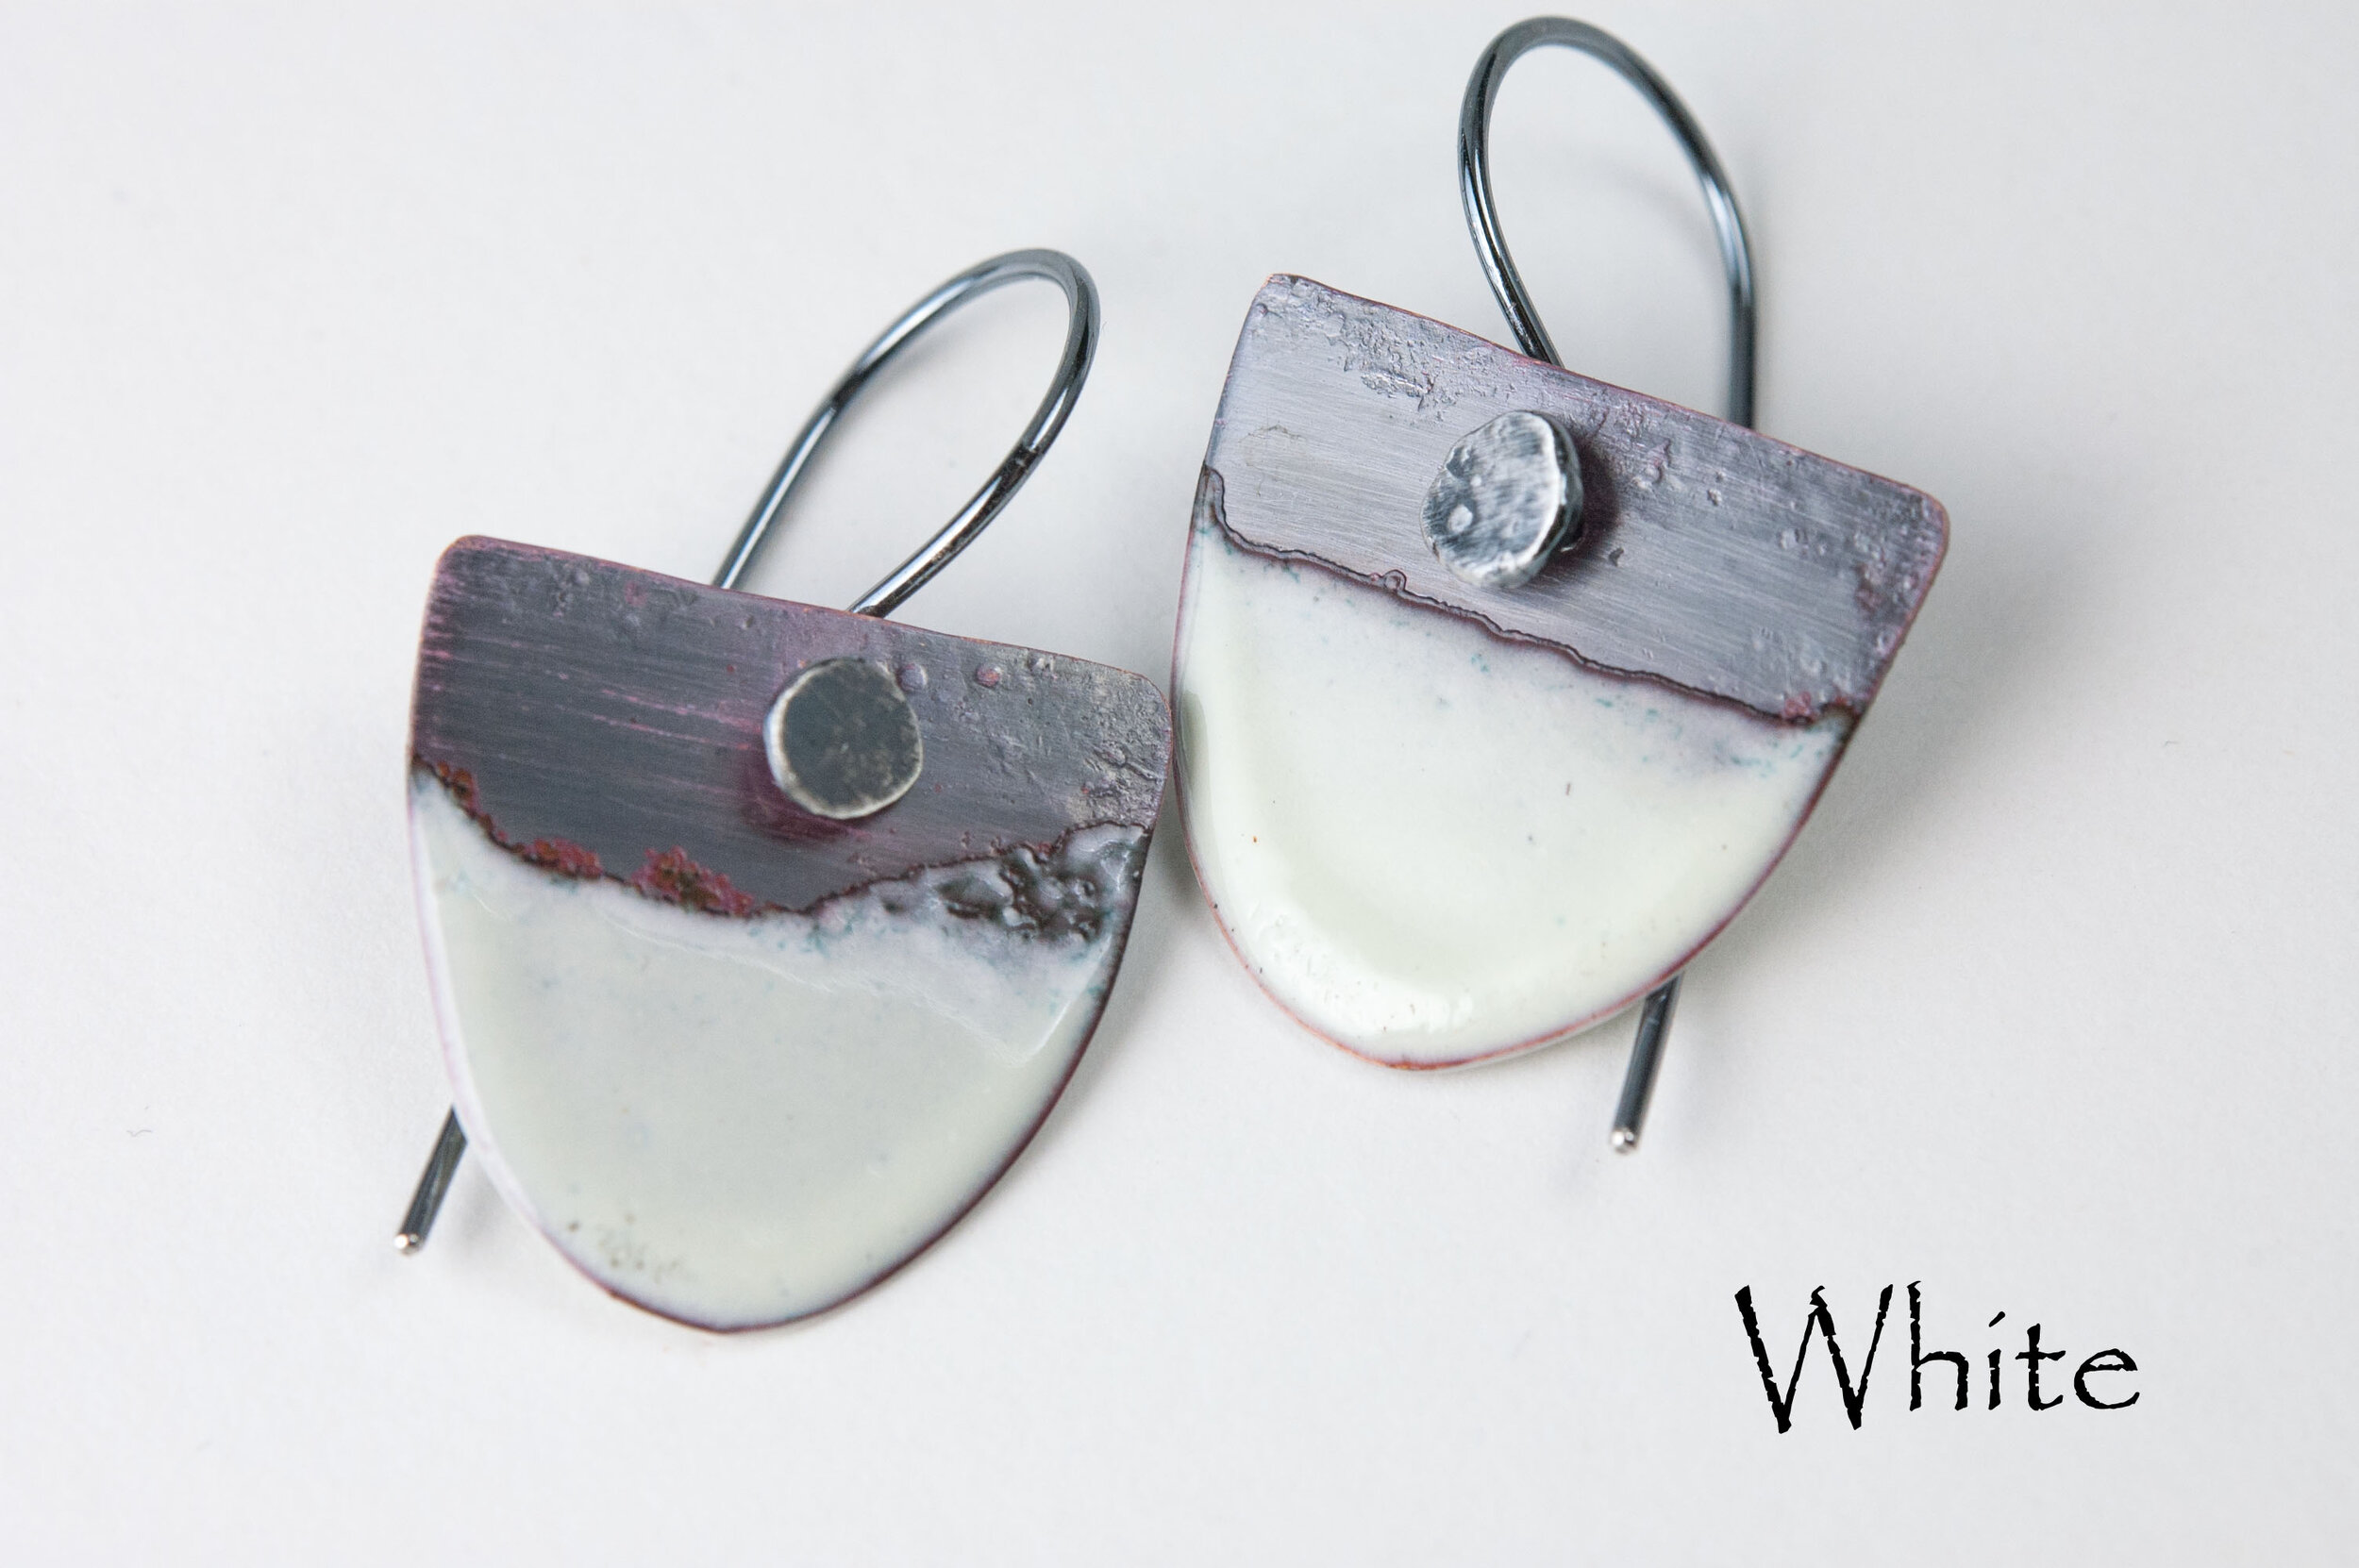
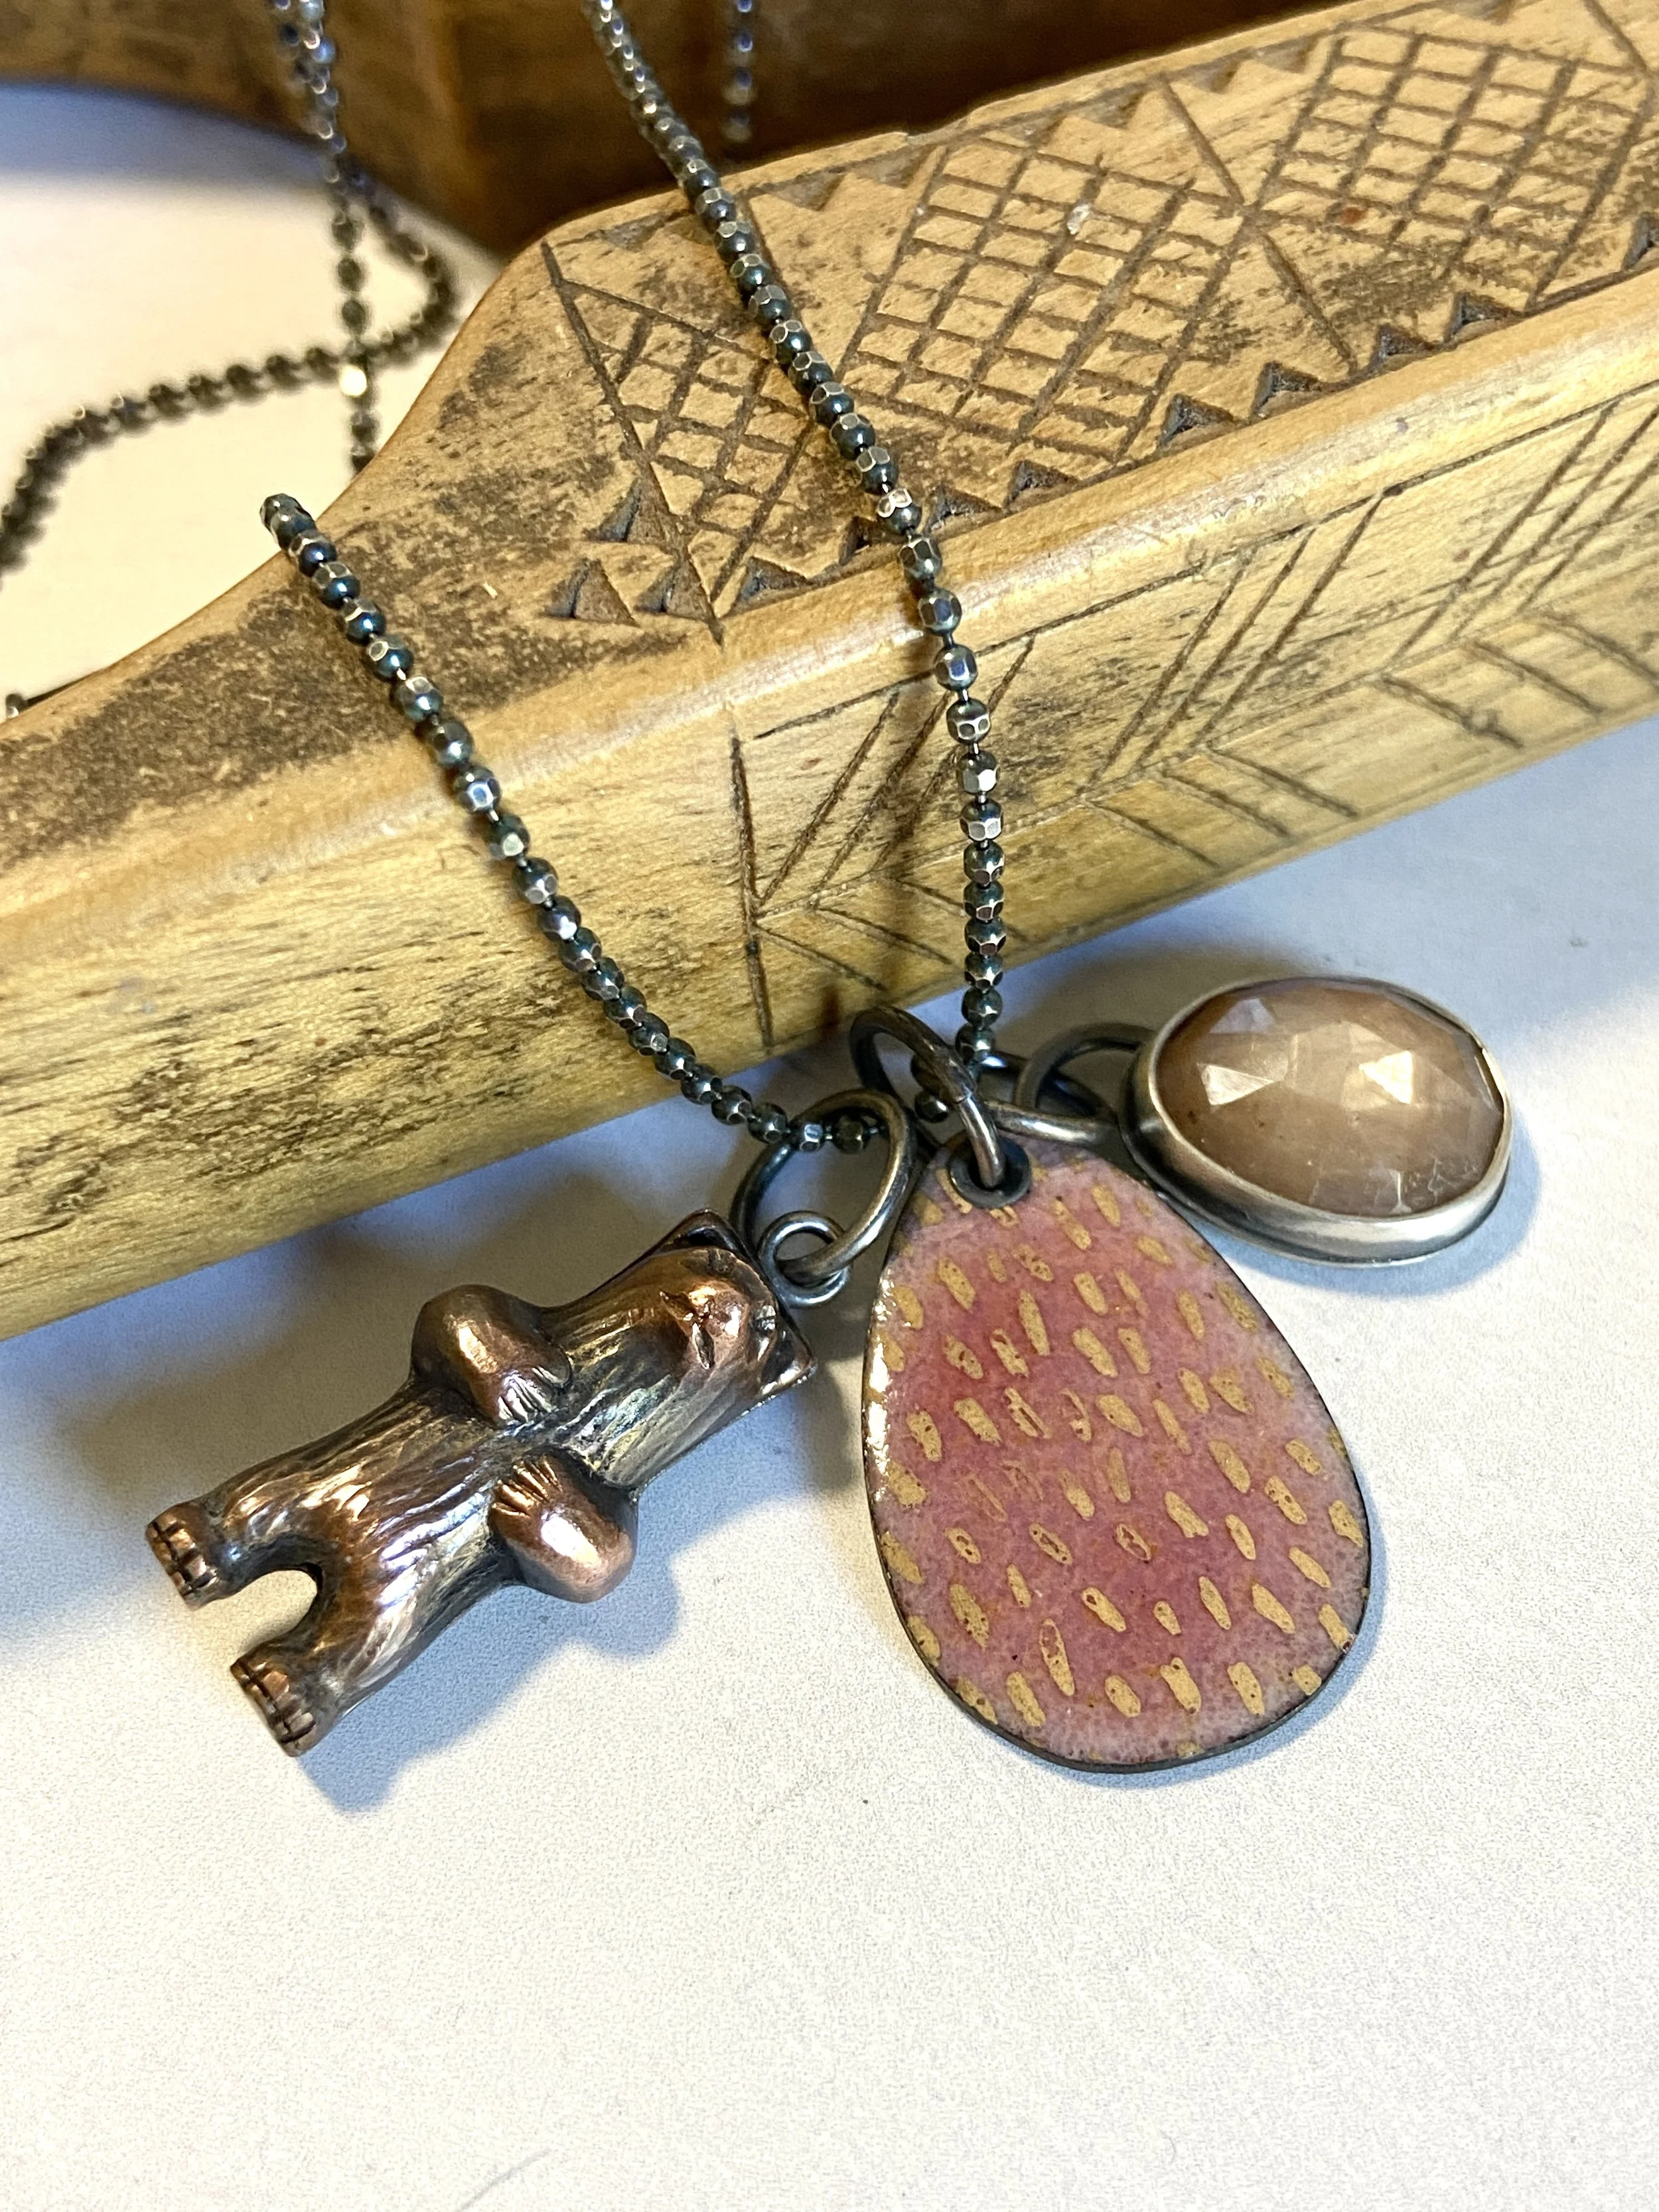
As I was doing dishes yesterday, daydreaming, I was reminded of my love of porcelain enamel, of fold forming and of copper. My first explorations in enamel were with white porcelain enamel and sgraffito. My daydreaming also lead me to recall a time in life when my mother asked me if I had any other color in my closet but white. I have strayed from white in all manner, but I sense it is a time to come back to it. White is the perfect canvas for self expression. I think it has something to say to me. I love its simplicity, but it can also tell a story, like a well worn doily or piece of clothing, yellowed over time, tattered and torn.
The year 2020 will be my year of white, in its many forms. It will also be a year to share with you what I can learn by diving deep, focusing on creating that juxtaposition between telling a story and keeping it simple. I want to bring life to my work this year. That is my biggest goal!
I wish you all an amazing New Year. May it bring you clarity and peace!
With a few days off and a semi-clean house, I have had time to reflect on this past year and what I hope for in the coming year…
Every year I tell myself that I am going to take some time to find myself, and by that I mean, to find who I am as an artist.
Never having been classically trained as an artist, I have learned through exploration, through classes and reading and searching the internet. I have tried so many different mediums throughout my lifetime and it has brought me to this point in my life where I have to ask, what is my focus? Who am I as an artist? Do I have a story to tell? What is my style? What is my medium?
Standing Up for What You Believe In
My strength came from lifting myself up after being knocked down.
Bob Moore
What do you do when someone bullies you? Do you sit back and cry or do you stand up and fight for what you believe in, fight for your truth? The answer to these questions is based on your life’s history - your childhood experiences, where you come from and where you are at in the moment.
I have faced a lot of diversity throughout my life. It has developed me into a person who stands up for herself and her principles.
Last week, I was challenged by a cyber bully. This person accused me of copying one of her online classes. She took every opportunity to discredit me and my work, with the intention of destroying my reputation as an enameling teacher. When I stood up to her attempts to intimidate me, she had no choice but to back off. I thank God I have been given the tools to stand up to people like her.
I also want to thank and acknowledge all of the wonderful people who stood up for me and acknowledged that I was being falsely accused of copying, of plagiarism. You were amazing and strong! We all need to hold each other up, not knock each other down. Having a small business is hard enough without being knocked down by someone who I thought of as a colleague.
So, if you are at all curious, the class in question, Enamel Surface Design, is being hosted in a Facebook group. This is a new format for me. In the past, I have created PDF and video tutorials and sold them on Etsy and on my website. They are great for people who can’t take the time or spare the expense to travel for a class. However, I miss the interaction of teaching in person. Having such a small studio makes that really tough. I am choosing to produce some of my classes using the Facebook platform so that my students and I will have the opportunity to interact. I’ve taken several classes using this platform, from painting to marketing. As a student, I love the ability to come and go as my schedule dictates, to have interactions with the other students and the teacher and to make new friends from all over the world. Facebook is where my peeps are and I’m just trying to reach out to them in a meaningful way.
To learn more about the class, see the description below…
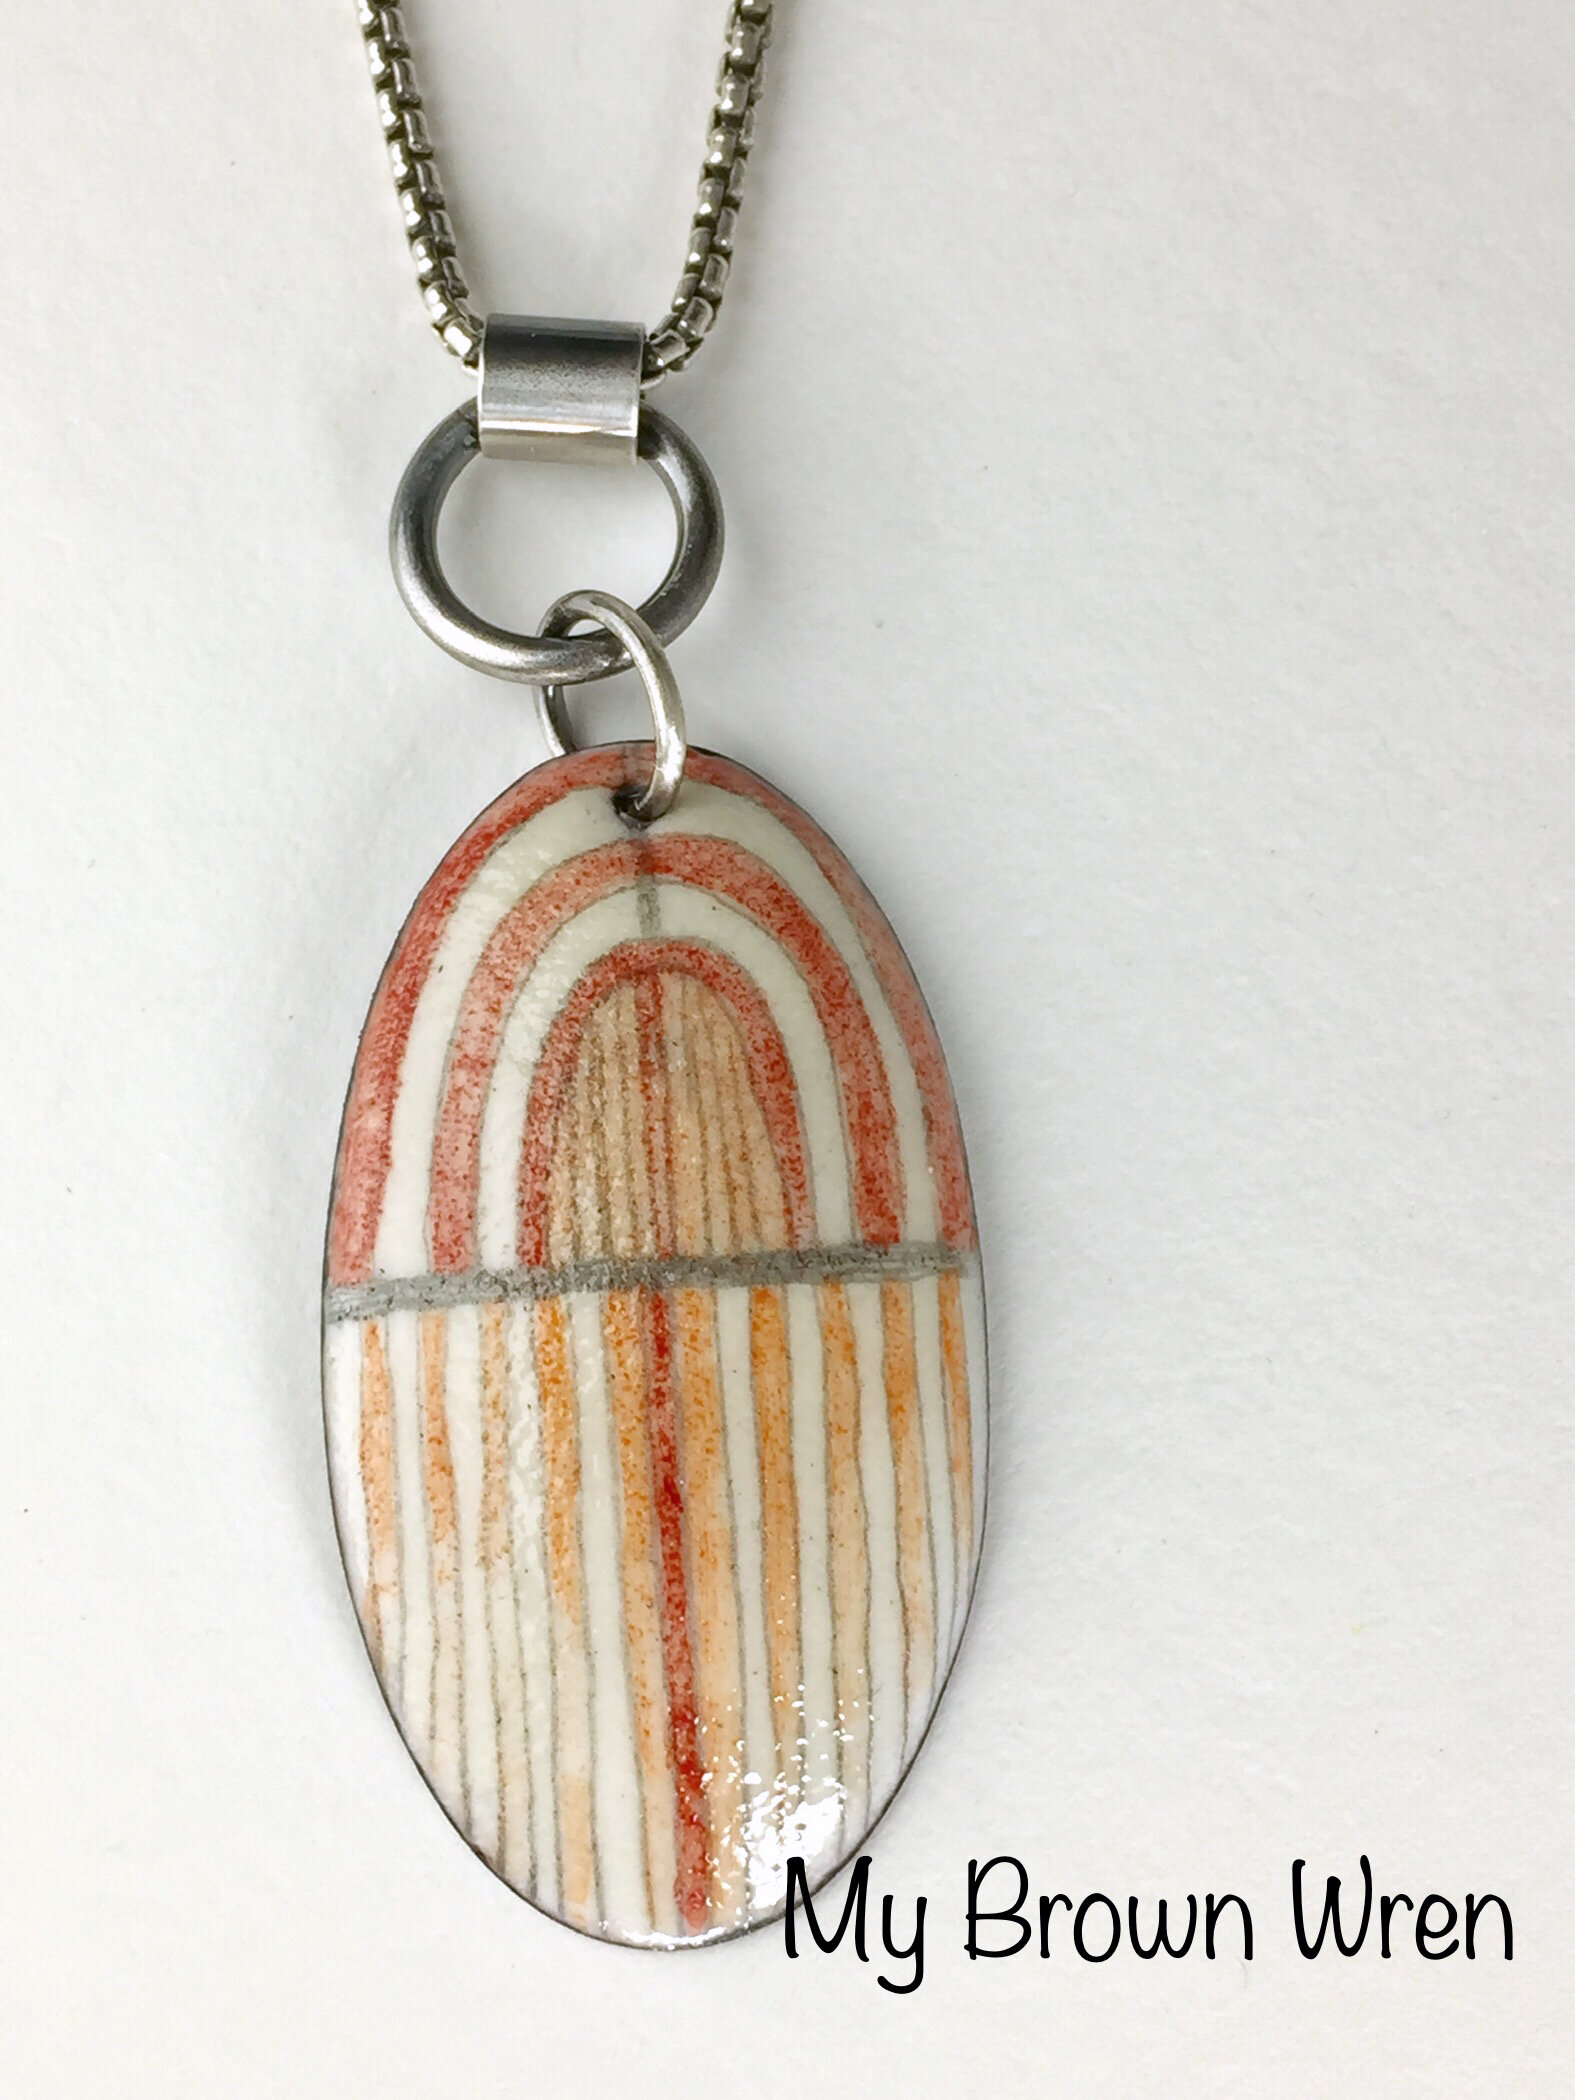
Scarab Necklace by My Brown Wren

Garden of Posies by My Brown Wren
I’ll show you a video of my tiny studio. It’s a total mess, but I figured I’d keep it real…


My Enamel Surface Design Class will cover using graphite, enamel crayons, acrylic enamels and watercolor enamels together to create rich imagery on your enamel work. It will help take out some of the mystery of working with these mediums that can be very fussy on their own, let alone in tandem. The class starts October 15th and runs for 30 days. The videos will be hosted on Vimeo, where you can have access to them for as long as you like. The PDF’s will be downloadable so you can refer back to them whenever needed. I want you to get a lot out of this class and have fun as well!
Inspired by Artists at The Enamelist Society Conference...
This past weekend, I attended my first Enamelist Society conference. There were a record number of attendees (165). It was held at The University of Oregon in Eugene, a mere 7 hour drive, lol! The number of talented artists there who have been enameling for 30 plus years would blow your mind. The speakers captured our attention and the break out demos and talks were awe inspiring. I can’t wait to go back again!!!
There were many opportunities to network and to learn from some of the great teachers in our field. I attended several great break out sessions and learned some wonderful tips and tricks from my favorite enamelists.
Sarah Perkins spoke about enameling on vessel forms. She had a particularly simple and time saving way to apply Klyr Fire to her vessels that I want to try. She used an airbrush to apply a 50/50 mix of Klyr Fire and water at an approximate distance of 3 feet. It creates a fine mist that adheres much better than the usual brush application. Another refreshing piece of info I learned from Sarah is that she doesn’t clean off her firescale, except to brush off the loose flakes, unless she wants to use a transparent over the copper and wants a pristine surface.
Judy Stone spoke about enamel layering techniques. She was a wealth of information! One of her dear friends, June Schwarz, was my enameling idol. She passed away a couple of years ago, but her legacy of knowledge was shared and passed down to people like Judy. What I learned from Judy is that you can layer leaded over non-leaded enamels if you use Blythe C10 Diamond Flux. I’m not really sure where she gets it from, and I don’t work with leaded enamels, but it’s delightful to know that most of the enamelists I spoke with break the rules. Our generation of enamelists feel more free to experiment and try things with varying degrees of success. It’s so exciting that we are no longer boxed in by the RULES!

Bowl in process - by Sarah Perkins
I also had the opportunity to attend Anne Havel’s breakout session titled Graphic Graphite. I have worked with graphite in enameling before, but I wanted to see what Anne did differently. You should know one thing about Anne… She works with a torch. She’s never kiln fired her work. Torch firing is fun, and can be somewhat unpredictable, but for the techniques she was showing us, it was perfect!
Anne is able to capture dark, crisp pencil marks through multiple firings. Her secret? She covers her drawings with an extremely thin coating of flux before she fires her graphite into the enamel. I tried it, along with successively thin applications of acrylic enamel (made for enameling - it’s not paint). She waters it down to a watercolor consistency. It can be as opaque or as transparent as you desire. If you make marks you don’t like, you can always cover them over in the next firing. She will use the pencil and acrylic enamel at the same time, cover coat and fire to a sugar fire stage. That give the piece tooth, so you don’t have to etch or stone it back before adding the next layer of detail.
This is a piece that I worked on yesterday. It was just green, with a melon yellow dapped circle pinned into the hole. I hated it, and now I’m in love! The color and texture that the graphite and acrylic enamels give it create a wonderful richness. I’m going to go back to my box of older work and see what I can do about reworking several pieces with this method.
Drawing with graphite and acrylic enamels is a tool to create a rich tapestry that can enliven your work.
I am extremely happy that I attended the conference. It was a long drive and the heat was oppressive, but it was so worth it. You learn so much if you can stretch yourself and network with people who do what you do. It’s not something that’s particularly in my comfort zone, but I made it work!
The Art of Anne Bagby
You should know that I’m a Pinterest fiend. When I’m in need of inspiration, I start searching my boards and other people’s pins. That’s how I happened on the art of Anne Bagby. She is a mixed media artist who utilizes her own handmade stamps in a unique form of collage to create complex imagery. People are the majority of her subject matter.

Anne Bagby
Her handmade stamps and use of glazes creates beautiful, complex imagery that is hauntingly beautiful.
I took one of her online courses to learn more about her techniques and used them to make two paintings for the May Bunny show at Whidbey Art Gallery. Both of the paintings below are on display there all month. Anne uses layer upon layer of stampings and glazes. I found myself wanting to go there, but my style is much more minimal. These are the bunnies that I created using what I learned from Anne’s class…

Bunny in Repose
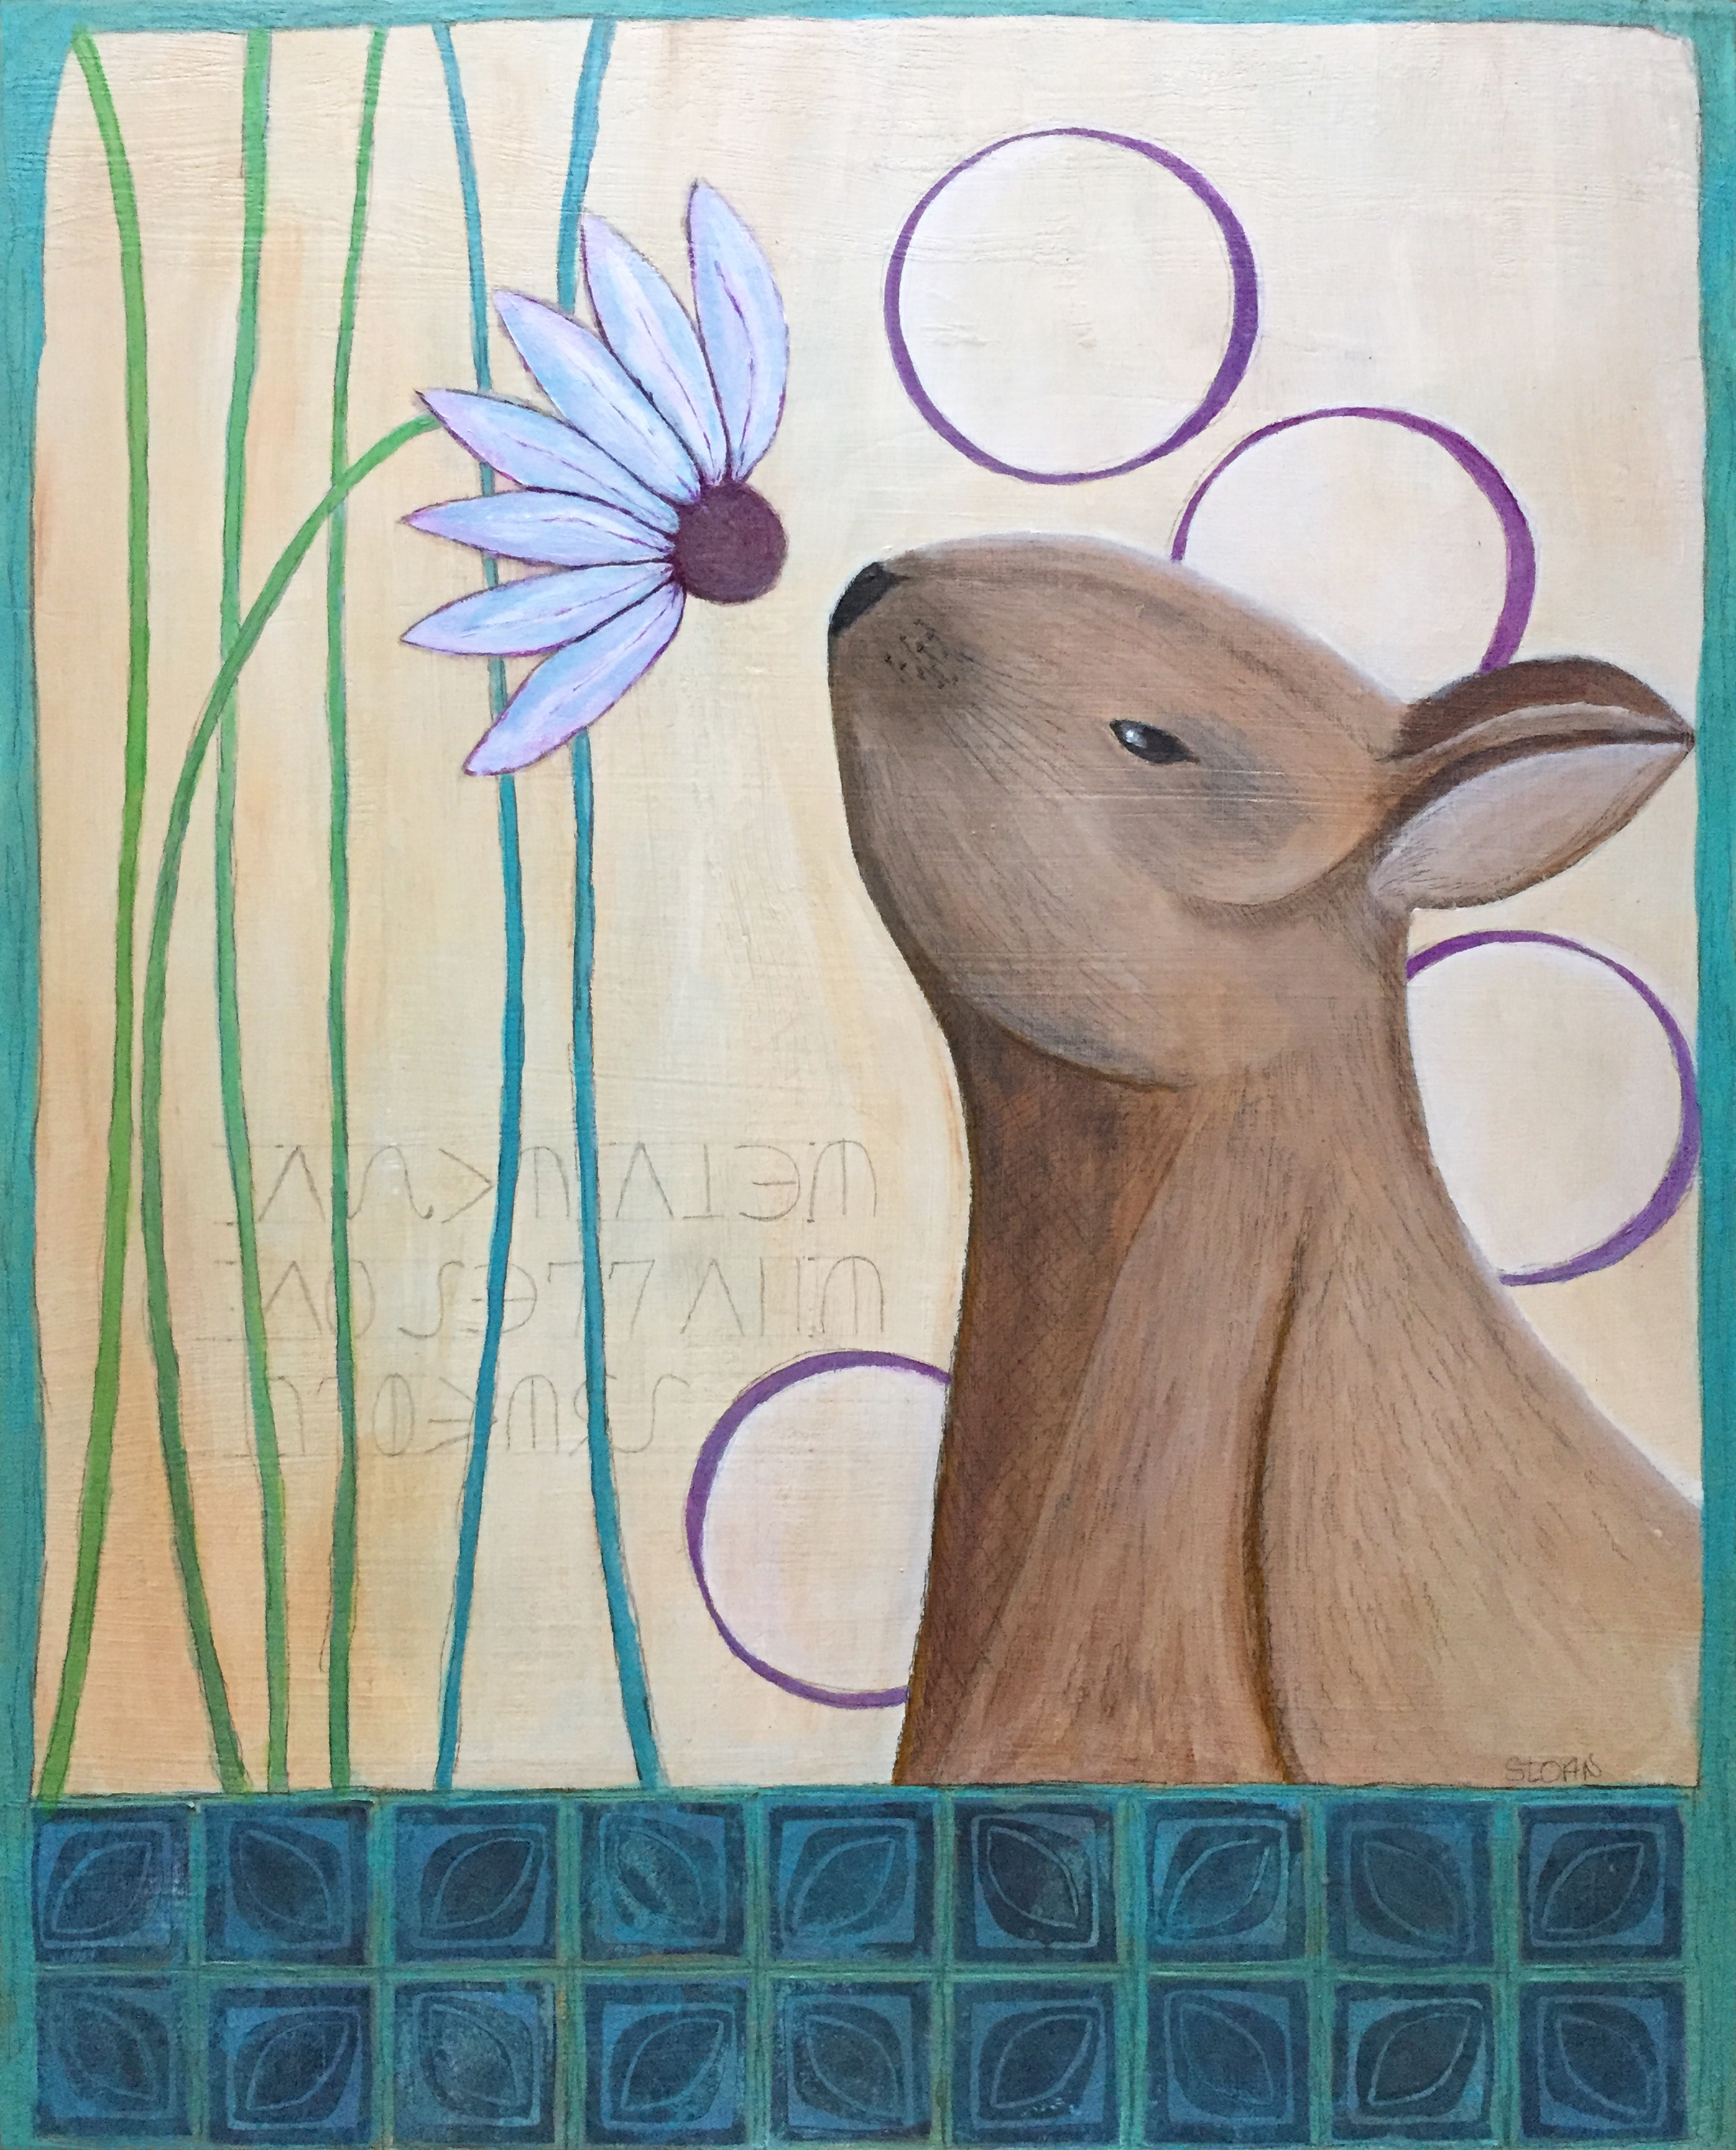
Take Time To Smell The Flowers
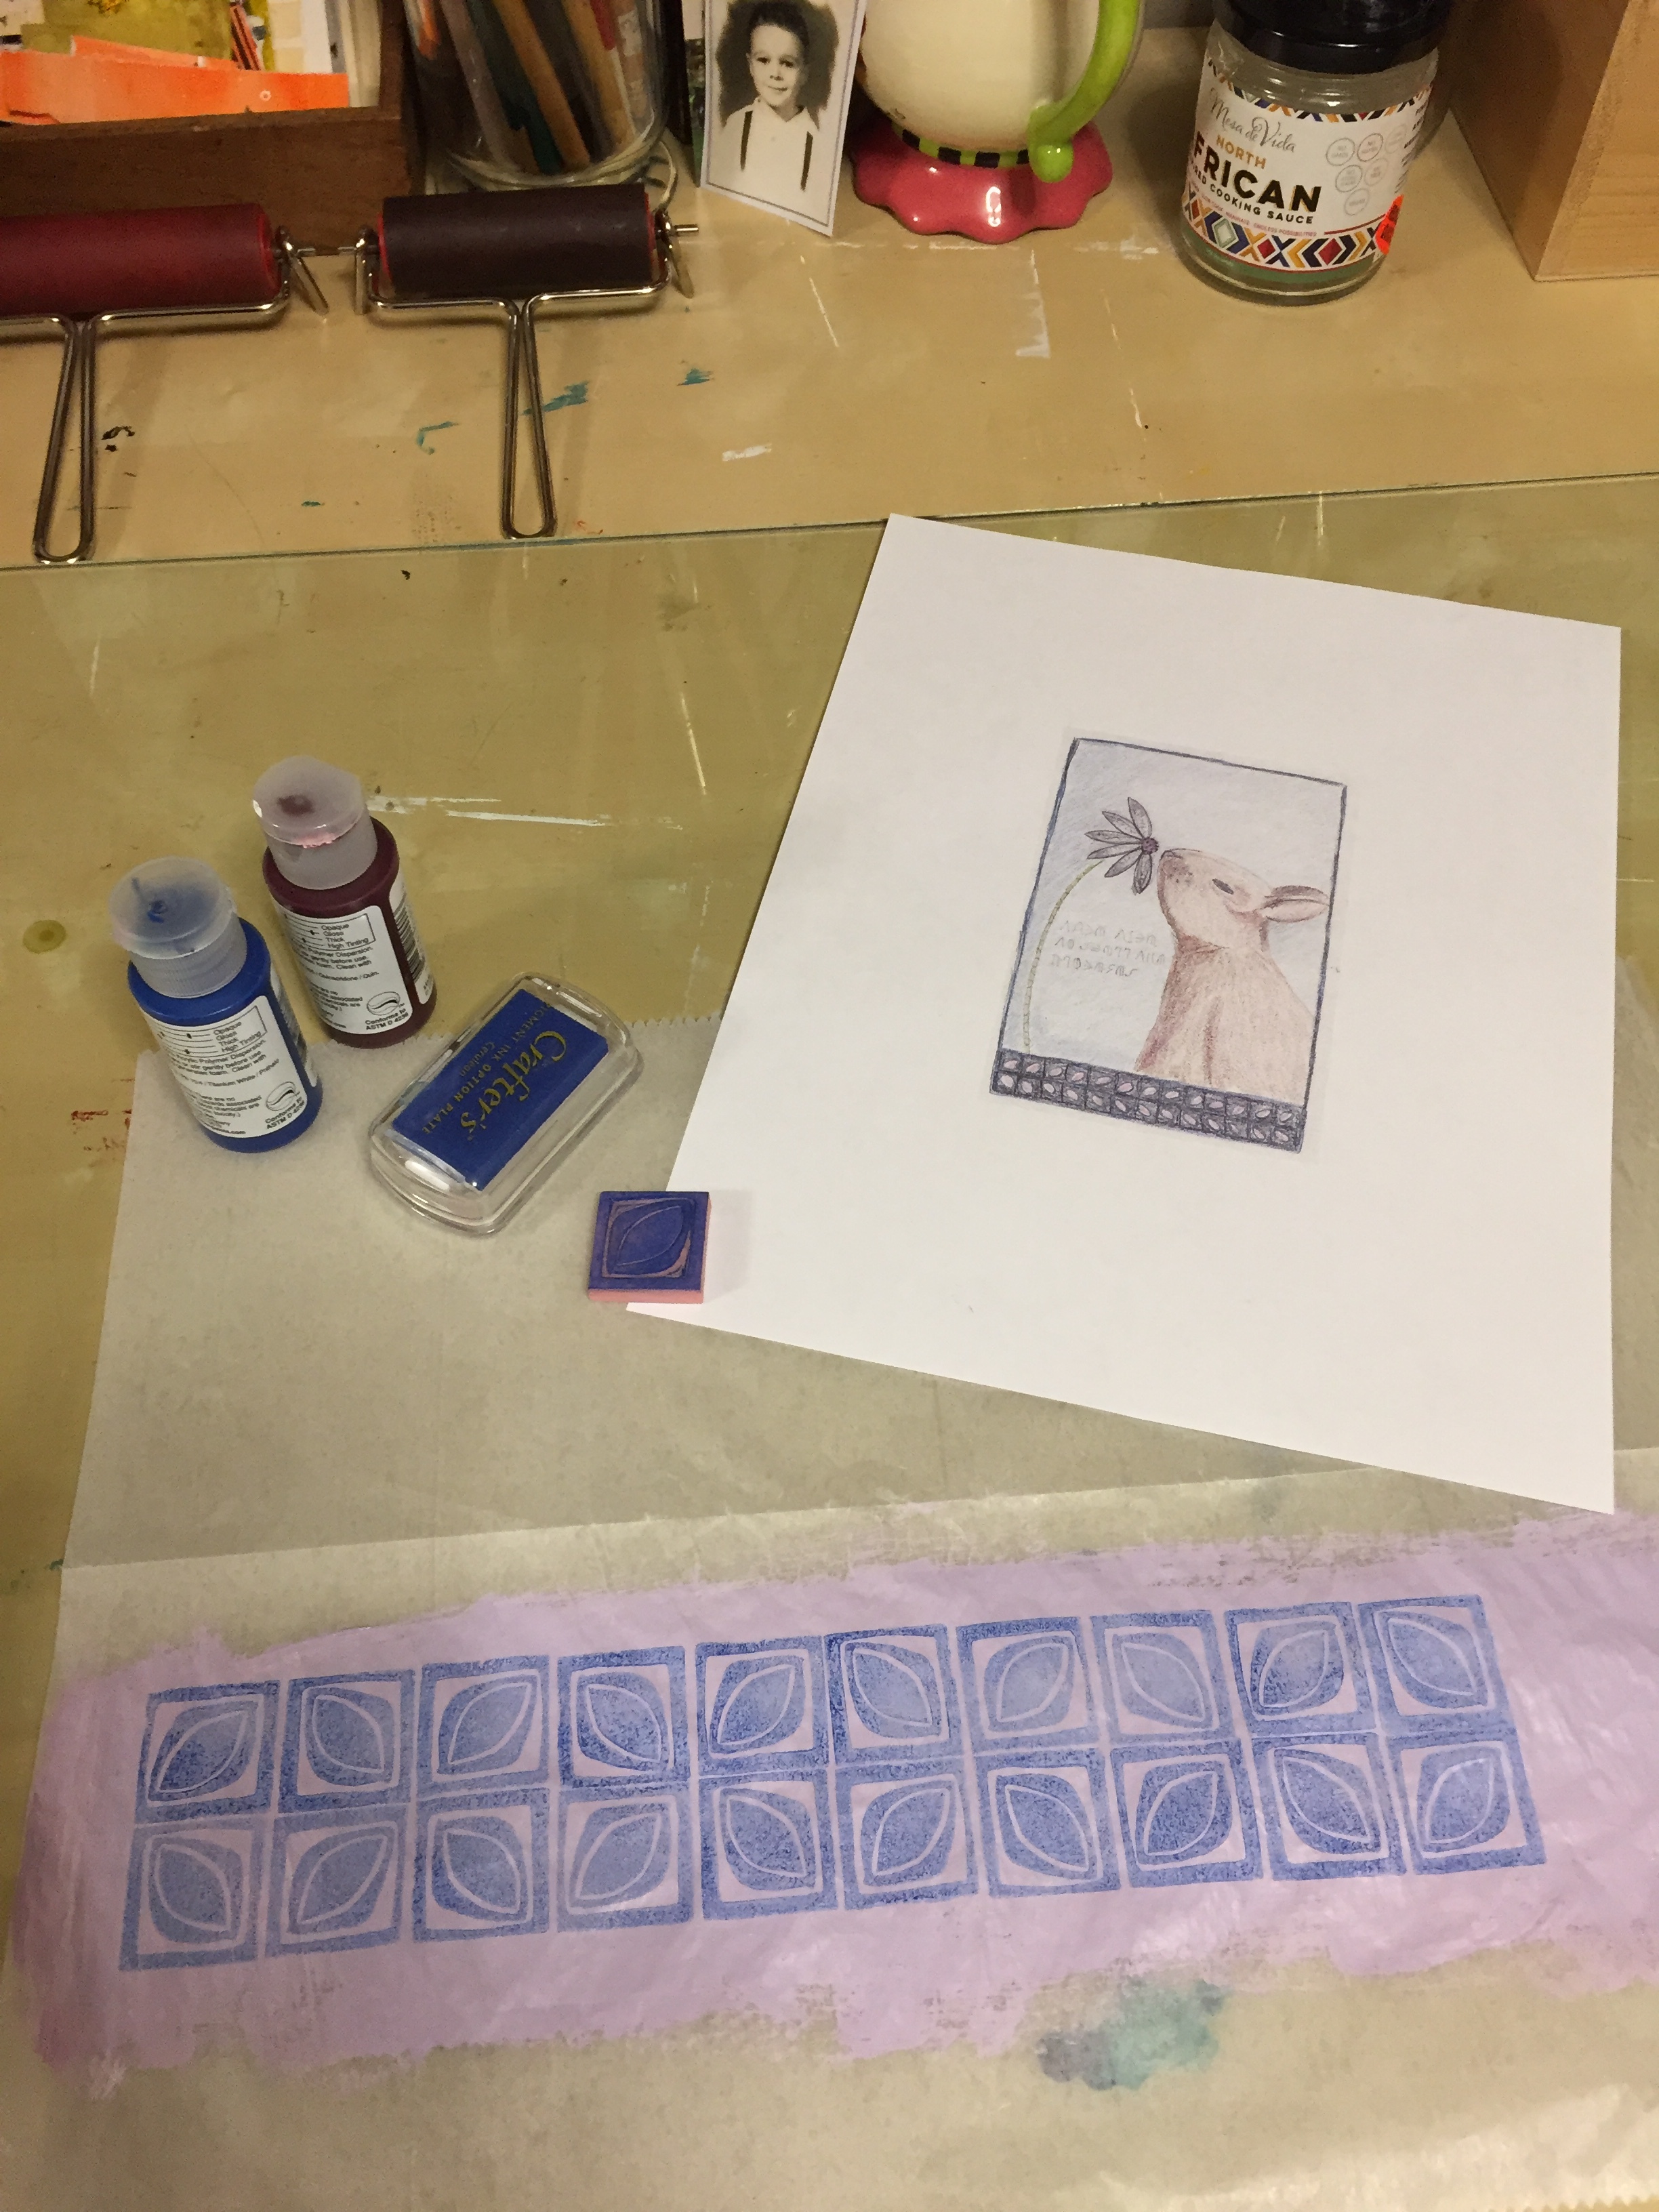
Process
Here, you can see the stamp that I carved. I painted a background on deli paper and then stamped the design for the border of my painting on the painted background. This is part of the process that Anne uses.
Anne often uses layers of these stampings to create the backgrounds and clothing of her subjects. While I love that about her work, it’s not really my style. I love carving stamps, and her technique inspired me to combine my love of printmaking with painting.
Make Your Own Charm Necklace