
Choosing Your Chain Length
It’s often difficult to picture just how long an 18” chain is when you are reading a necklace description. So, here’s a handy Necklace Length Guide from Cooksongold.

I also find it handy to take a piece of string that is the described length and wrap it around my neck. The above image is great, but we all have different size necks. That’s why there is an inch or two range in the lengths below. The string is a foolproof way to really see where the chain you are buying will land on your neck/chest. You can tape the ends together when the two ends are in front of you if you don’t want to hold onto the ends.
Choker Length: 13 – 15 inches
Collar Length: 16 – 17 inches
Princess Length: 17 – 19 inches
Matinee Length: 20 – 24 inches
Opera Length: 28 – 37 inches
Rope Length: 37+ inches
If you have any questions, please don’t hesitate to comment below or drop me an email at mybrownwren @ gmail.com (please remove the spaces before sending).
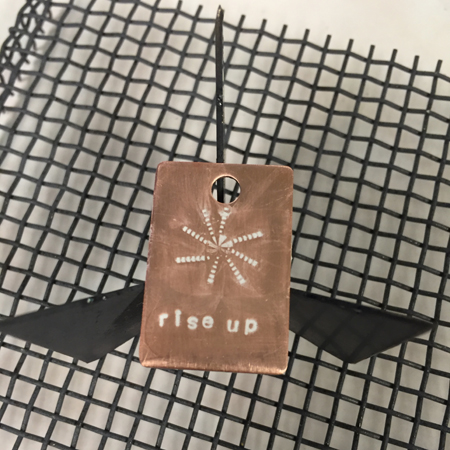
Riveting Enamel

Spring brings new energy for using old ideas in exciting new ways. Here is an example of how I connected an enameled piece to a copper back with heat rivets. The silver balls are heat rivets. Heat rivets are made from a silver wire that is heated until it balls up. If you'd like to learn how to create your own heat rivets, please check out my tutorial. This beautiful sunflower necklace is in my shop. A miniature version, inorange, red or yellow, can be found in my Etsy shop. See picture below...
Tiny sunflower necklaces

Simple Champleve Enamel
What is champleve? It is a fairly complicated enameling technique that requires some skill with a saw blade and soldering. A design is cut from a sheet of copper or fine silver, retaining a border around it. A base plate is cut to match the shape of the outer shape of the top sheet. Then, the two pieces are soldered together with eutectic solder. Any solder that leaks out from between the two pieces must be meticulously cleaned away from the recessed areas. Then, the cells of the design are filled, much like you would do in cloisonne. In this post, I will offer you a fairly simple way to create similar effects without the use of a saw or solder.
A few years ago, I discovered that you could use metal stamps or a rolling mill to create some pretty amazing textures in metal. Getting your designs to stand out requires the application of some type of patina. Patinas work nicely, but they take time to apply and partially remove to achieve the desired effect. Plus, your design usually ends up being just black. If you want your design to have a different color, you are out of luck. Or are you?
I started playing around with liquid enamel to see if I could highlight my textures with color. What I came up with is uniquely different than what most metalsmith artists are doing today. And the cool thing about it is that you don't have to counter-enamel your piece - unless you want to apply transparent colors to the front surface of your design to further accentuate it.
Let's take a simple design, like letter stamping, and see if we can take it up a notch...

Here's the finished product. Now, I'll show you the steps...
For the purpose of this tutorial, I will show you how to use metal stamps to create your design and liquid white enamel to accent it. You can, of course, use other colors to fill in the design. I like the contrast that I get with white and a little patina after firing.

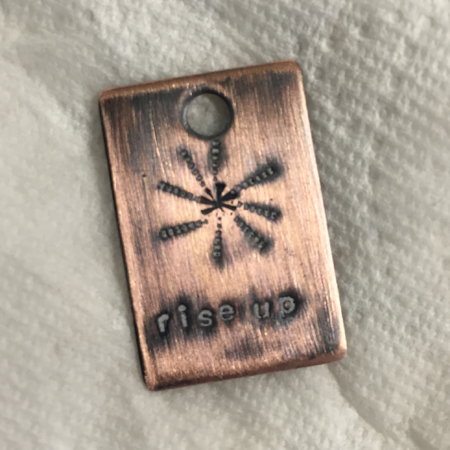
In the images above, you can see that I have applied liquid white enamel to the areas of my piece that have been stamped. After allowing the enamel to dry, I use the edge of a credit card or a piece of box board to scrape away the majority of the enamel. You want to make sure you leave the enamel in the depressions.
Clean up any residue around your stamped design with a damp paint brush. It shouldn't be wet, or you'll end up with a mess.
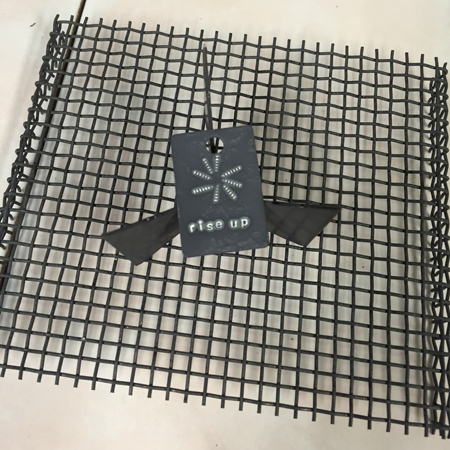
Next, fire your piece in the kiln or with a torch from the underside. The exposed copper will oxidize to a dark black. You can throw it in the pickle pot once it cools, to clean off the oxidation. Alternatively, you can sand it with some fine grade wet-dry sandpaper under running water.
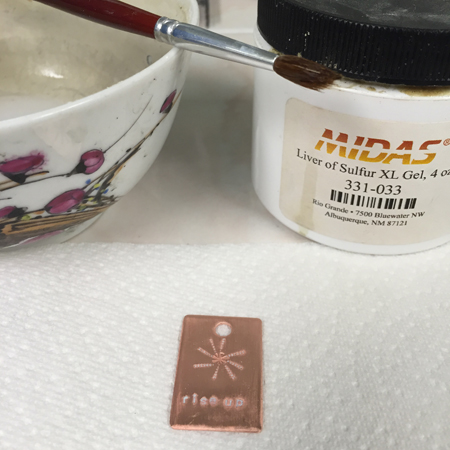
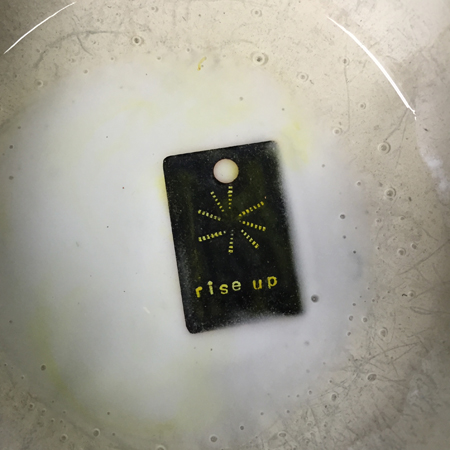
After the exposed copper is clean, you can add a patina or leave it as is. I like the rustic look of the patina, so I use a little liver of sulphur to achieve the aged look. Apply the liver of sulphur as you would normally and neutralize in a baking soda and water solution. Dry completely and buff with a pro-polish pad or use some fine grade wet-dry sandpaper, as I did, to remove the patina from select areas.
Voila! There you have an easy champleve in less time than it took you to cut out a design and solder.
Now, if you want to, as I mentioned earlier, you can give your design more color and accents with some transparent enamel. It requires counter enamel to do that. Here is an example of what you can do. I have also created a design in the center of this piece using the sgraffito technique.

If you'd like to learn more about using liquid enamel to create amazing sgraffito designs, check out my sgraffito enamel designs in my shop.
Setting an Enamel Cabochon
I have had people ask me how to set an enamel cabochon. It is rather simple, so I thought I'd share the process with you today.
Here are the simple steps:
1. Form a circle in 16g sterling silver, slightly smaller than the finished size of the cabochon.

Create base for cabochon setting
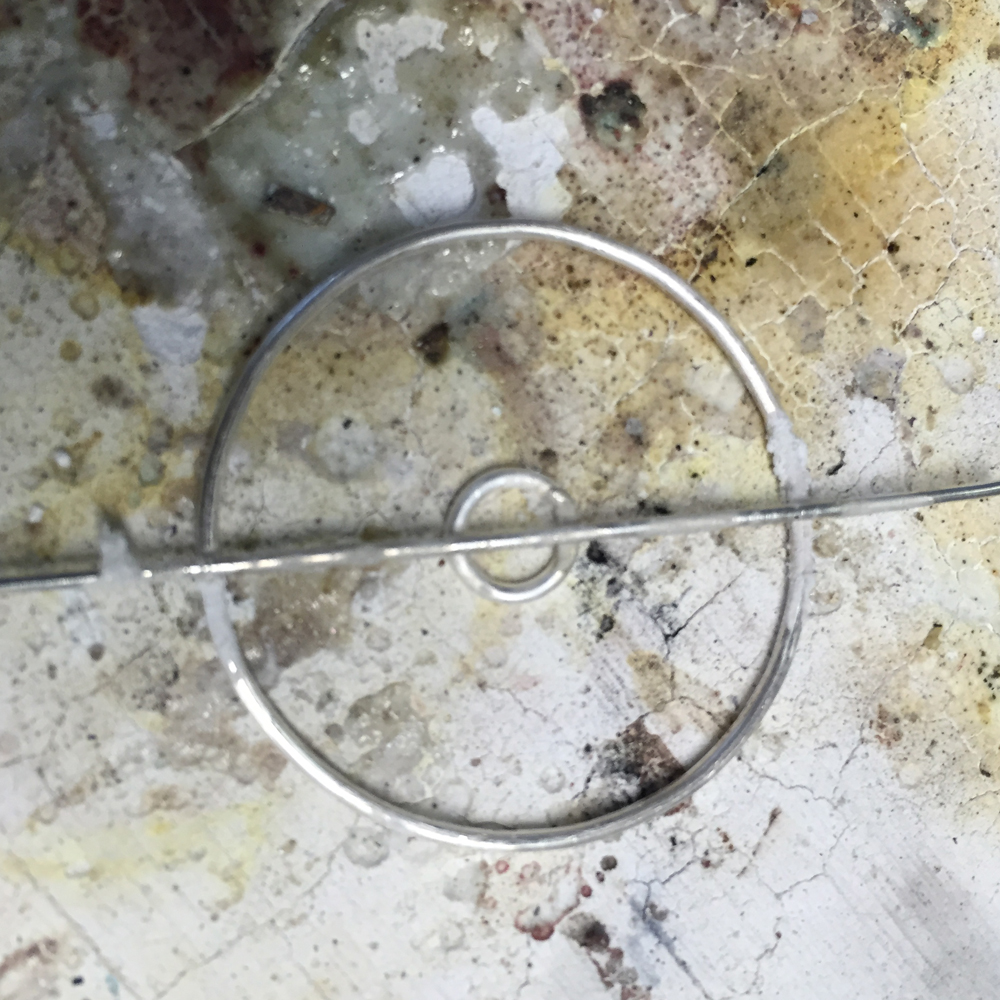
Step 2 - Solder an 18g jump ring for the center of the setting. Center it inside the larger circle.

Center the soldered jump ring within the larger circle.
Step 3 - Cut a length of 18g sterling silver wire about a half inch wider than the total width of the circle and center it over the circle and the jump ring.
Prep first prong set.
Solder each of the crossing points of the top wire.
Step 4- Add two shorter wires that sit perpendicular to the long wire but don't cross it.

Pic solder or stick solder the additional wires onto the ring.
Step 5 - Clean up your solder joints with whatever method you prefer. I like to use silicon disks in my flex shaft.
Step 6 - Add one or two hanging loops. One would have looked better on this small cabochon, but it will flip over less with two.
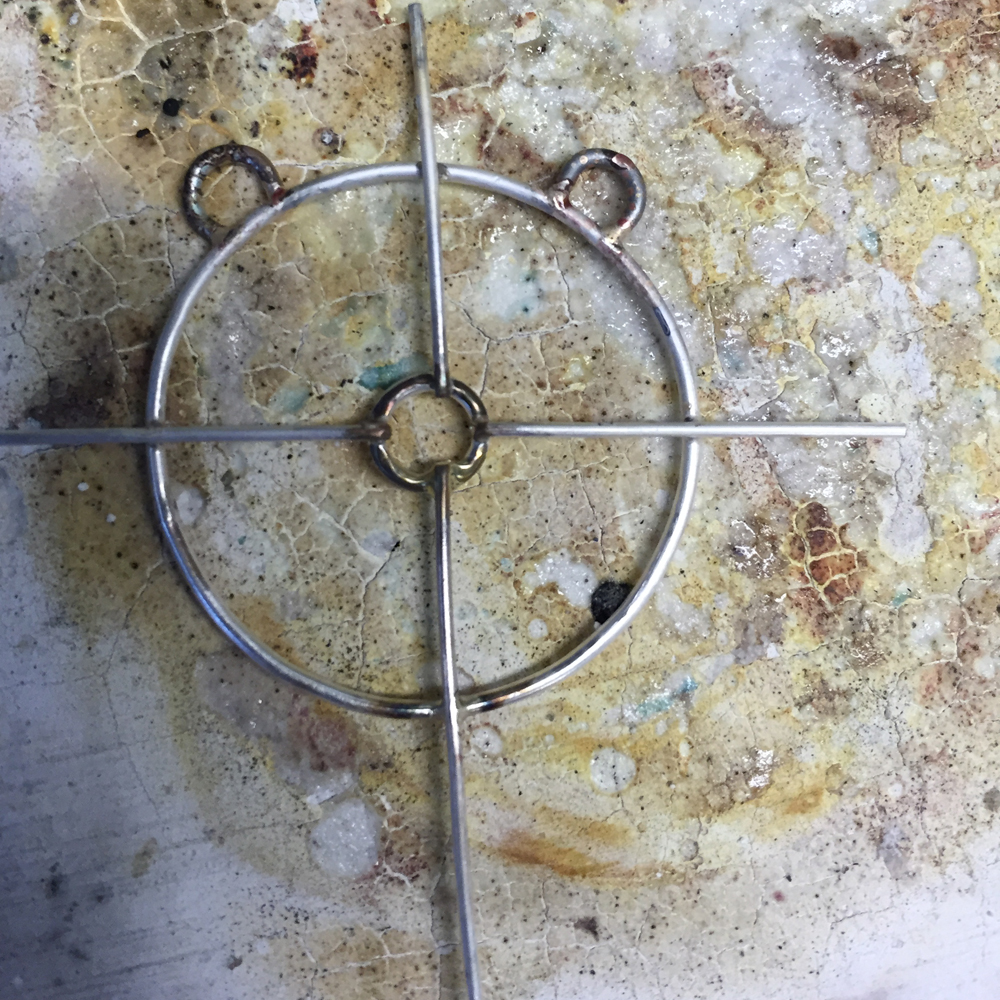
Create the hanging loops with a pair of round nose pliers and 16g wire.
Step 7 - Clean up your setting and smooth the wire ends that cross into the center jump ring. These wires were cut from the center after soldering. I used my silicon polishing disk to smooth the ends so they won't catch on someone's clothing.
Step 8 - Prepare for folding over the prongs...

Center the cabochon on the wire setting.
Pick up the cabochon and the setting and gently fold over one of the prongs. Next, fold over the prong that is directly across from the first. Fold over the remaining two prongs.

The 18g wire can be bent easily with your fingers. Jut bend it over so that the cabochon doesn't wiggle. It doesn't need to lay flat at this point.
Step 9 - Cut your wires to the desired length. I like mine to be about 3 or 4 mm over the initial curve of the edge. It they are too short, your cabochon will not sit securely in the setting.
Step 10 - Using a cup burr, round the ends of each wire.
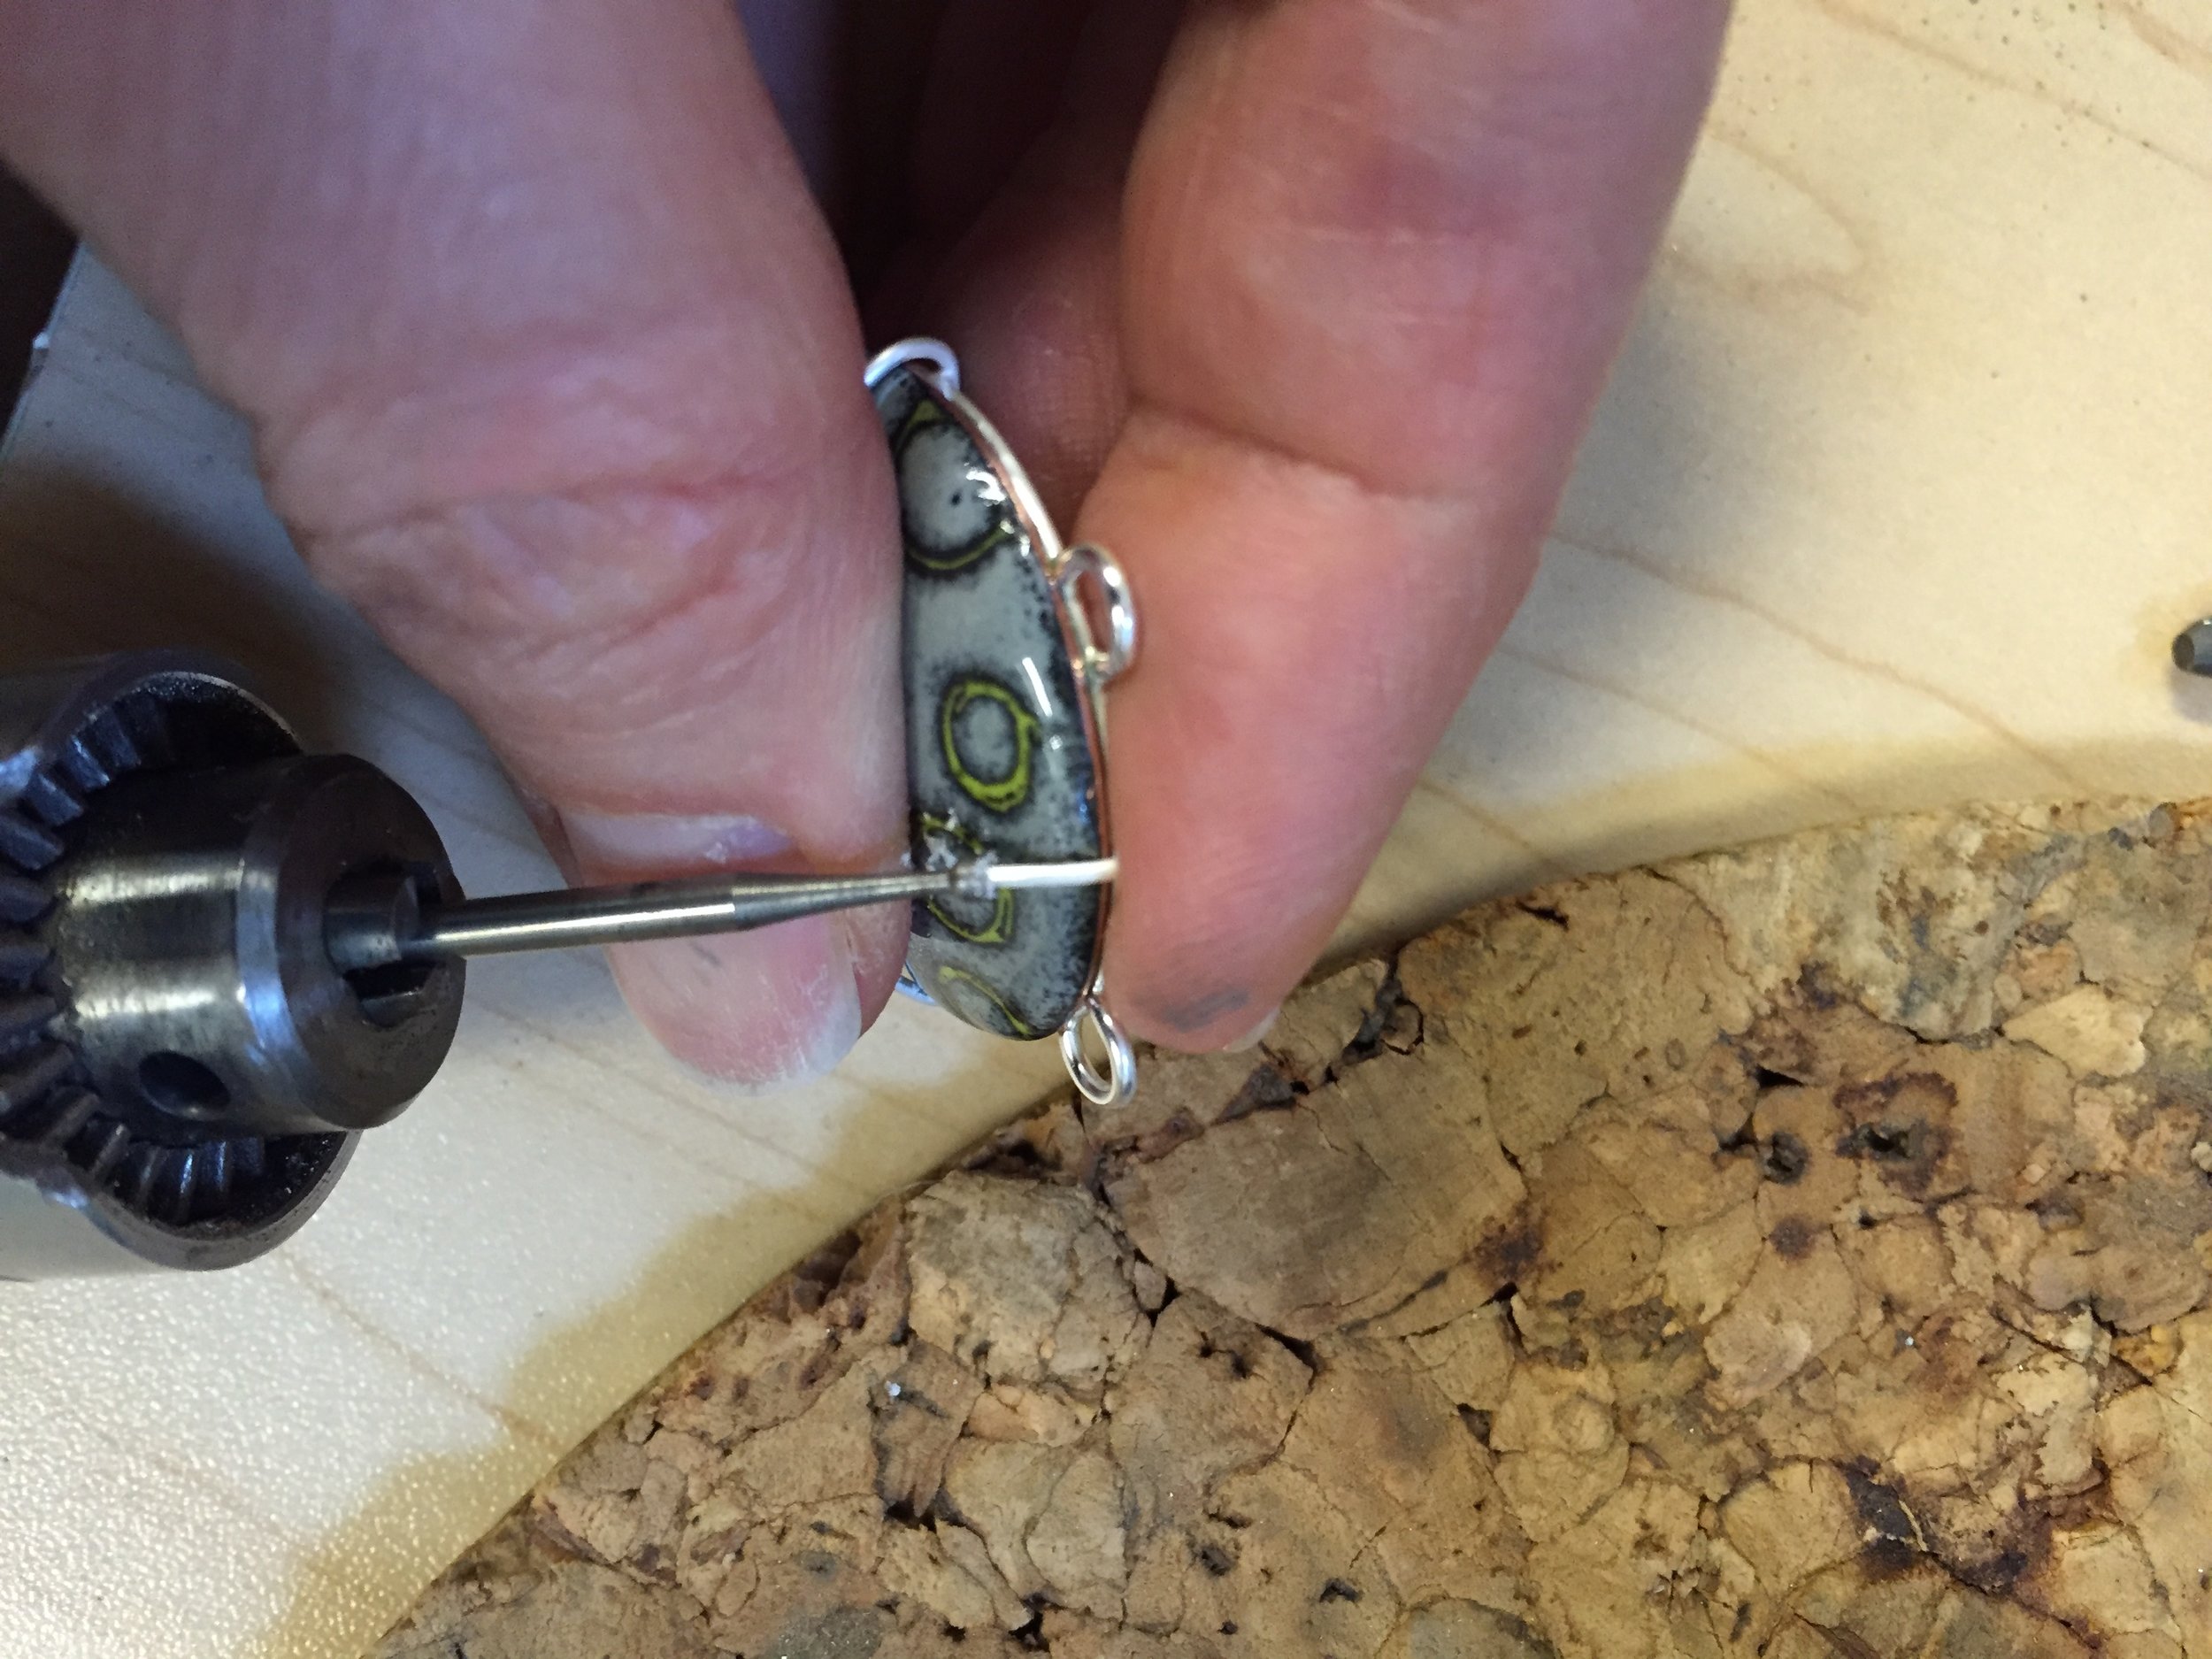
Use a little Burr Life lubricant on your cup burr to keep it from getting too hot. It prolongs the life of the tiny cutting blades inside the burr.
Step - 10Using a bezel pusher, fold the prongs over completely, allowing them to hug the curve of the cabochon. It will work harden the prongs and make them shine. You can rub the bezel pusher all over the setting to shine it up, or you can use a glass brush. Either will give the setting a nice shine. Alternatively, you can polish the entire setting before setting the cabochon. If you prefer a more rustic look, the setting can be dipped into liver of sulphur to give it a nice, rich patina.

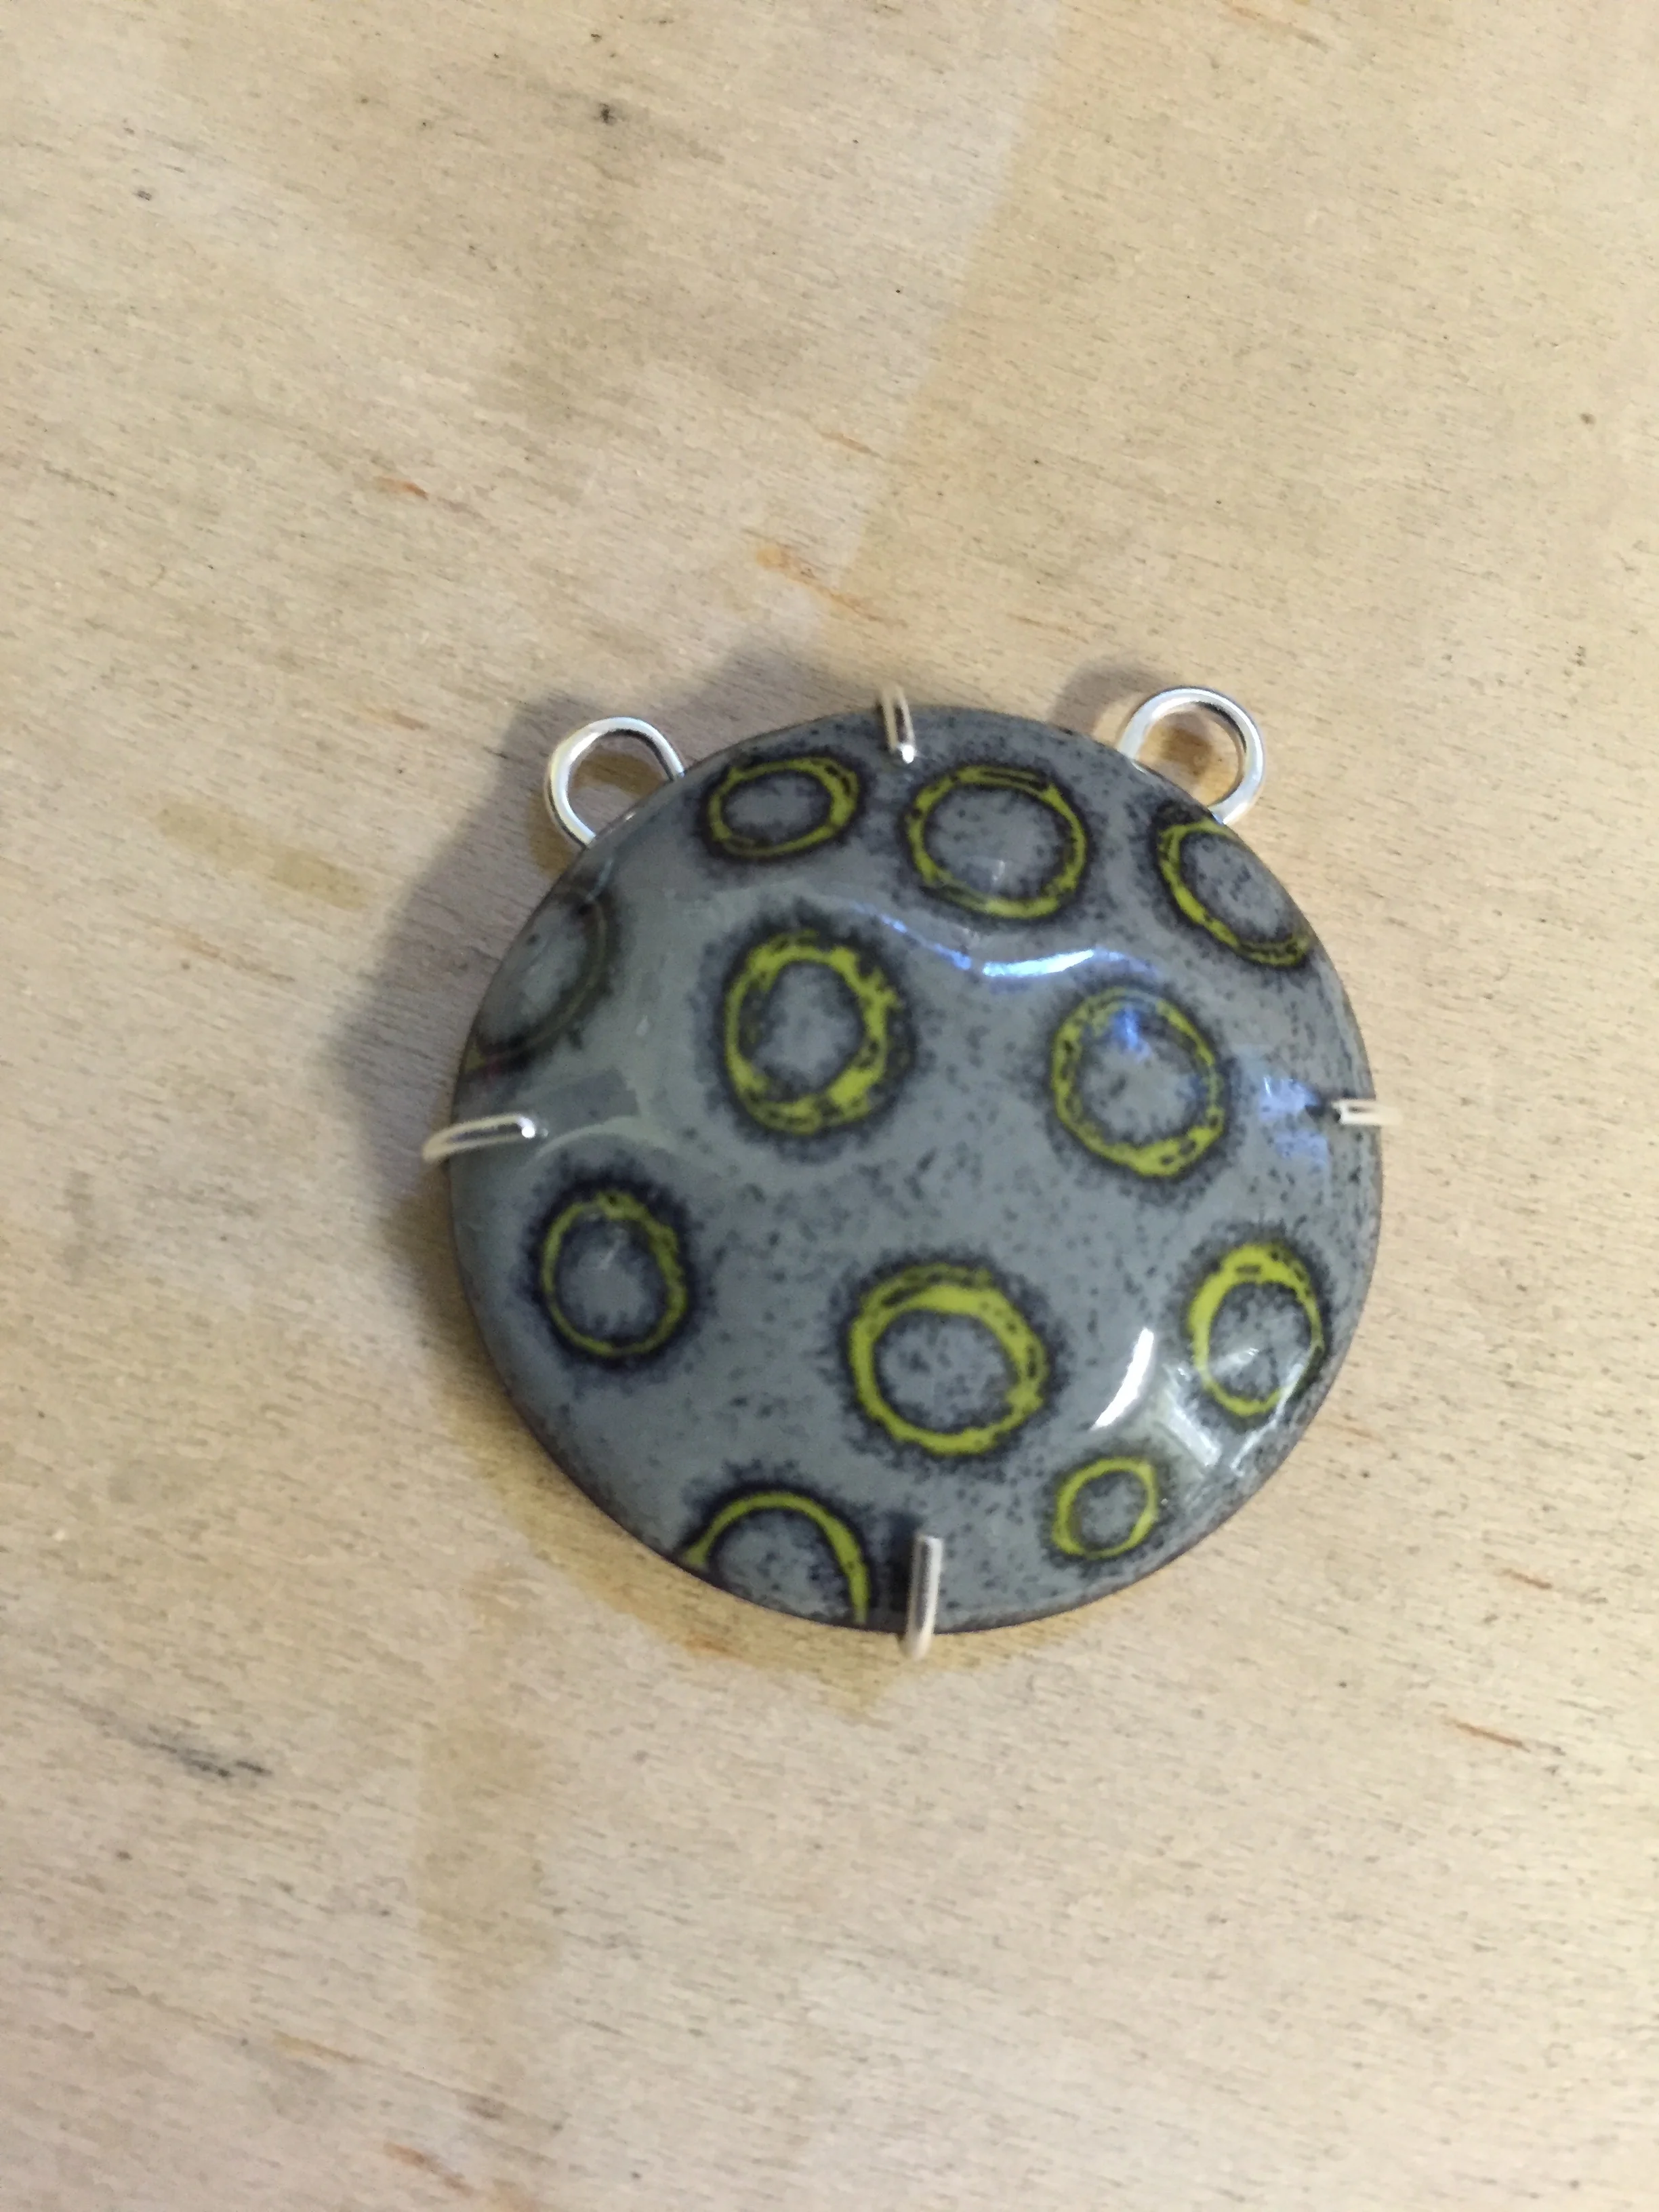
The finished setting...
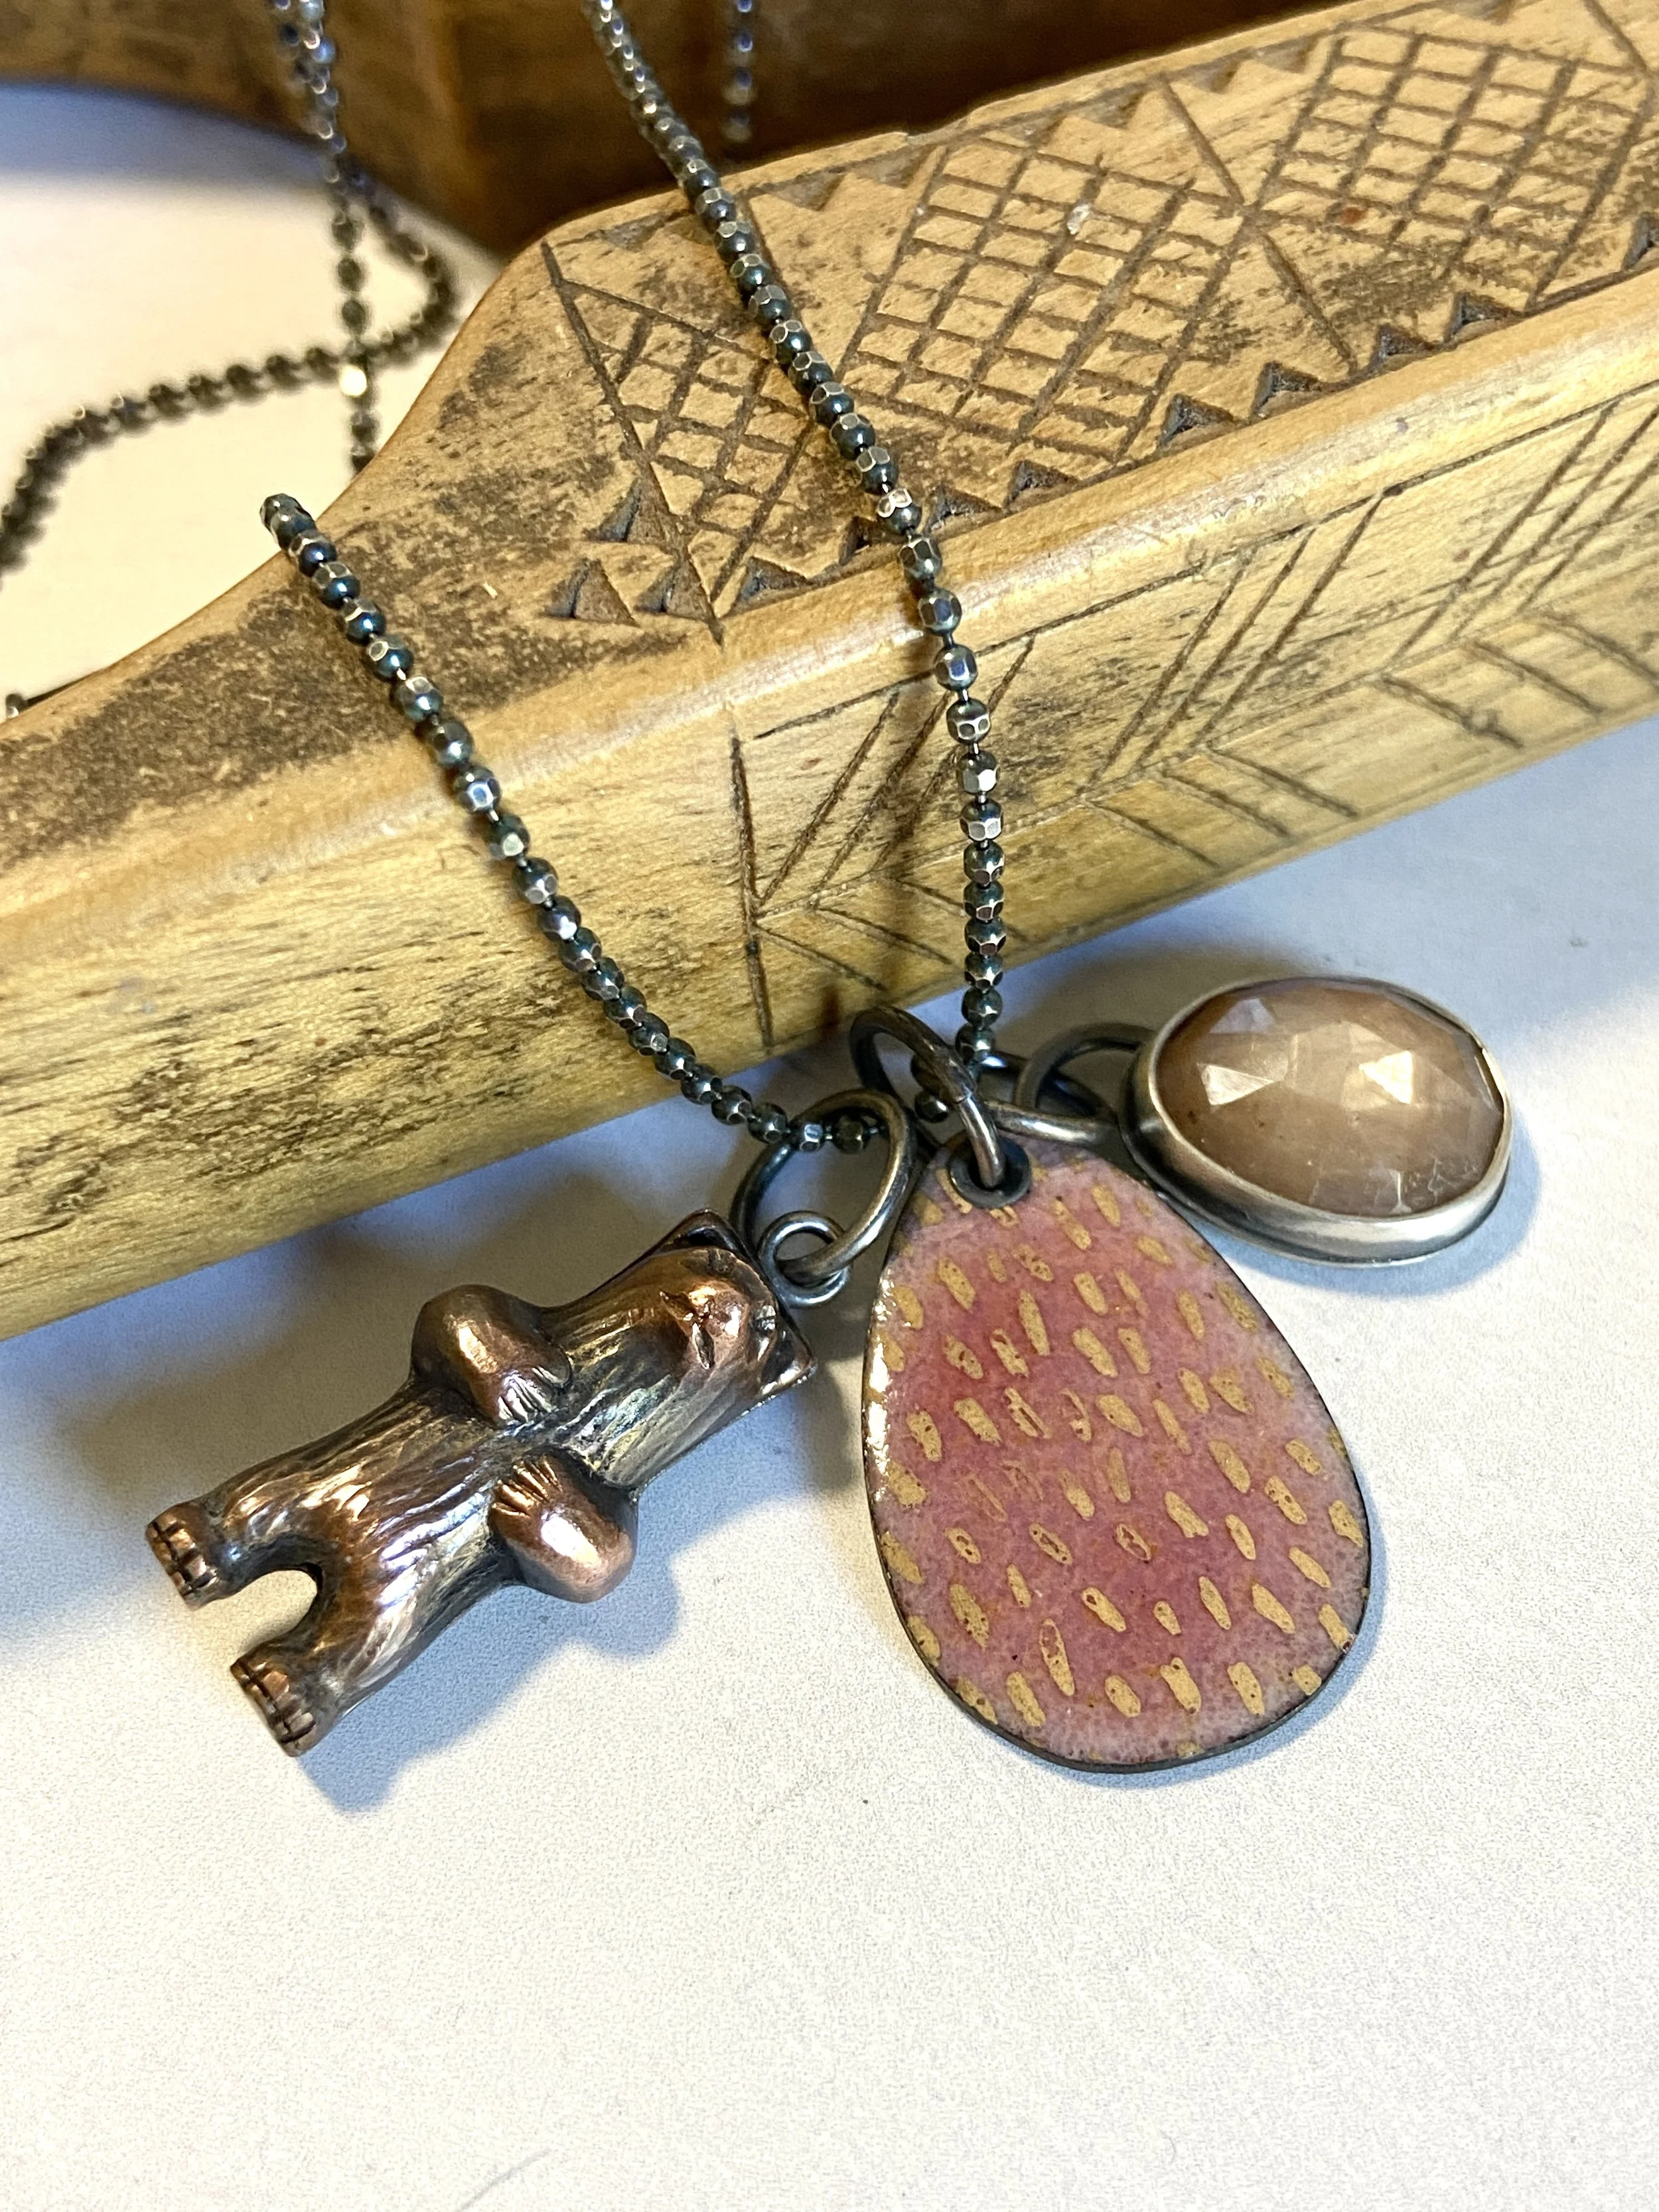
Make Your Own Charm Necklace