
The Art of Anne Bagby
You should know that I’m a Pinterest fiend. When I’m in need of inspiration, I start searching my boards and other people’s pins. That’s how I happened on the art of Anne Bagby. She is a mixed media artist who utilizes her own handmade stamps in a unique form of collage to create complex imagery. People are the majority of her subject matter.

Anne Bagby
Her handmade stamps and use of glazes creates beautiful, complex imagery that is hauntingly beautiful.
I took one of her online courses to learn more about her techniques and used them to make two paintings for the May Bunny show at Whidbey Art Gallery. Both of the paintings below are on display there all month. Anne uses layer upon layer of stampings and glazes. I found myself wanting to go there, but my style is much more minimal. These are the bunnies that I created using what I learned from Anne’s class…

Bunny in Repose
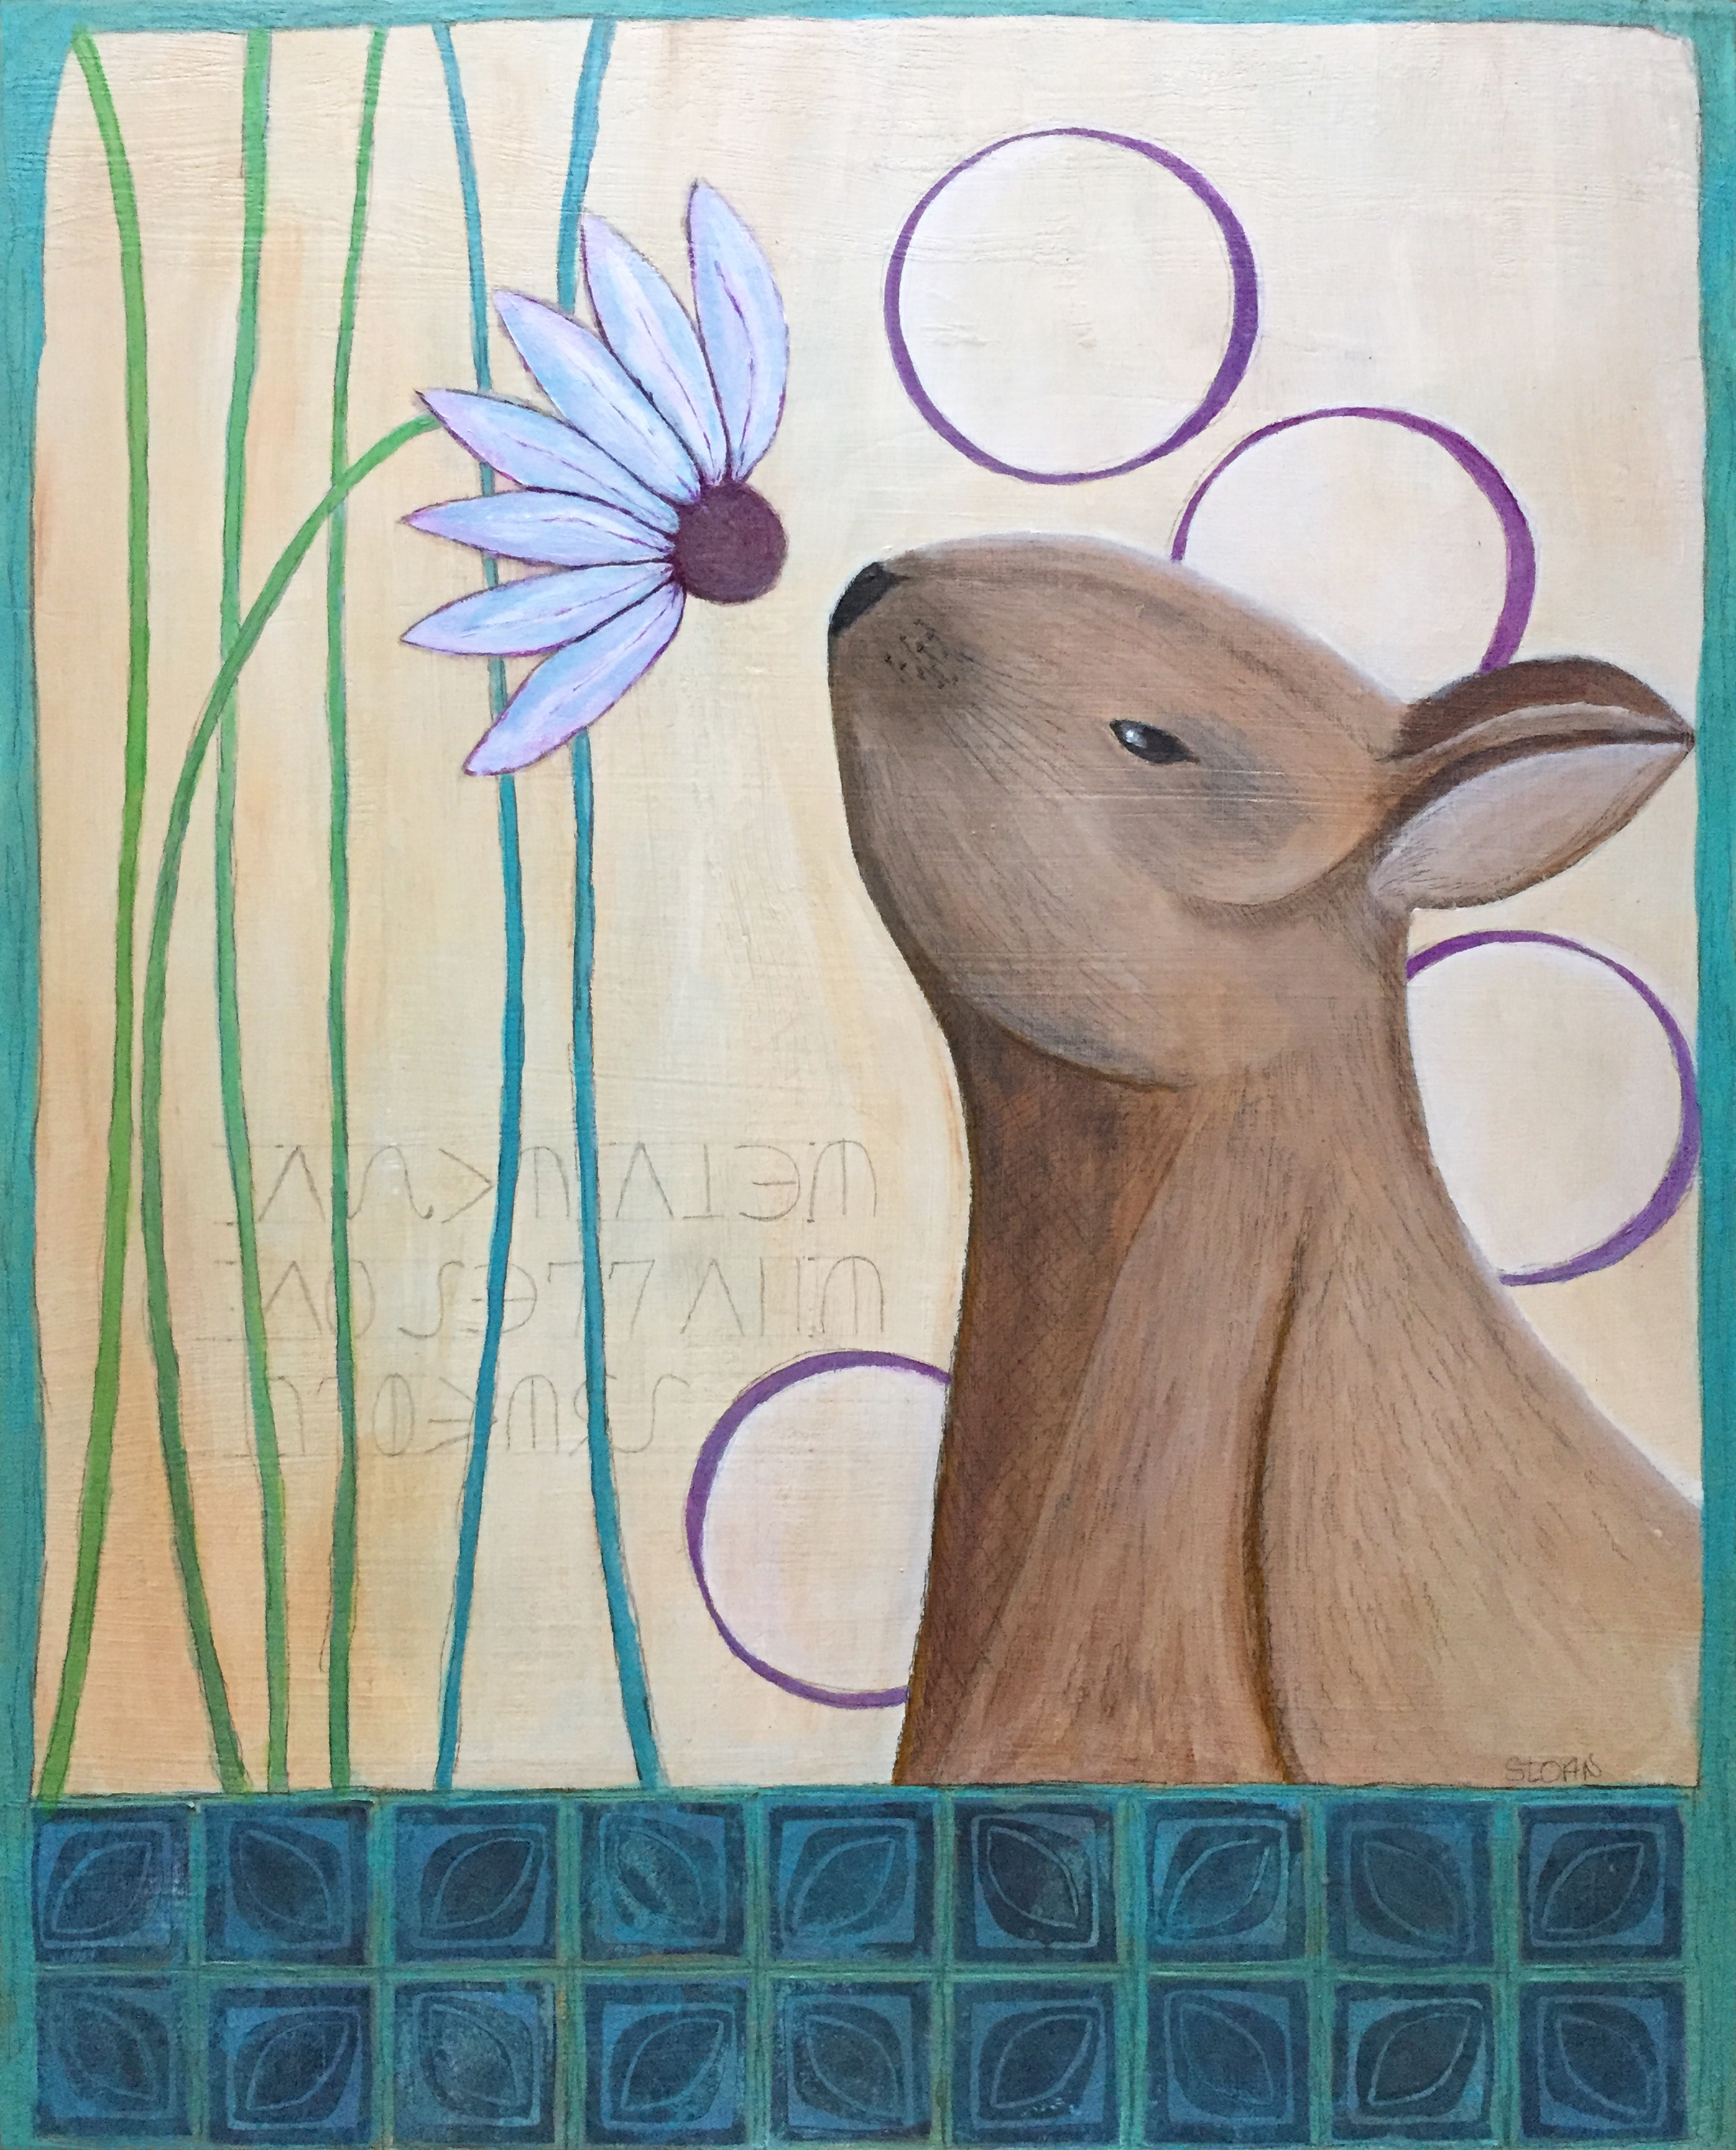
Take Time To Smell The Flowers
Process
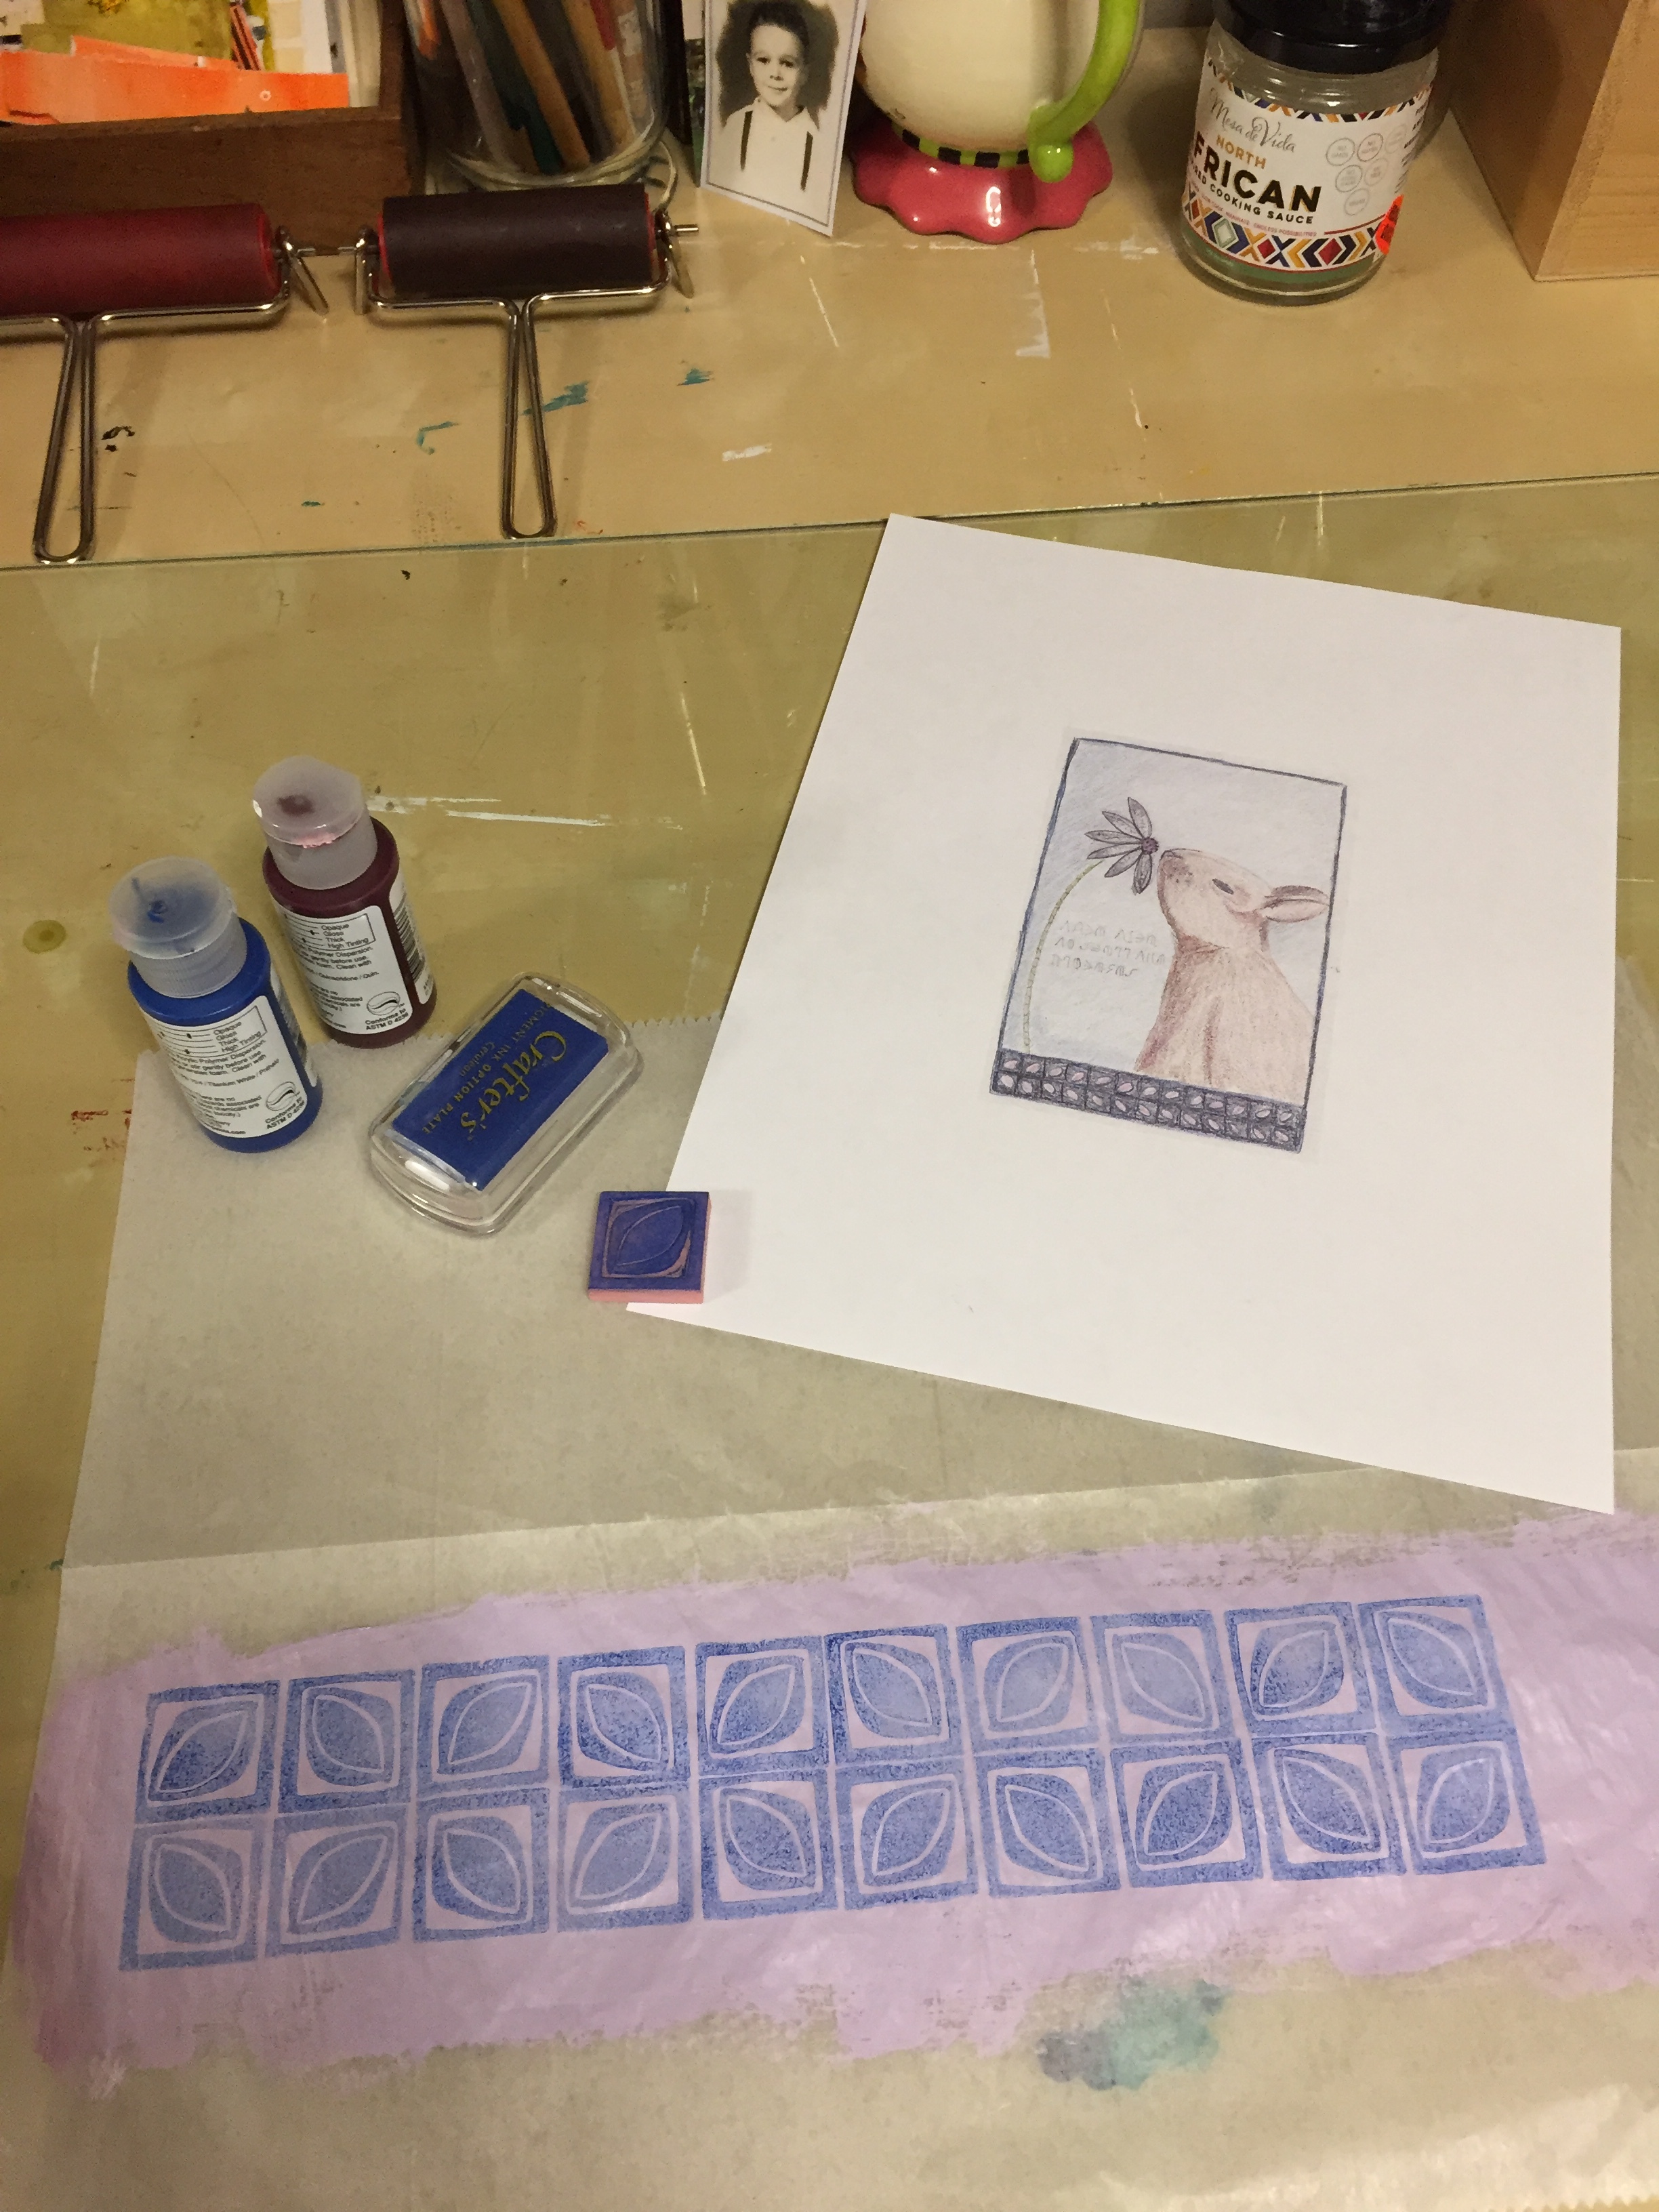
Here, you can see the stamp that I carved. I painted a background on deli paper and then stamped the design for the border of my painting on the painted background. This is part of the process that Anne uses.
Anne often uses layers of these stampings to create the backgrounds and clothing of her subjects. While I love that about her work, it’s not really my style. I love carving stamps, and her technique inspired me to combine my love of printmaking with painting.
Enamel and Etching (Basse Taille) - What a Fun Combo!
I’ve spent a lot of time these days just doodling, trying to get inspired. Like many artists, I have times when the ideas just aren’t flowing, but my doodles keep me creative. Lately, I’ve been thinking about ways to incorporate them into 2D art and my jewelry.
This week, I experimented with etching my drawings in copper. I was hoping to enamel over the etchings with opaque colors, but the etchings weren’t quite deep enough to accomplish what I had in mind. So, I pulled out the transparents and started playing.
Transparent enamels can be very tricky. I haven’t done much with them for that reason. It’s a whole other ball of wax. Firing temps and times are so different than opaques. I had some successes and some half successes. I wouldn’t call them total failures. I stuck with one color to see what I could come up with and adjusted time and temp with each attempt. I even pulled out the enamling Bible - The Art of Enameling by Linda Darty. With the info there, I now know that I need to fire lower and longer to prevent the edges from burning (though I like the look of it on the larger oval).
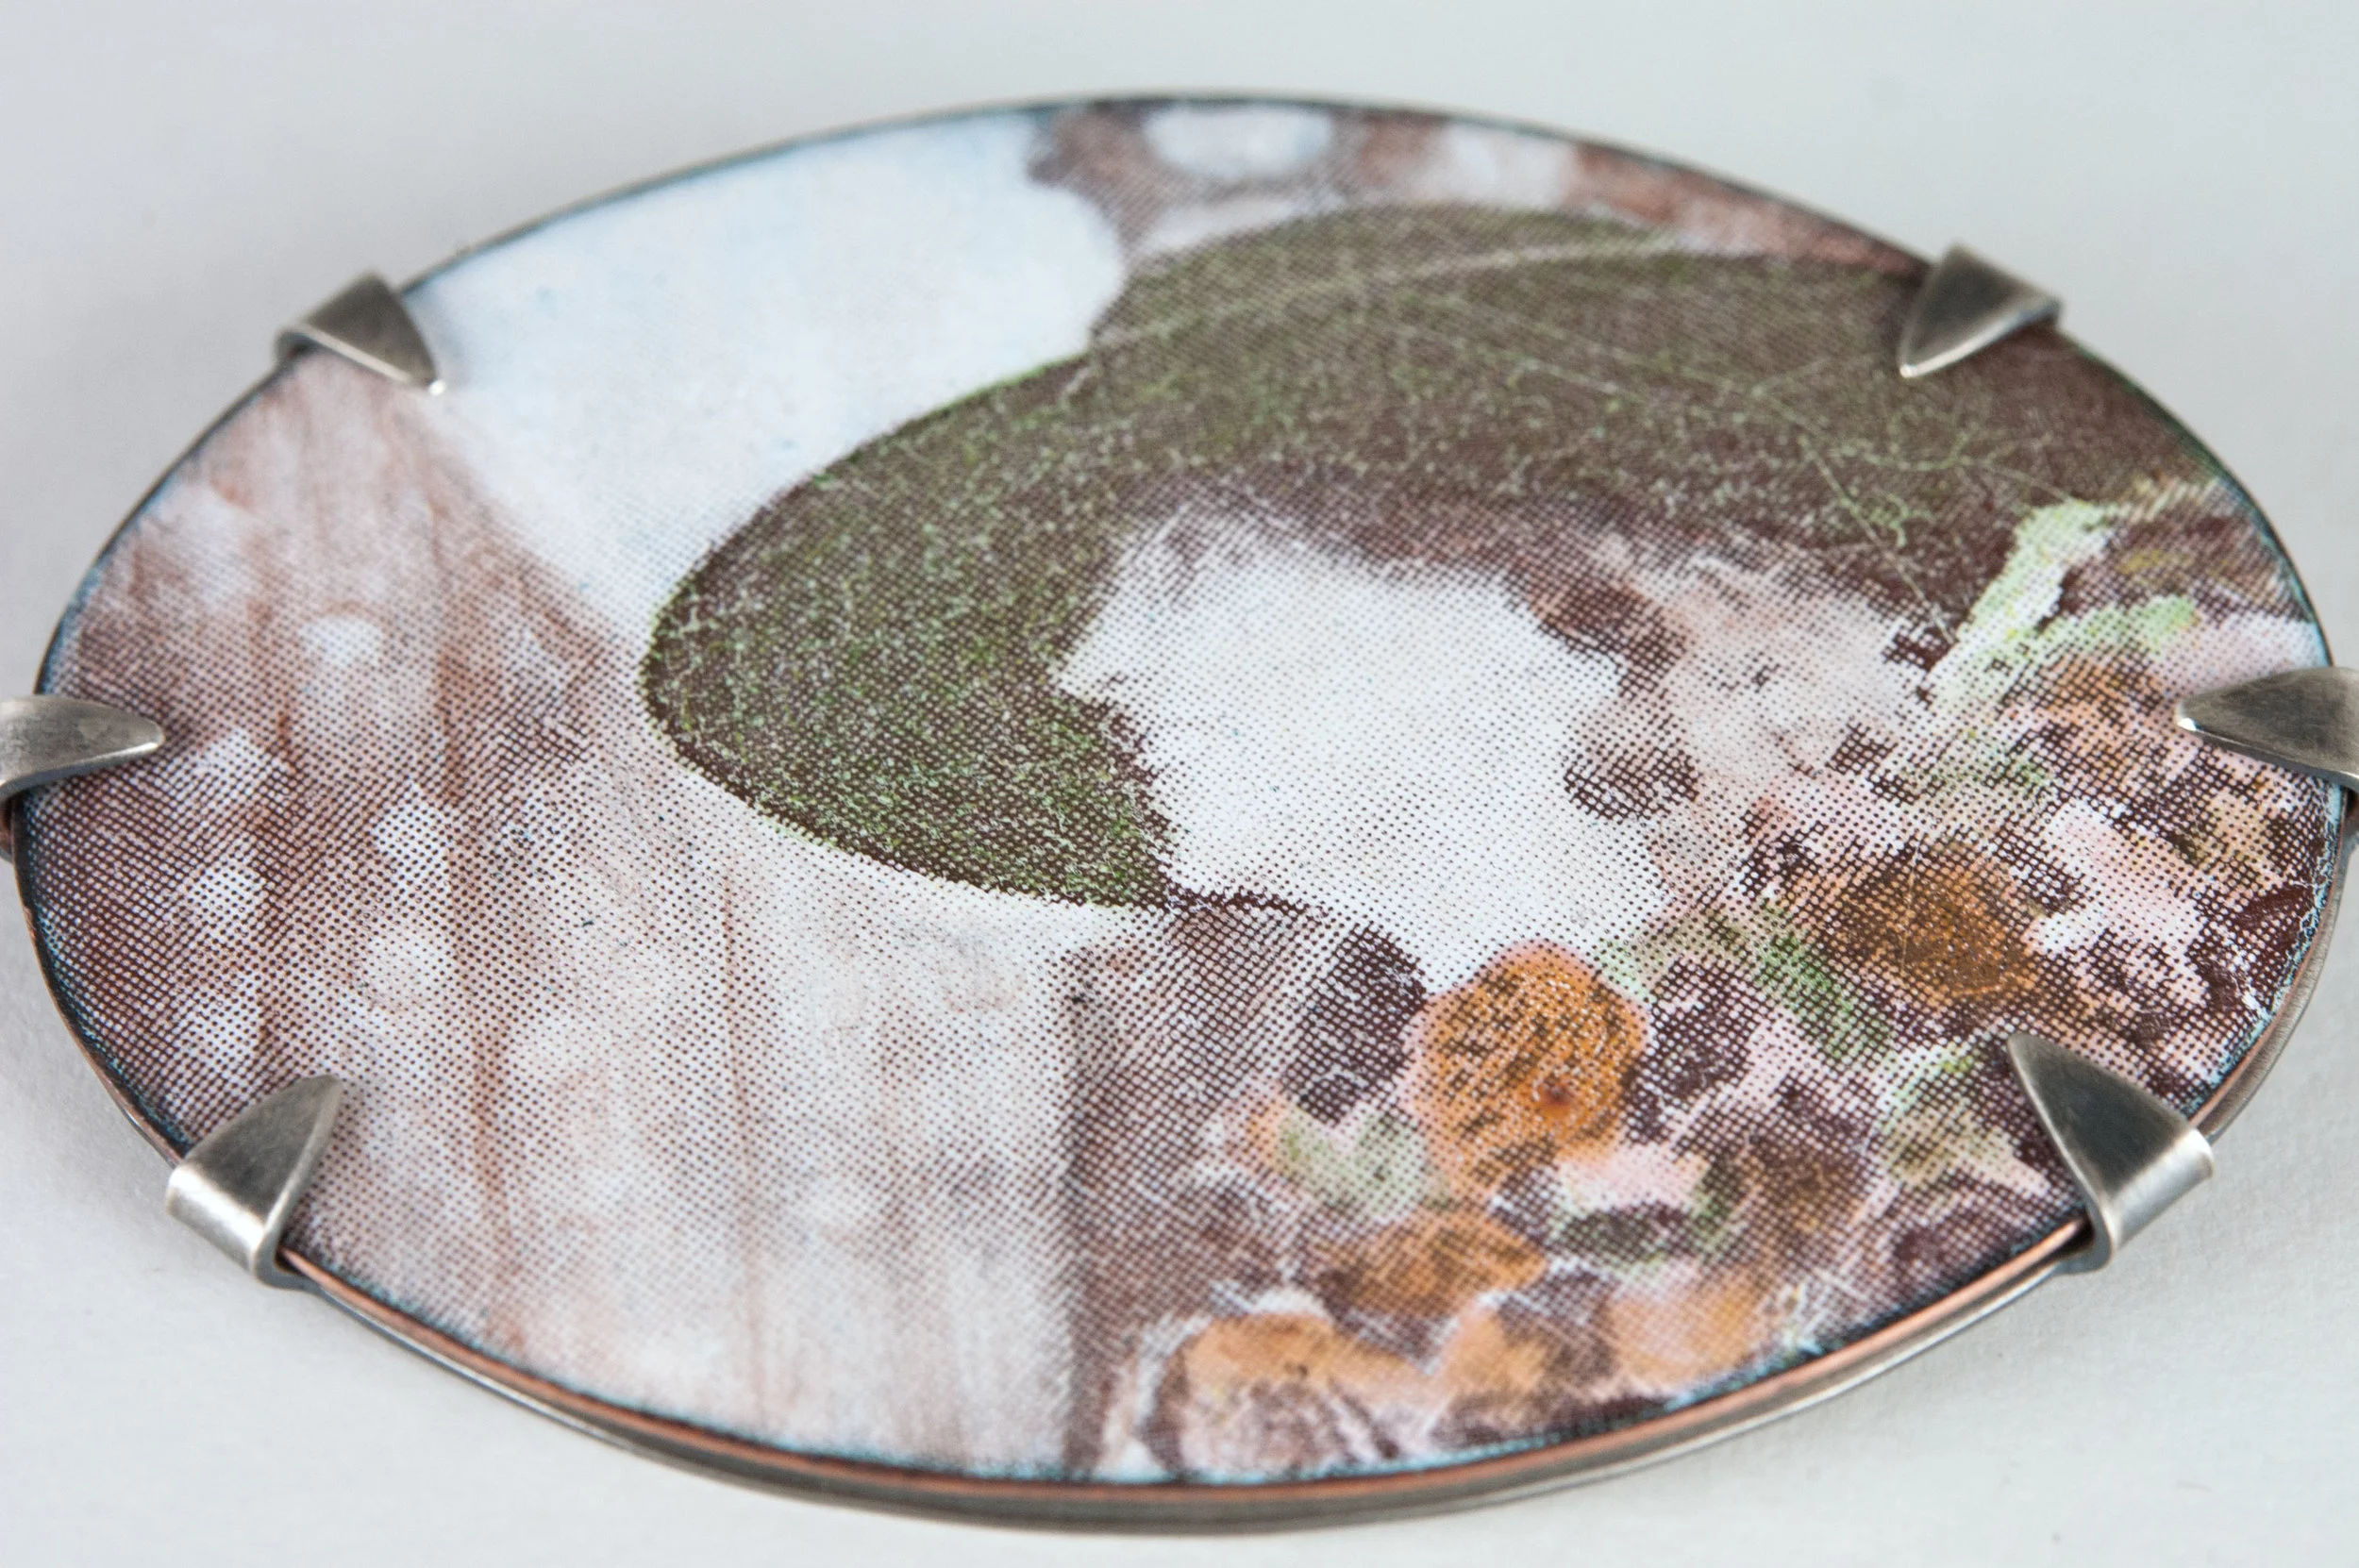
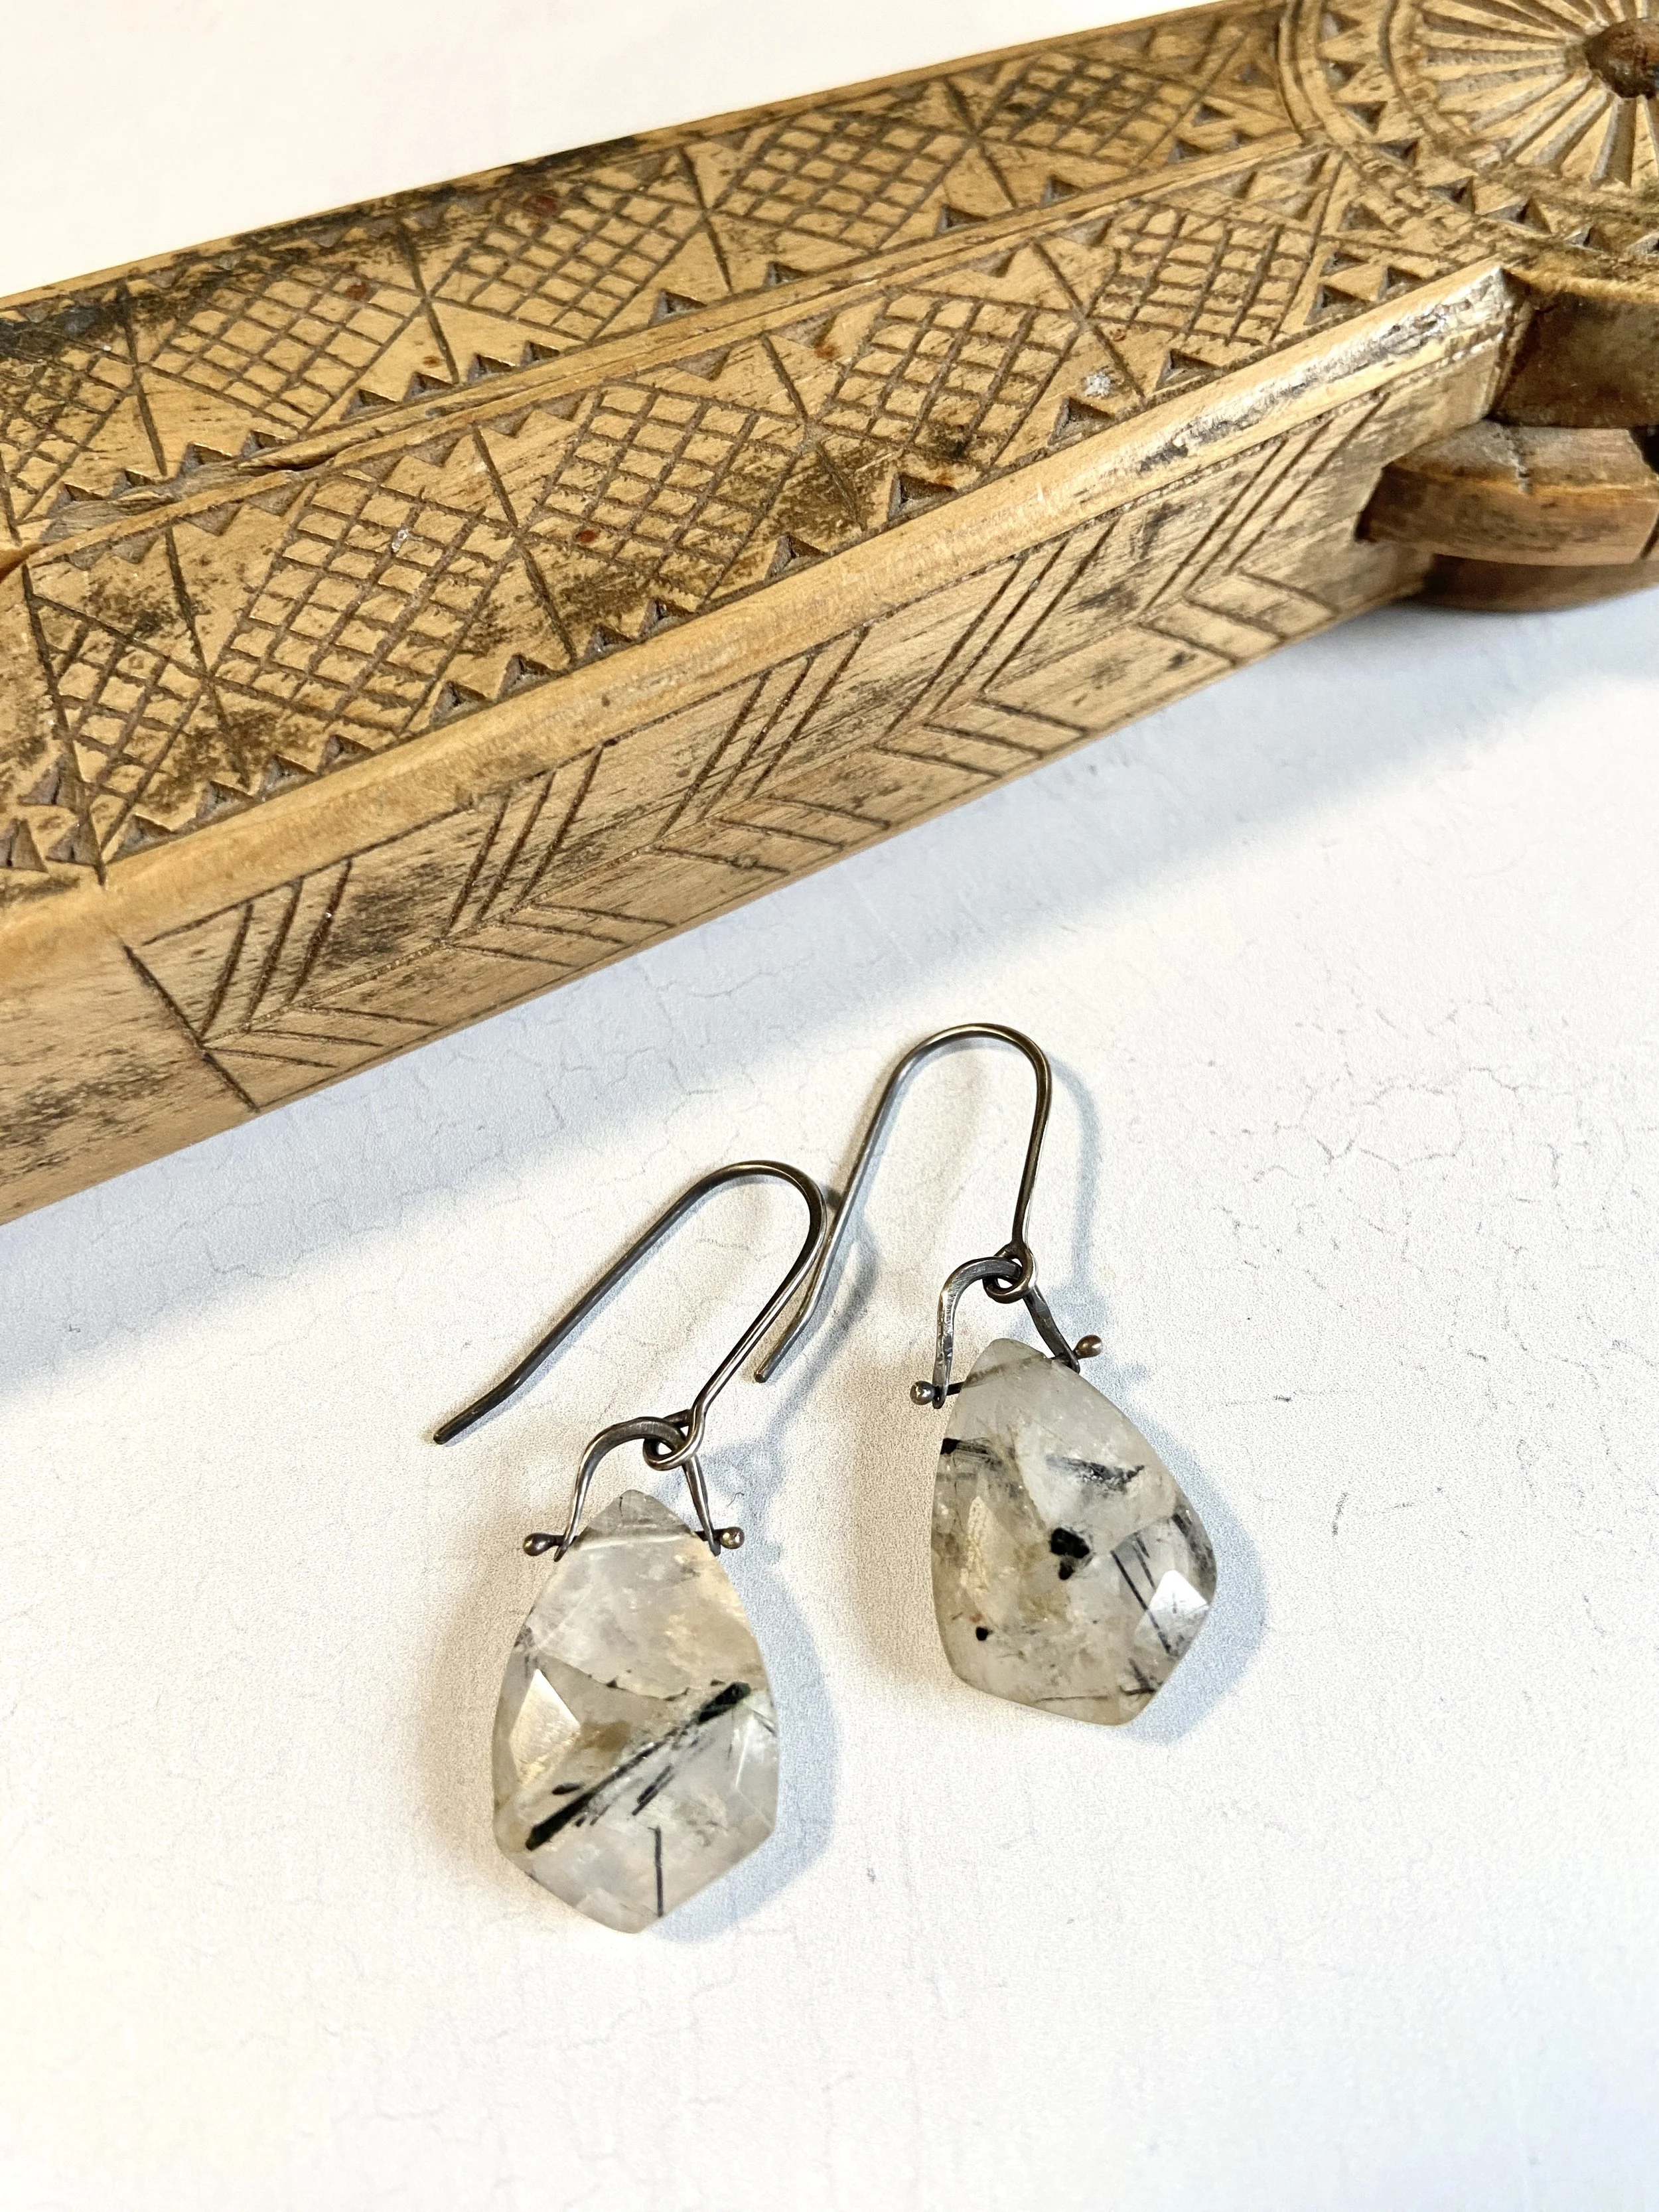
I want to set the large oval with a straight sided bezel with six tabs. I’m not sure yet what the bail will look like, but I want to incorporate a small green stone in it. It will likely hang on a snake chain for substance. Here are a few examples of my attempts at Basse Taille Enameling.

Basse Taille Enamel - experiments by My Brown Wren
These pieces were etched using electricity. If you are interested in learning to etch without acid, I have two tutorials available on my classes and tutorials page. The copper etching tutorial is a simple, step-by-step PDF that shows you how to etch copper, brass, bronze and nickel with salt water and electricity. My tutorial on how to etch silver is an hour long video with a backup PDF tutorial that goes through all the steps to etch silver without acid. It’s been a work in progress for a couple of years, but I finally got it done this summer. I’m just a little late in getting the word out…
Being A Women Ain't Easy
In the late 1800's women started seeing that the cards were stacked against them. There wasn't fair representation, fair wages or fair treatment in the workplace or at home. Women started fighting back by demanding the right to vote. They lobbied members of Congress, they staged rallies and parades, and they protested in great numbers. All of this was disruptive to "civilized" male society, and men fought back, and they fought dirty. They assaulted women protesters in an attempt to humiliate them. They even jailed them in an attempt to quiet them. Remember, during that time, women had no rights. They worked longer hours than men and made 1/3 of the wages of men. We've come a long way baby, but not far enough!
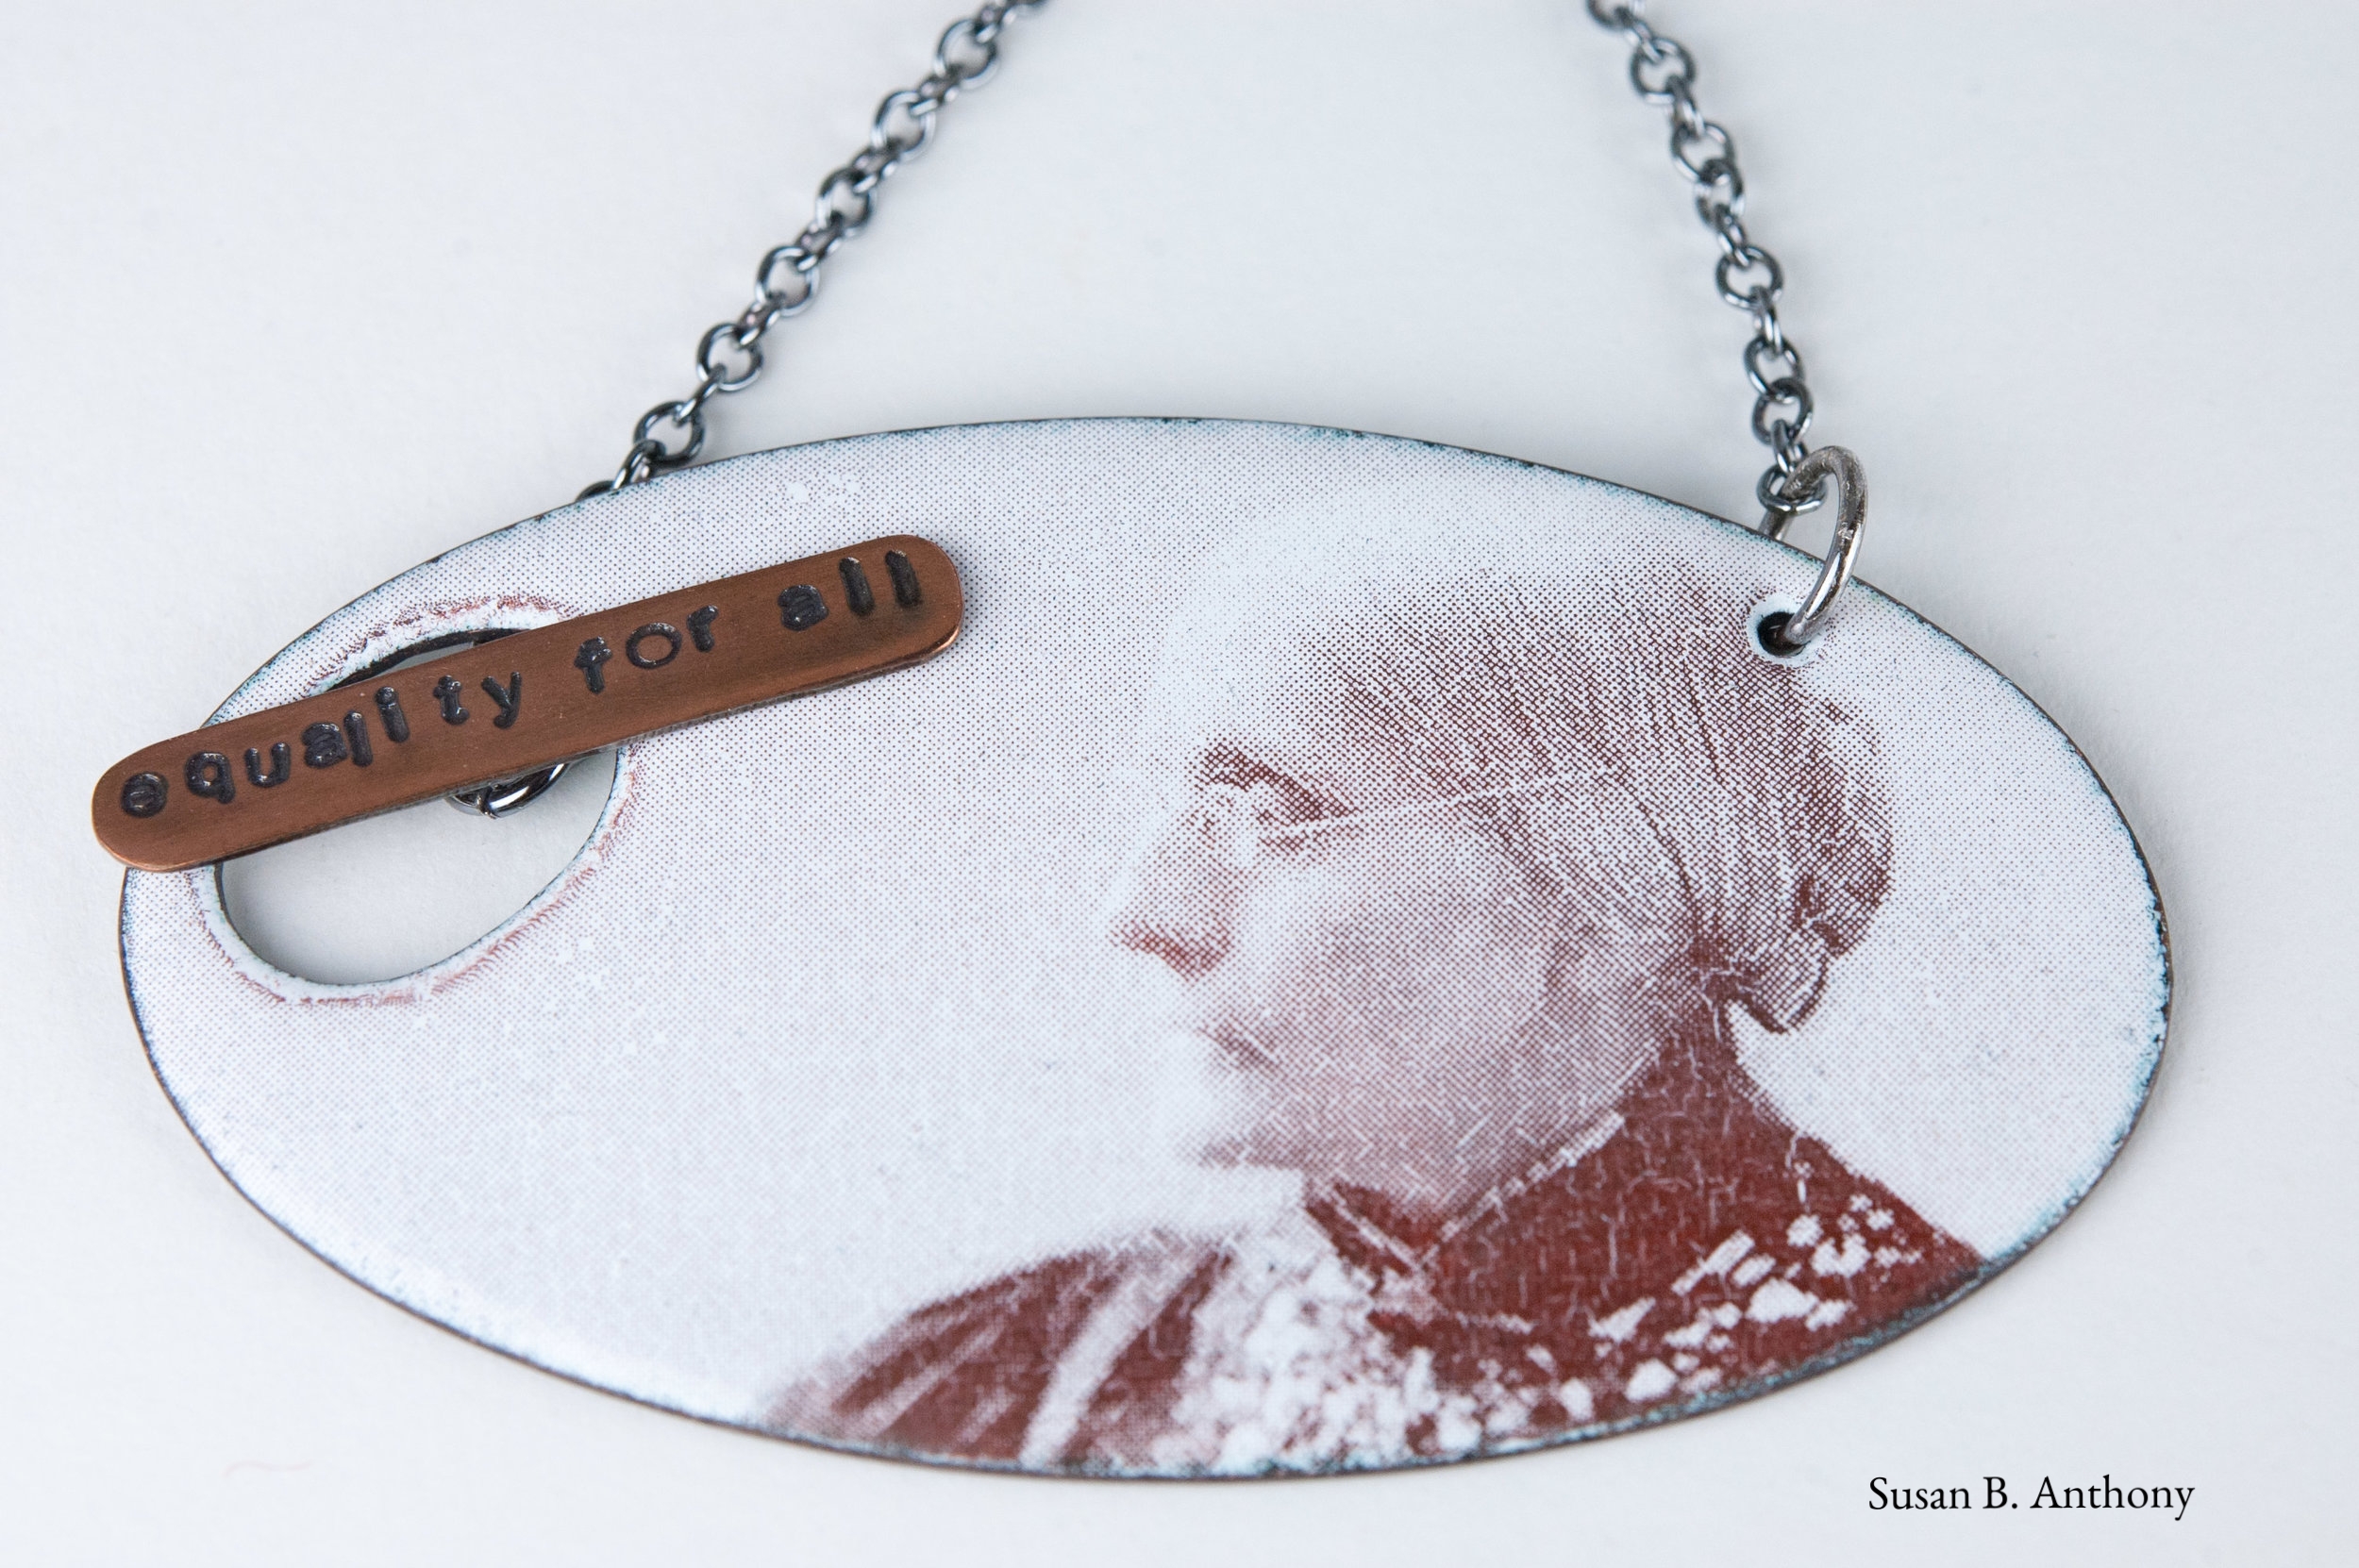
For the last couple of months I have been creating a series of Women's Suffrage jewelry to honor those women that fought so hard for our right to vote and for fair and humanitarian treatment. Each piece is one-of-a-kind, enameled copper with sepia tone photographic images. Each piece is a reminder of where we've been and where we could return if we continue to take our rights for granted.
I have been researching these women, their lives and their legacy. I am grateful for all they have done to bring awareness to the inequities in society between men and women. I fear we are heading back to that time with all of the new policy changes in our current administration. It's important to me that women's equality become a reality, not just a dream. This project is my way of raising awareness for the cause.


In the late 1800's women started seeing that the cards were stacked against them. Women were working to support their families. However, they weren't fairly represented, their wages were poor and they were taken advantage of in the workplace and at home. Women started fighting back by demanding the right to vote. They lobbied members of Congress, they staged rallies and parades, wrote articles in newspapers and they protested in great numbers. All of this was disruptive to "civilized" male society, and men fought back, and they fought dirty. They assaulted women protesters in an attempt to humiliate them. They even jailed them in an attempt to quiet them. Remember, during that time, women had no rights. They worked longer hours than men and made 1/3 of the wages of men. We've come a long way baby, but not far enough!
For the last couple of months I have been creating a series of Women's Suffrage jewelry to honor those women that fought so hard for our right to vote and for fair and humanitarian treatment. Each piece is one-of-a-kind, enameled copper with sepia tone photographic images. Some are hand painted in the colors of the woman's suffrage movement - purple and green for England and yellow and green for the US. Each piece is a reminder of where we've been and where we could return if we continue to take our rights for granted.
I have been researching these women, their lives and their legacy. I am grateful for all they have done to bring awareness to the inequities in society between men and women. I fear we are heading back to that time with all of the new policy changes in our current administration. It's important to me that women's equality become a reality, not just a dream. This project is my way of raising awareness for the cause.
Another crusader hoping to bring awareness to the 80 plus year battle for women's rights is Alinah Azadeh. She is an artist who created an amazing piece that speaks to their cause, using the typewriter as a powerful symbol - the main means of communication women used to write to their legislators, newspapers and each other. Follow the link here to read more about her project.
If you are interested in learning more about these women and all they did to fight for you and me, please check out each of their listings on my website. If you are interested in a particular suffragette with whom I have not created a piece, please feel free to email me for a personal commission - mybrownwren@gmail.com.

What is Sgraffito?
I recently learned of a technique that was developed by John Kilmaster. It's called granular spray enamel. It is very exciting to have a new way to create design and texture in enamel in a free an exacting manner.
Sgraffito is the art of scratching through to a layer below. Potters and ceramic artists utilize the technique, as well as enamelists. I learned the technique from Angela Gerhard several years ago, using liquid porcelain enamel.

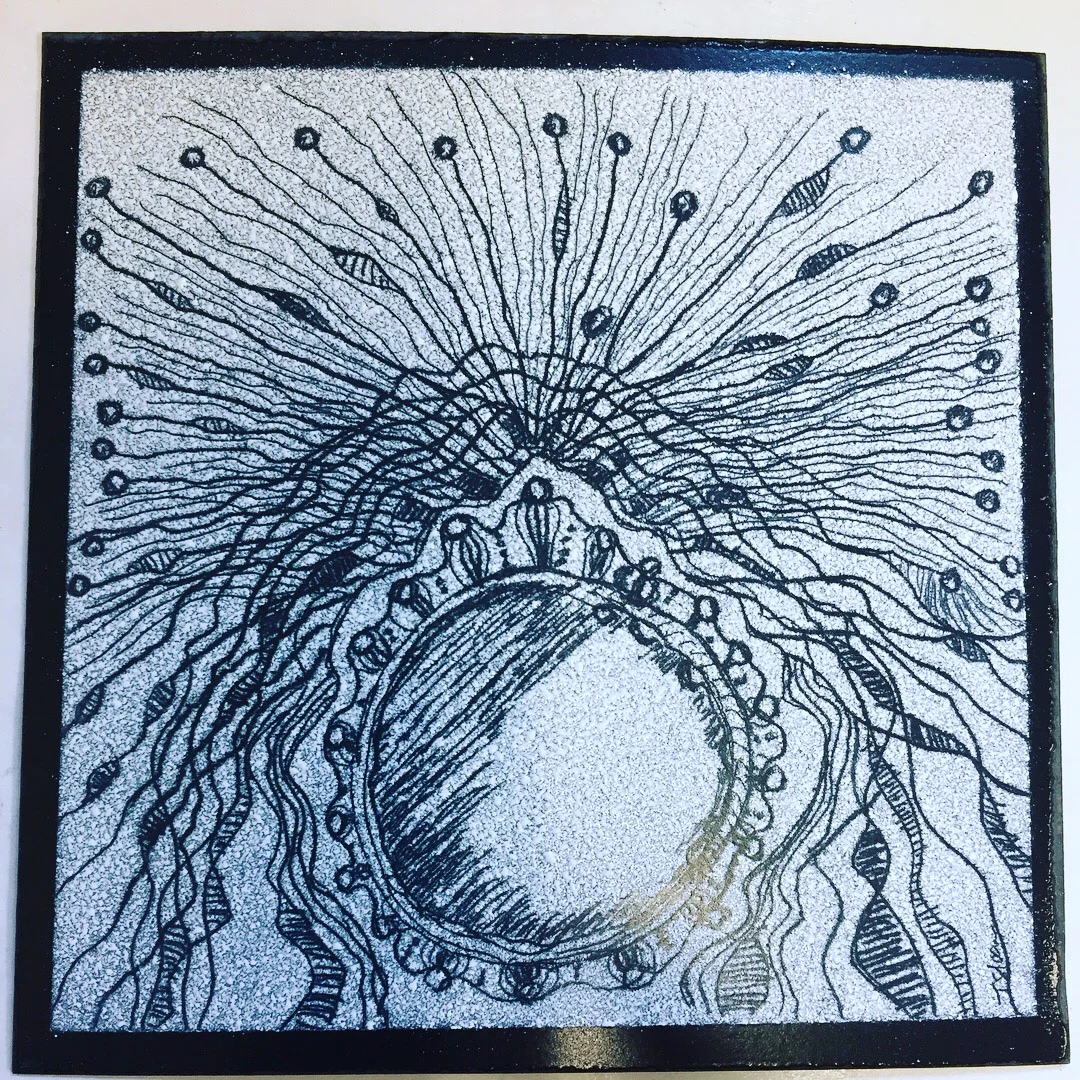
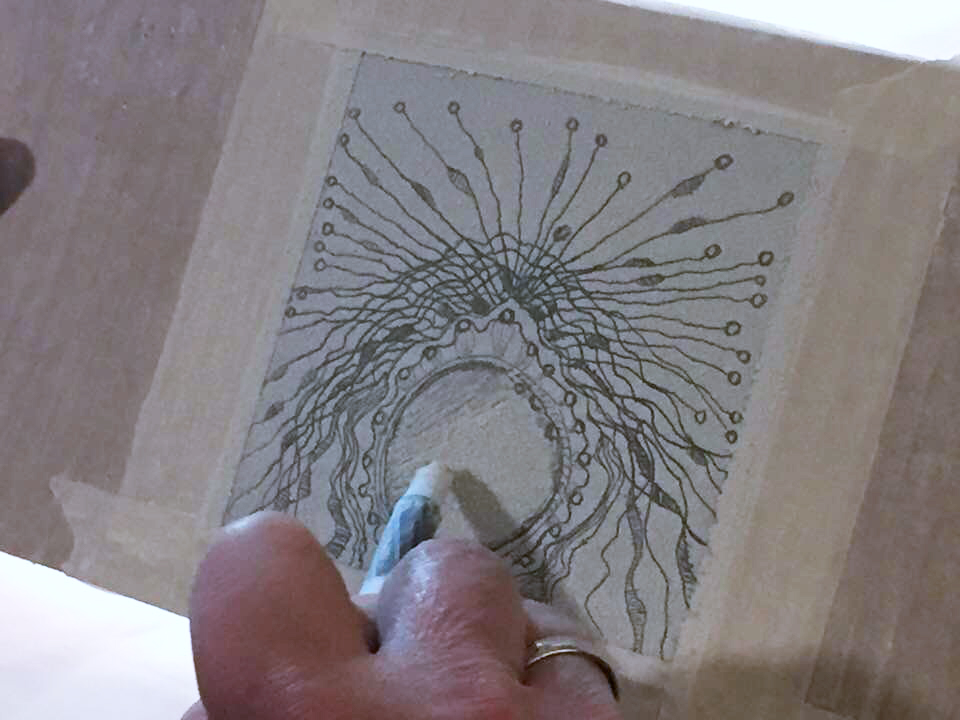
Scratching through liquid porcelain enamel is delicate business. If it's too wet, you get little squiggles that roll up and are difficult to irradicate. If you let it dry too much, when your lines cross, large chunks can flake off. So, creating fine textures are difficult. I recently learned of a technique that was developed by John Kilmaster. It's called granular spray enamel. It is very exciting to have a new way to create design and texture in a free an exacting manner. In the picture below, you can see me spraying a steel mask that I fabricated in a class I took from Alisa Looney, a student of John's.

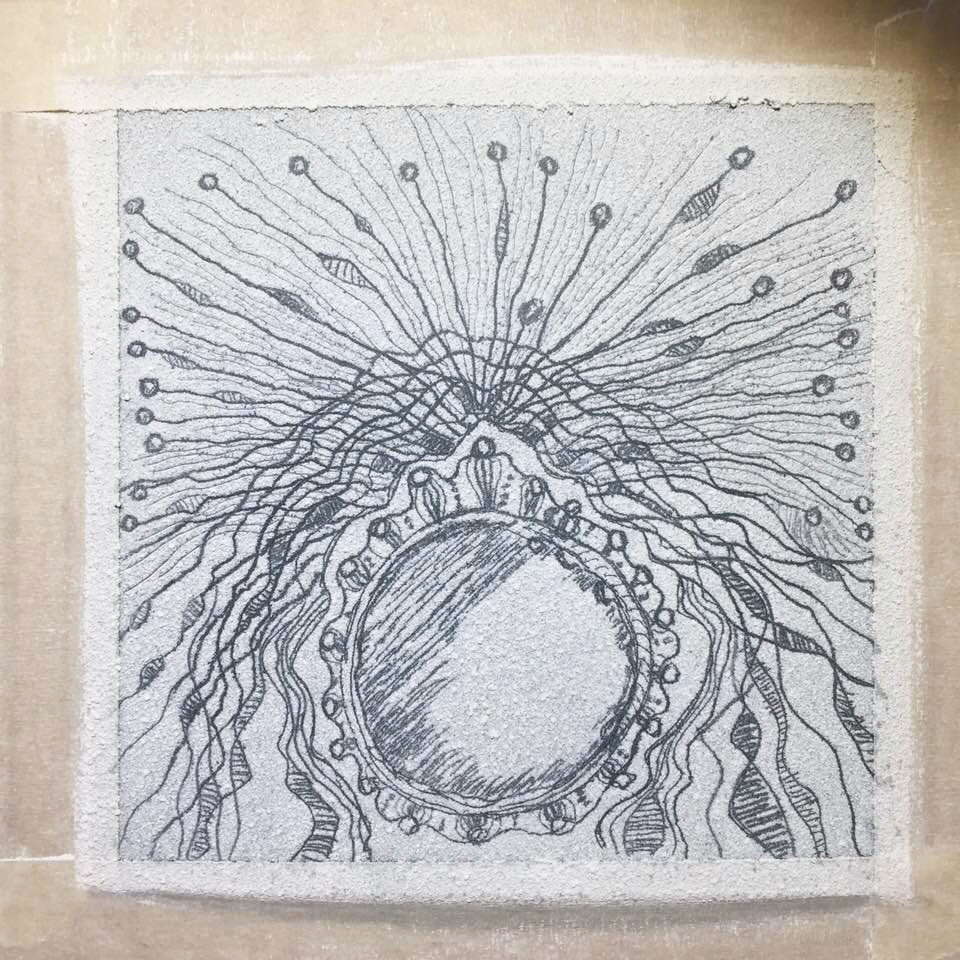
Here are some process pics of one of the test pieces I made in Alisa's class. We taped the steel tiles to cardboard to make it easier to work on. The last photo is of the piece after it was fired. It was slightly underfired, so there is a lovely, bumpy texture to it.

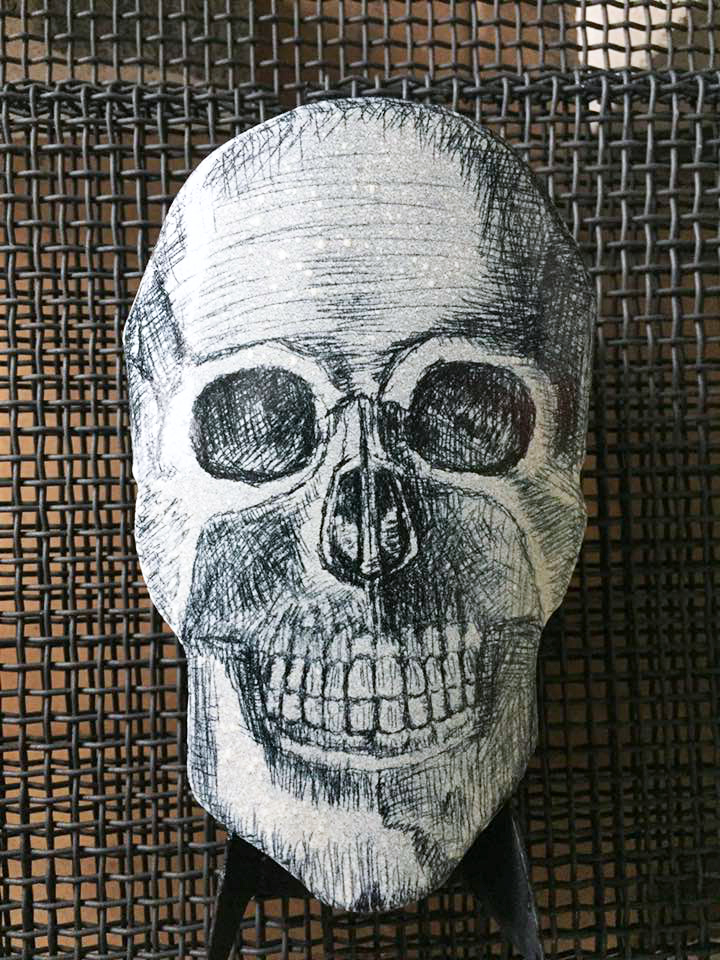
I went to Alisa's class planning to make jewelry. We spent three days making test tiles and fabricated one large piece. We made a few token pairs of earrings. I had to come up with designs on the fly - flying by the seat of my pants - ha, ha. Knowing that I am going to be exhibiting a collection based on The Day of The Dead at Whidbey Art Gallery in October, I decided to create a sugar skull. However, my sugar skull somehow turned into a more life-like skull.
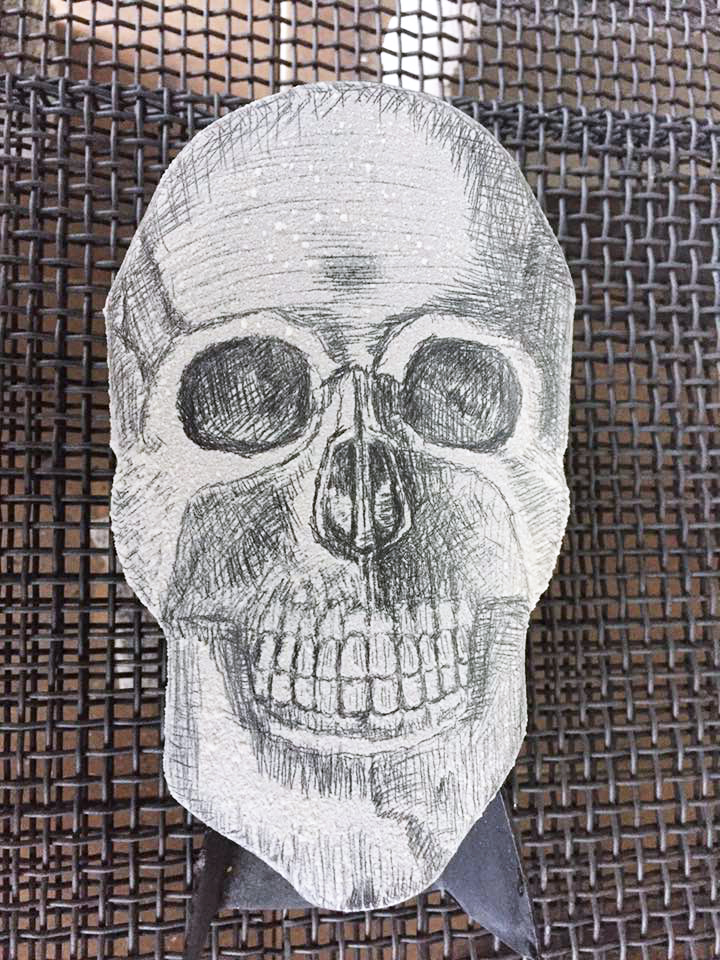
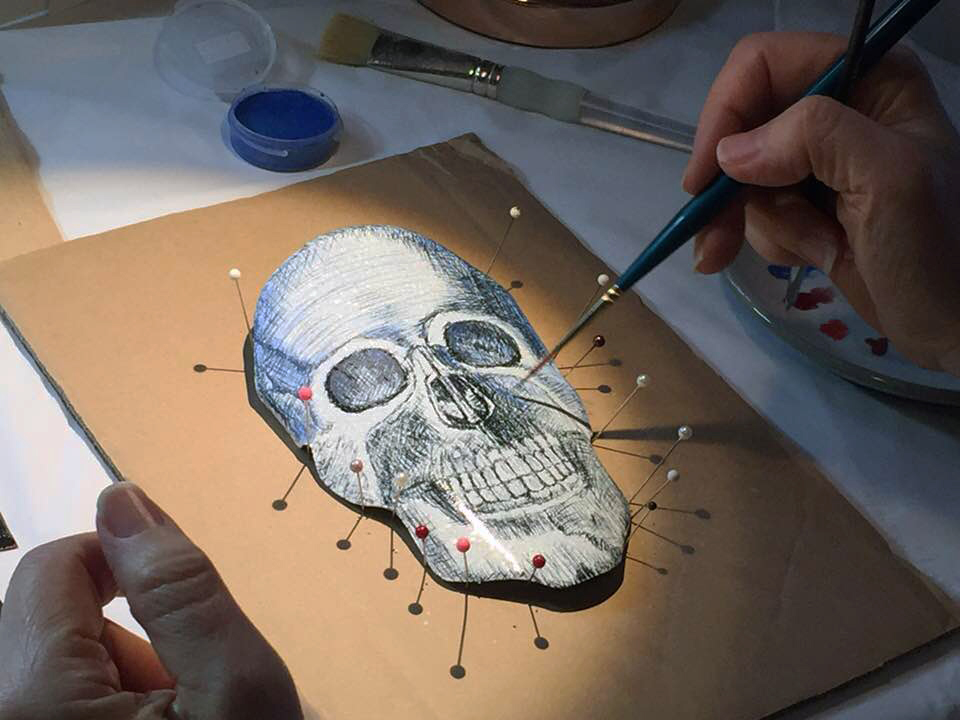
The ease of creating lines with the sprayed on enamel was so freeing! I really enjoyed creating fine detail and shading with cross hatching. The photo above left is pre-firing. The middle photo is just after the skull came out of the kiln. In the third photo, I'm applying watercolor enamel to the skull to add more shading and visual interest.

Here, you can see the little scratching tool we made in the class. I'm using it to remove some of the watercolor enamel before I complete the final firing.

This is the skull after the final firing. I'm pretty excited about how it came out. Now, I have to figure out how to do this process at my studio. It's messy - not something you can do inside. I have the spray gun, but I don't have a compressor yet. So, I'm still doing sgraffito the way I learned from Angela. Here's a little video of how it's done.
If you are interested in learning how to do sgraffito in porcelain enamel, you should check out my Beginning Sgraffito Enamel Technique Tutorial.
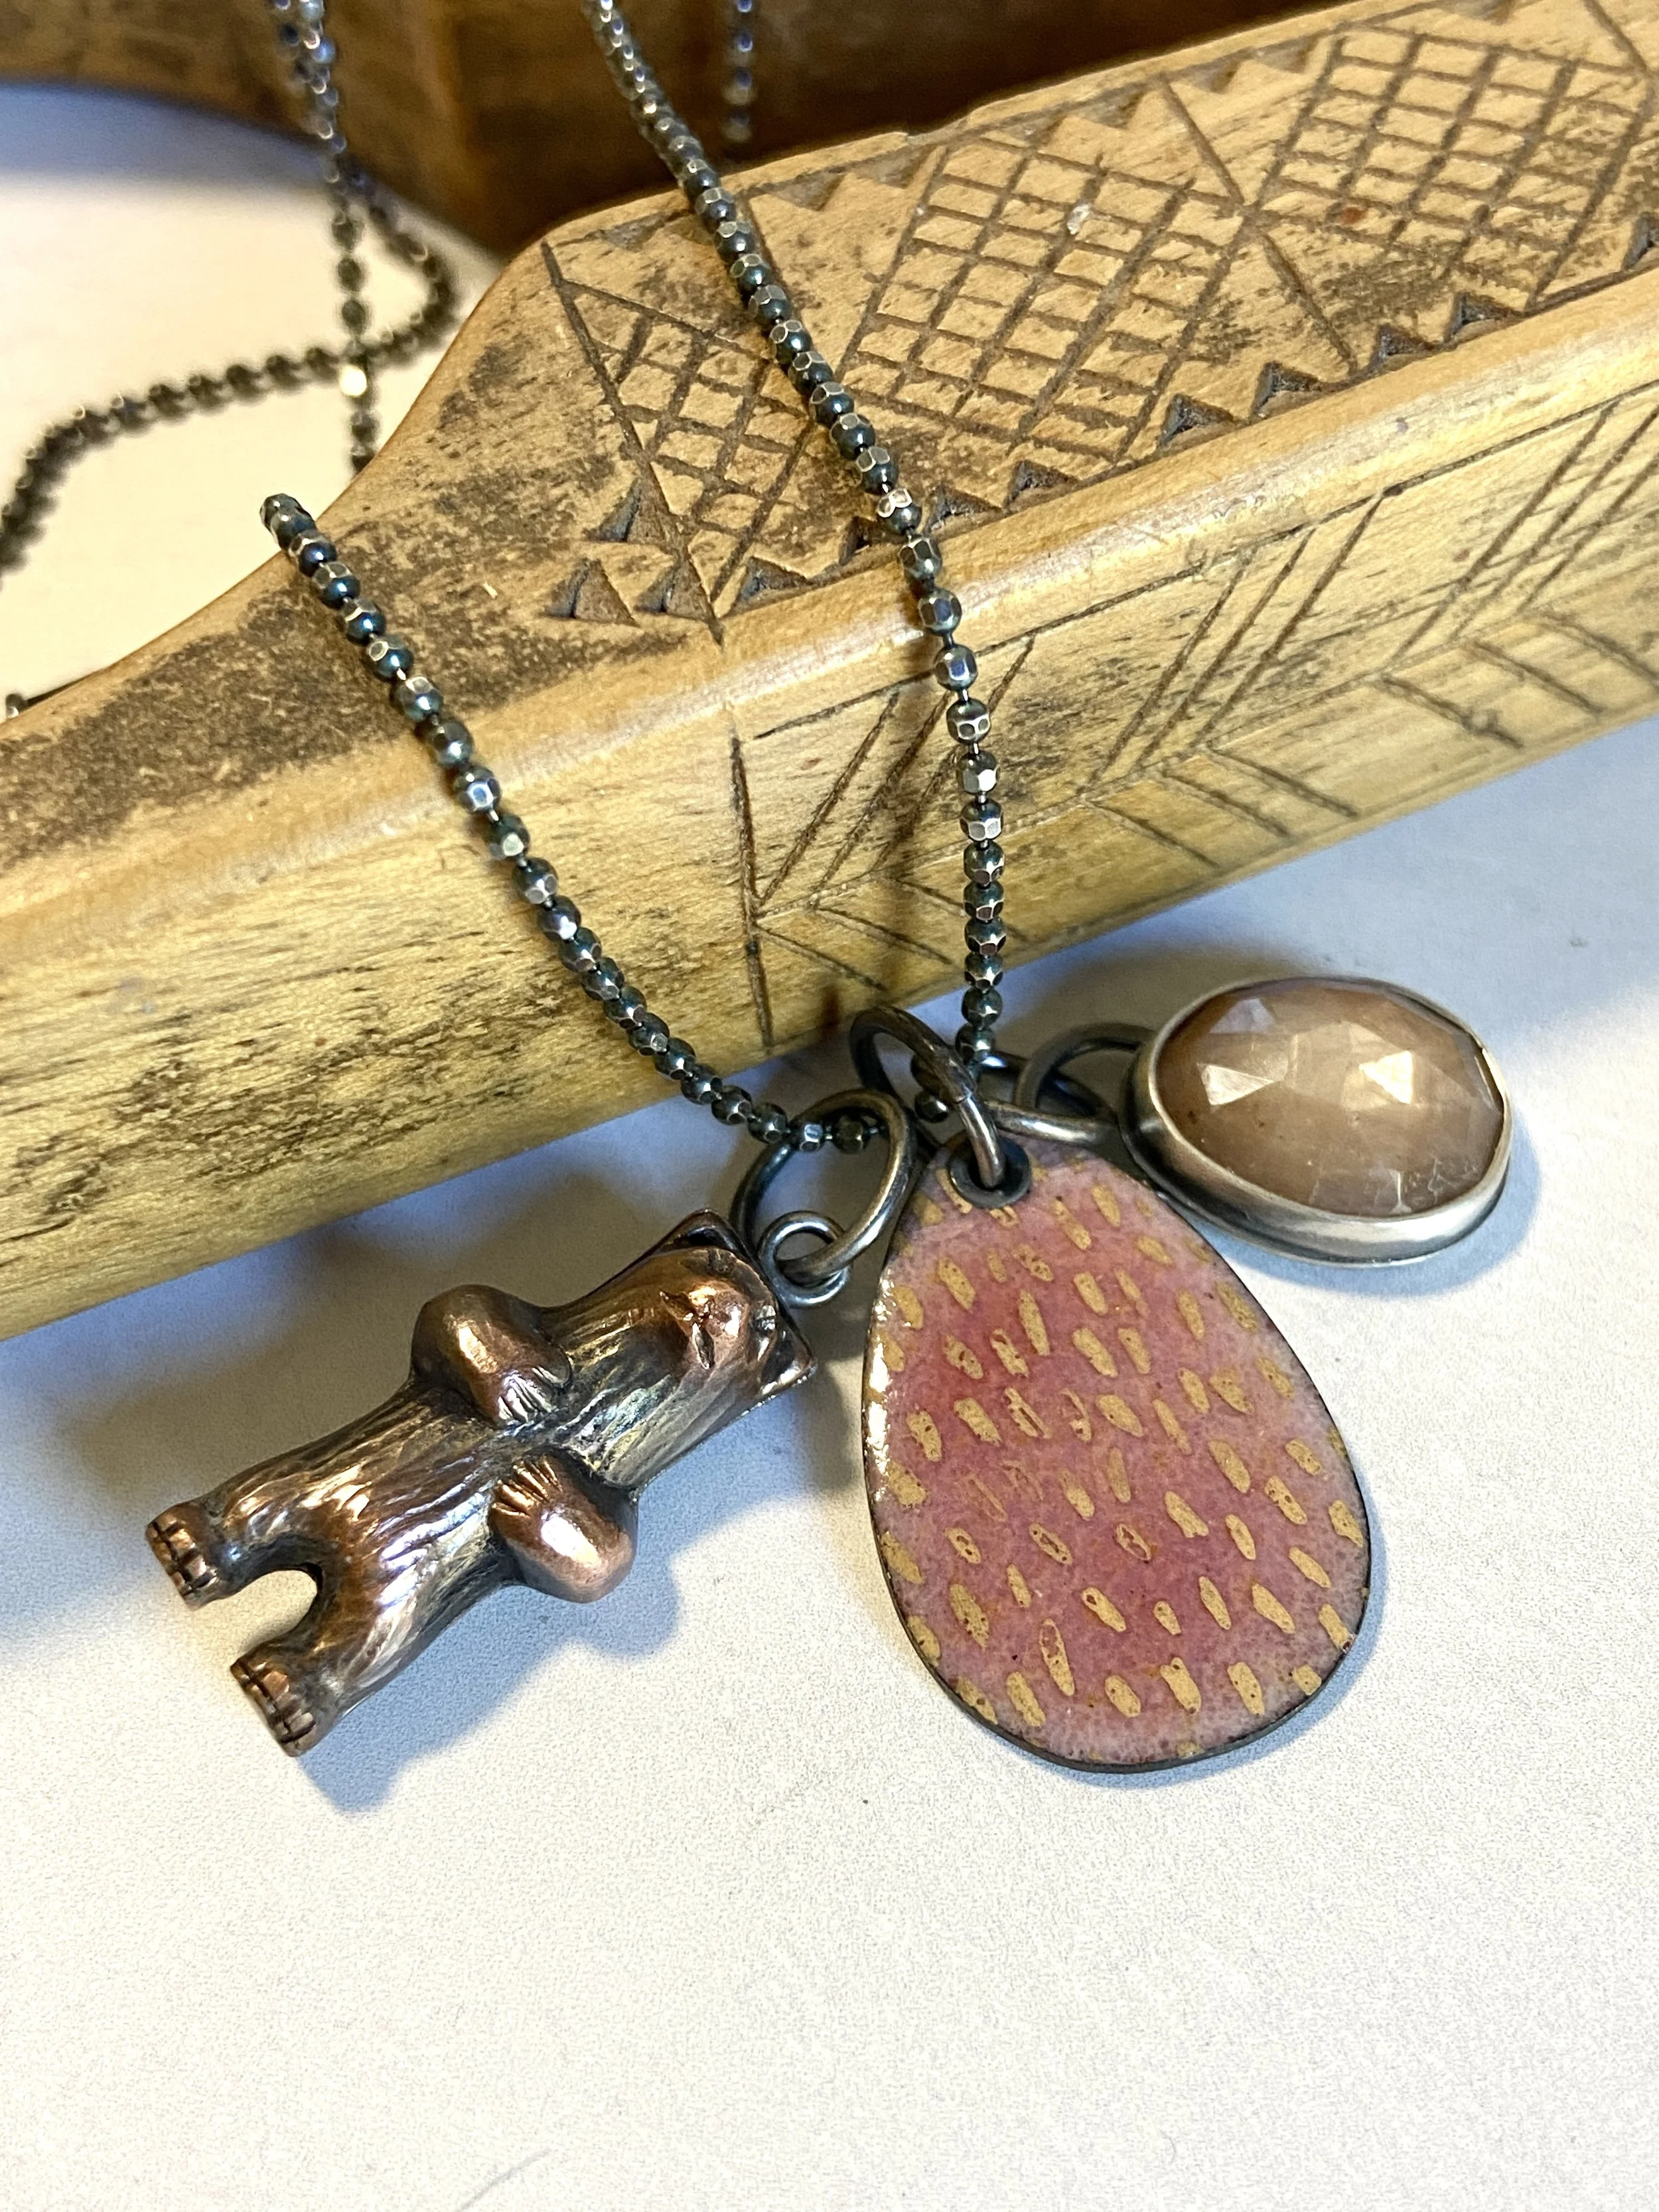
Make Your Own Charm Necklace