
What is champleve? It is a fairly complicated enameling technique that requires some skill with a saw blade and soldering. A design is cut from a sheet of copper or fine silver, retaining a border around it. A base plate is cut to match the shape of the outer shape of the top sheet. Then, the two pieces are soldered together with eutectic solder. Any solder that leaks out from between the two pieces must be meticulously cleaned away from the recessed areas. Then, the cells of the design are filled, much like you would do in cloisonne. In this post, I will offer you a fairly simple way to create similar effects without the use of a saw or solder.
A few years ago, I discovered that you could use metal stamps or a rolling mill to create some pretty amazing textures in metal. Getting your designs to stand out requires the application of some type of patina. Patinas work nicely, but they take time to apply and partially remove to achieve the desired effect. Plus, your design usually ends up being just black. If you want your design to have a different color, you are out of luck. Or are you?
I started playing around with liquid enamel to see if I could highlight my textures with color. What I came up with is uniquely different than what most metalsmith artists are doing today. And the cool thing about it is that you don't have to counter-enamel your piece - unless you want to apply transparent colors to the front surface of your design to further accentuate it.
Let's take a simple design, like letter stamping, and see if we can take it up a notch...

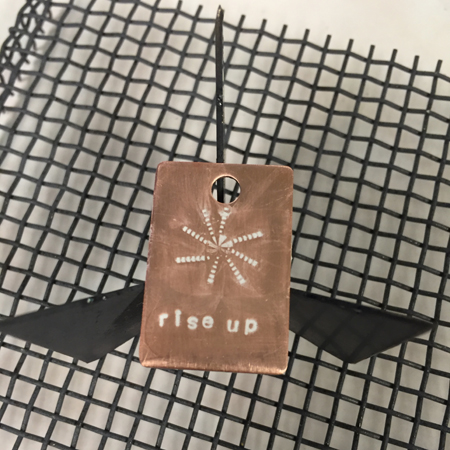
Here's the finished product. Now, I'll show you the steps...
For the purpose of this tutorial, I will show you how to use metal stamps to create your design and liquid white enamel to accent it. You can, of course, use other colors to fill in the design. I like the contrast that I get with white and a little patina after firing.

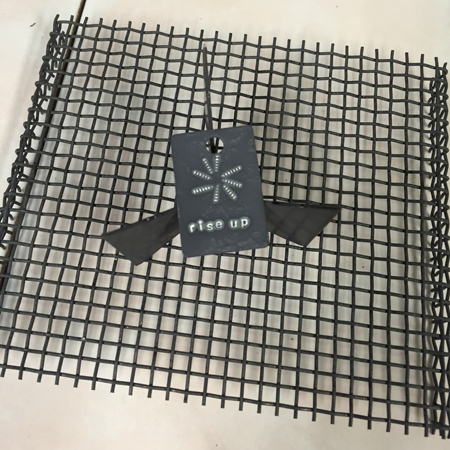
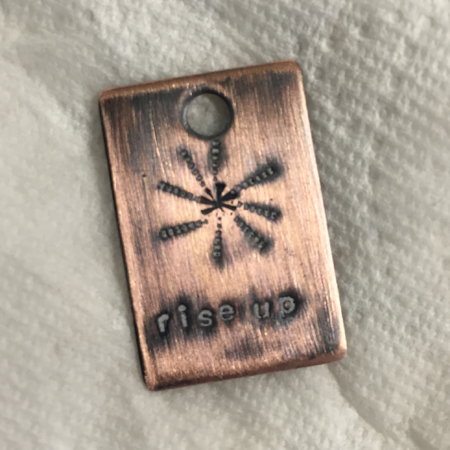
In the images above, you can see that I have applied liquid white enamel to the areas of my piece that have been stamped. After allowing the enamel to dry, I use the edge of a credit card or a piece of box board to scrape away the majority of the enamel. You want to make sure you leave the enamel in the depressions.
Clean up any residue around your stamped design with a damp paint brush. It shouldn't be wet, or you'll end up with a mess.
Next, fire your piece in the kiln or with a torch from the underside. The exposed copper will oxidize to a dark black. You can throw it in the pickle pot once it cools, to clean off the oxidation. Alternatively, you can sand it with some fine grade wet-dry sandpaper under running water.
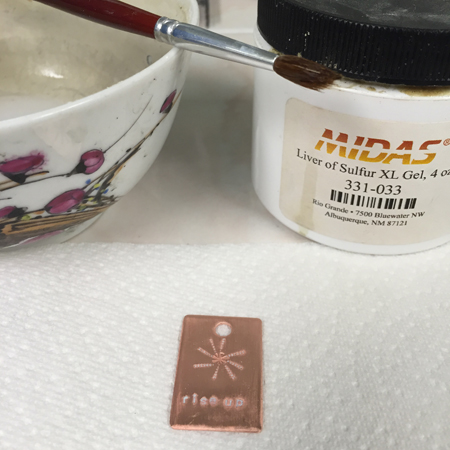
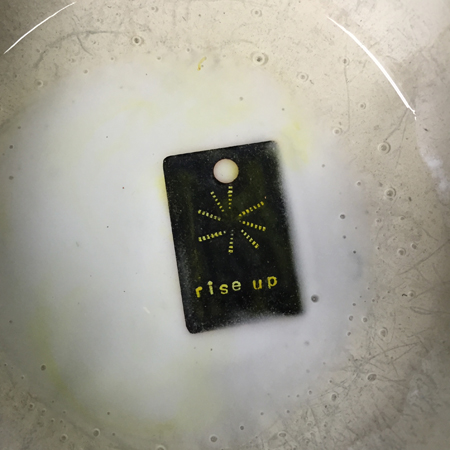
After the exposed copper is clean, you can add a patina or leave it as is. I like the rustic look of the patina, so I use a little liver of sulphur to achieve the aged look. Apply the liver of sulphur as you would normally and neutralize in a baking soda and water solution. Dry completely and buff with a pro-polish pad or use some fine grade wet-dry sandpaper, as I did, to remove the patina from select areas.
Voila! There you have an easy champleve in less time than it took you to cut out a design and solder.
Now, if you want to, as I mentioned earlier, you can give your design more color and accents with some transparent enamel. It requires counter enamel to do that. Here is an example of what you can do. I have also created a design in the center of this piece using the sgraffito technique.

If you'd like to learn more about using liquid enamel to create amazing sgraffito designs, check out my sgraffito enamel designs in my shop.